

Set your Basic mailbox on Outlook for Mac
— Once your Basic mailbox has been created, go to Outlook on your Mac computer to set up your mailbox.
Follow these steps in Outlook for Mac 2016:
- Go to “Accounts” via the “Extra” menu.
- Click on the plus sign at the bottom left to add an account.
- Enter your e-mail address and continue.
- Select “IMAP / POP” in the menu and continue.
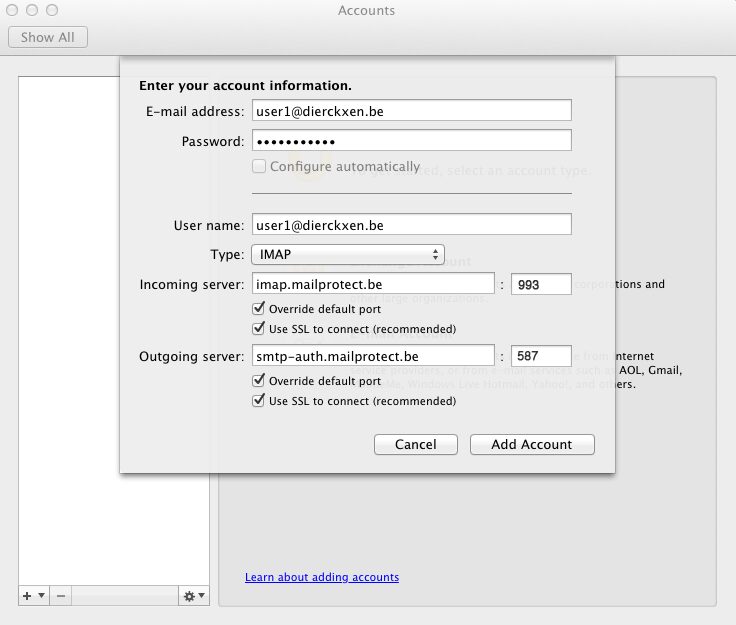
- Choose IMAP or POP in the drop-down menu (Read our selection guide) and enter the missing information. Check “Use SSL to connect” at the servers (see image).
Username: Enter your e-mail address
Password: Enter your password
Incoming e-mail server:
For IMAP (recommended): imap.mailprotect.be - Port 993
For POP3: pop3.mailprotect.be - Port 995
Outgoing e-mail server:
smtp-auth.mailprotect.be - Port 587

6. Click on “Add account” to add your account.
7. Click on “More options” at the bottom and make sure that “Use info Incoming Server” is checked under “Authentication”. Click on “Ok” to close the window.
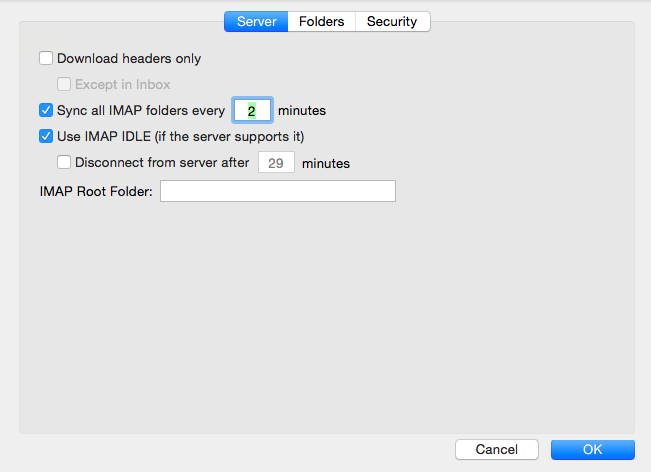
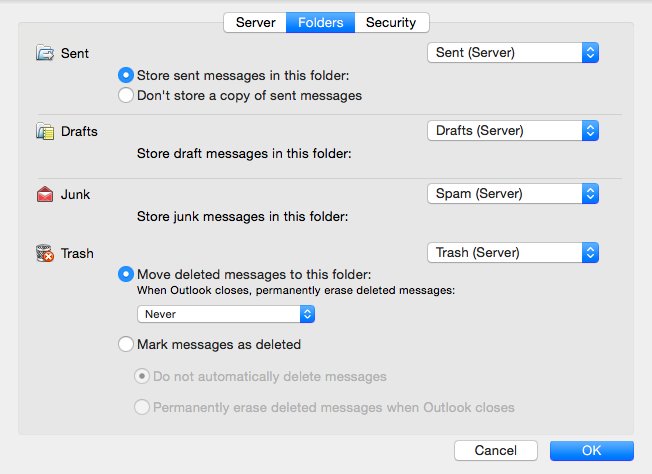
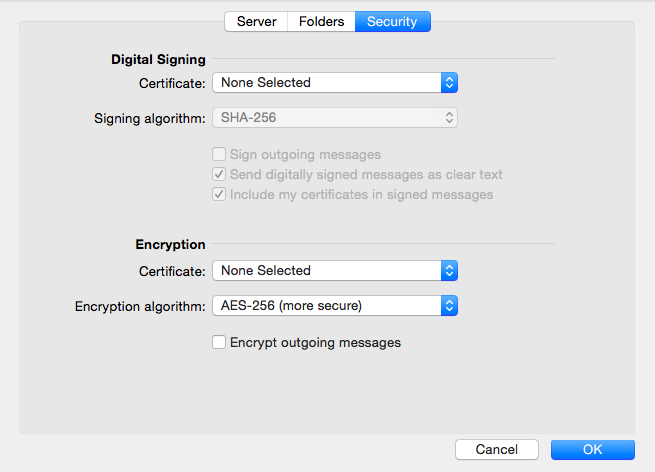
8. Optional: Click on “Advanced” for additional recommended settings (see screenshots).
Follow these steps in Outlook for Mac 2011:
- Go to “Accounts” via the “Tools” menu.
- Click on the plus sign at the bottom left to add an account and choose “E-mail”.
- Enter your e-mail address and password and continue.
- Choose IMAP or POP in the drop-down menu and enter the missing information. Check “Use SSL to connect” at the servers (see image).
Username: Enter your e-mail address
Password: Enter your password
Incoming e-mail server:
For IMAP (recommended): imap.mailprotect.be - Port 993
For POP3: pop3.mailprotect.be - Port 995
Outgoing e-mail server:
smtp-auth.mailprotect.be - Port 587
5. Click on “Add account” to add your account.
6. Click on “More options” at the bottom and make sure that “Use info Incoming Server” is checked under “Authentication”. Click on “Ok” to close the window.