

Add an e-mail account to Outlook 2016
— Once your Basic mailbox has been created, go to Outlook on your Windows computer to set up your mailbox.
Follow these steps in Outlook 2013 or 2016:
- Via the navigation bar at the top left you go to “File”> “Add account”.
- At the bottom choose the option “Manual setting or additional server types” and continue.
- Choose “POP or IMAP” and continue.
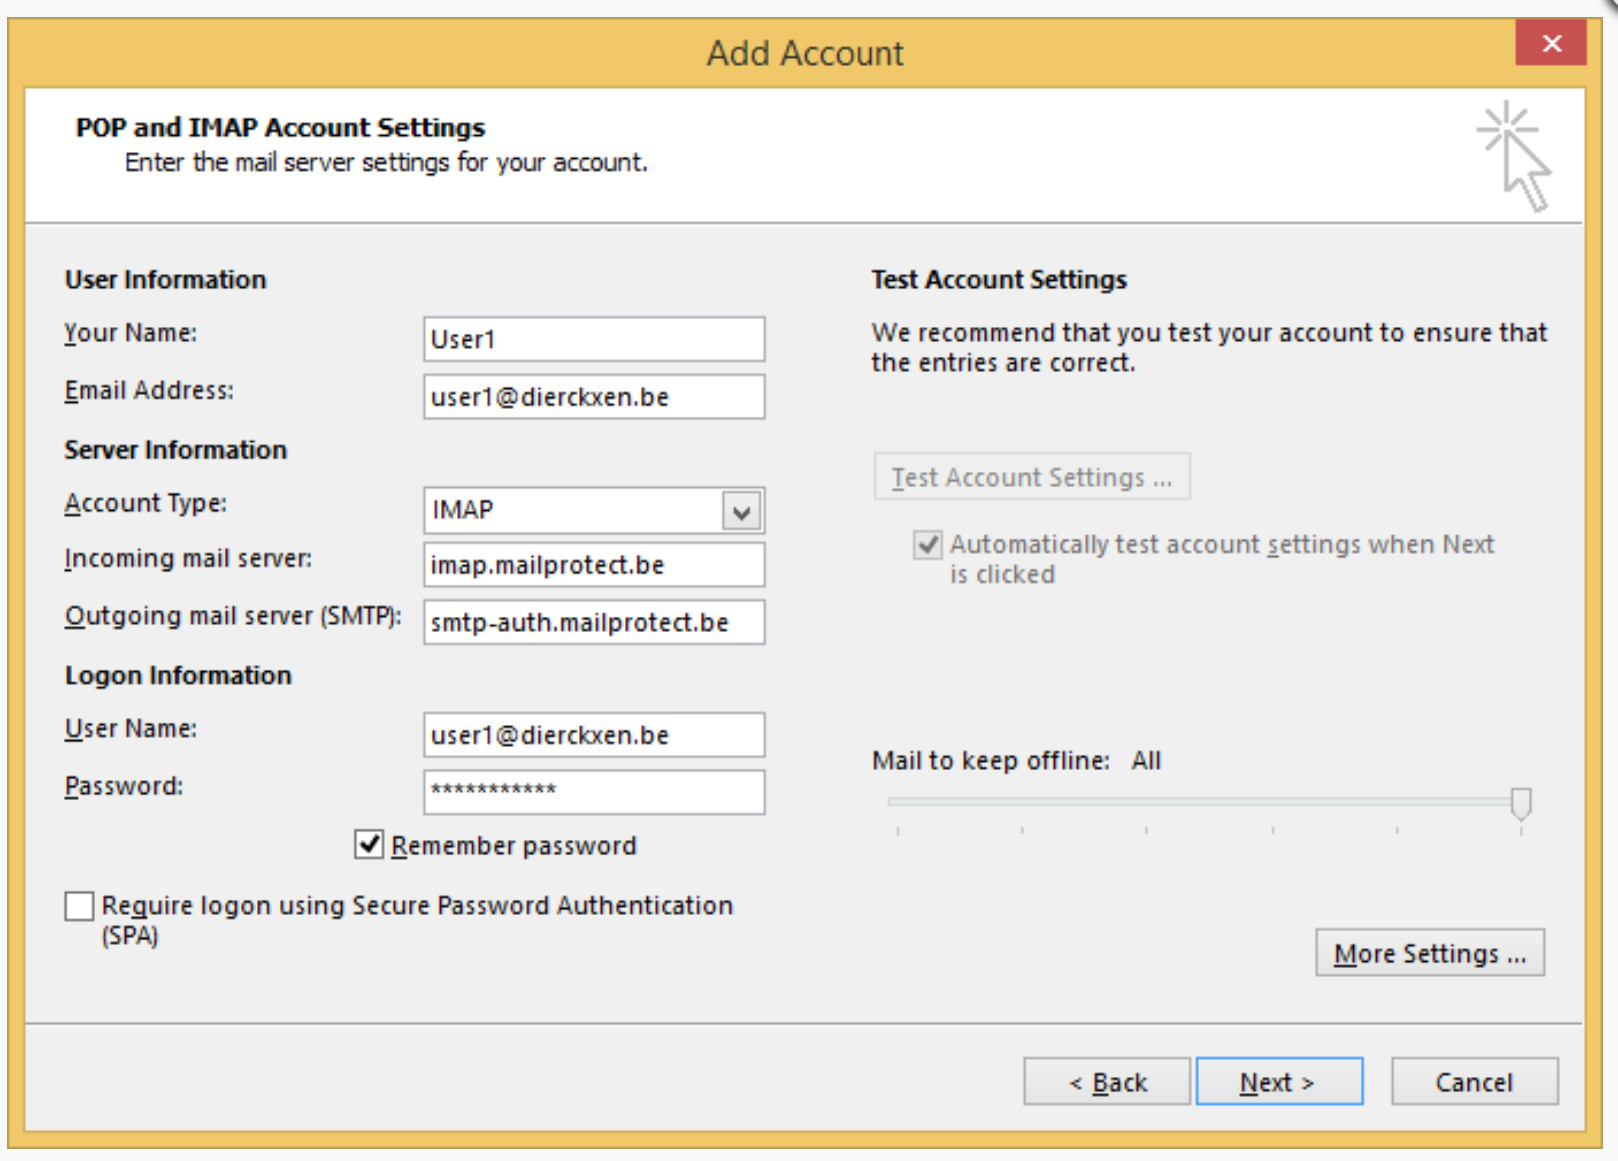
- Choose IMAP or POP3 in the drop-down menu and enter the missing information (see image).
Name: Enter your name (appears with your e-mails)
E-mail address: Enter your e-mail address
Incoming e-mail server:
For IMAP (recommended): imap.mailprotect.be
For POP3: pop3.mailprotect.be
Outgoing e-mail server:
smtp-auth.mailprotect.be
Username: Enter your email address
Password: Enter your password
5. Before you click on “next”, click on “More settings” at the bottom right.
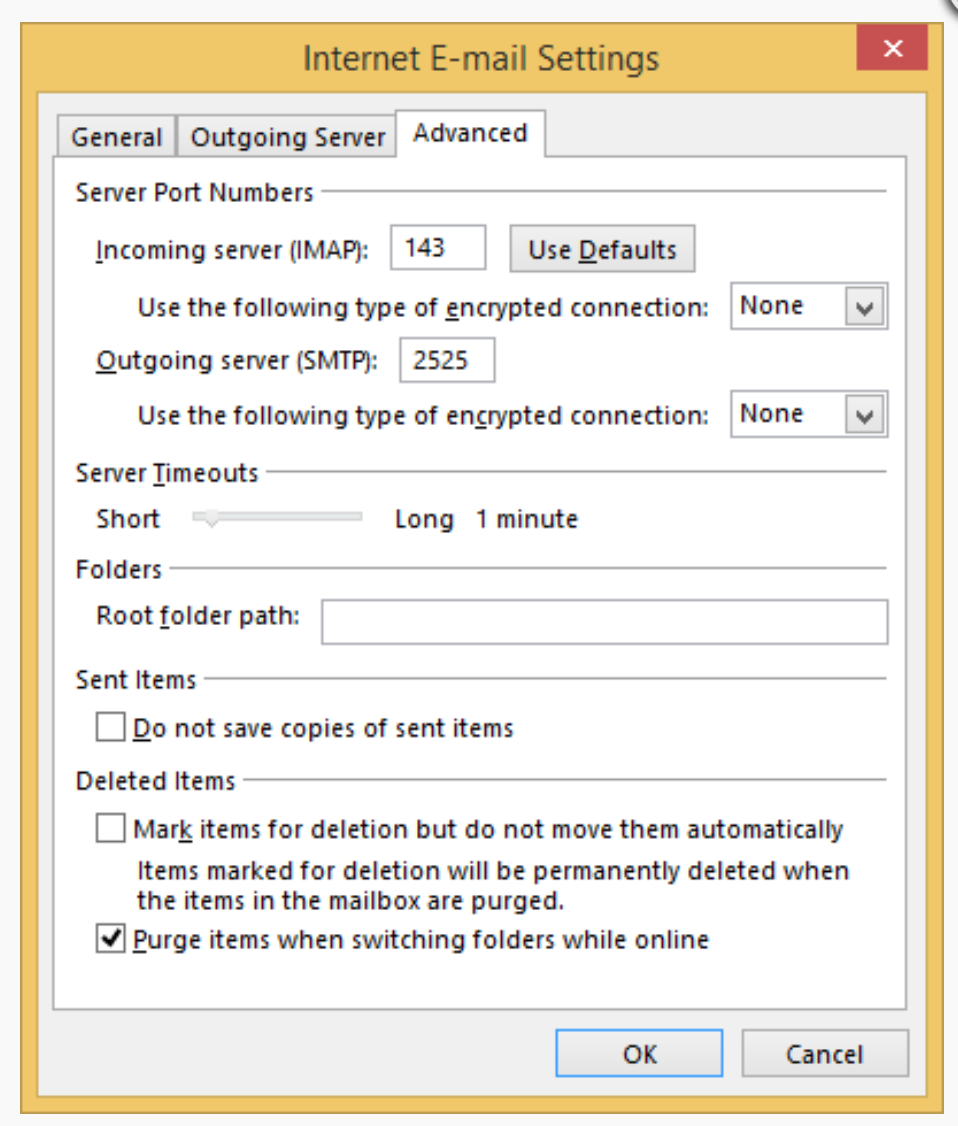
6. Go to the “advanced” tab (see image) and make sure the ports match this data:
-
- For incoming servers this is 995 (pop) or 993 (imap)
- For the outgoing server 465
7. Go to the “Outgoing e-mail server” tab and check the option “The outgoing e-mail server (SMTP) requires verification”.
8. Select the option: “Use the same settings as for my incoming e-mail” and click “OK”.
9. Click on “Next” and Outlook will check your settings and send a test message. As soon as that check is over, your mailbox is active and you can close the configuration.