
Booking 27/7 booking and appoints
Getting started booking 24/7
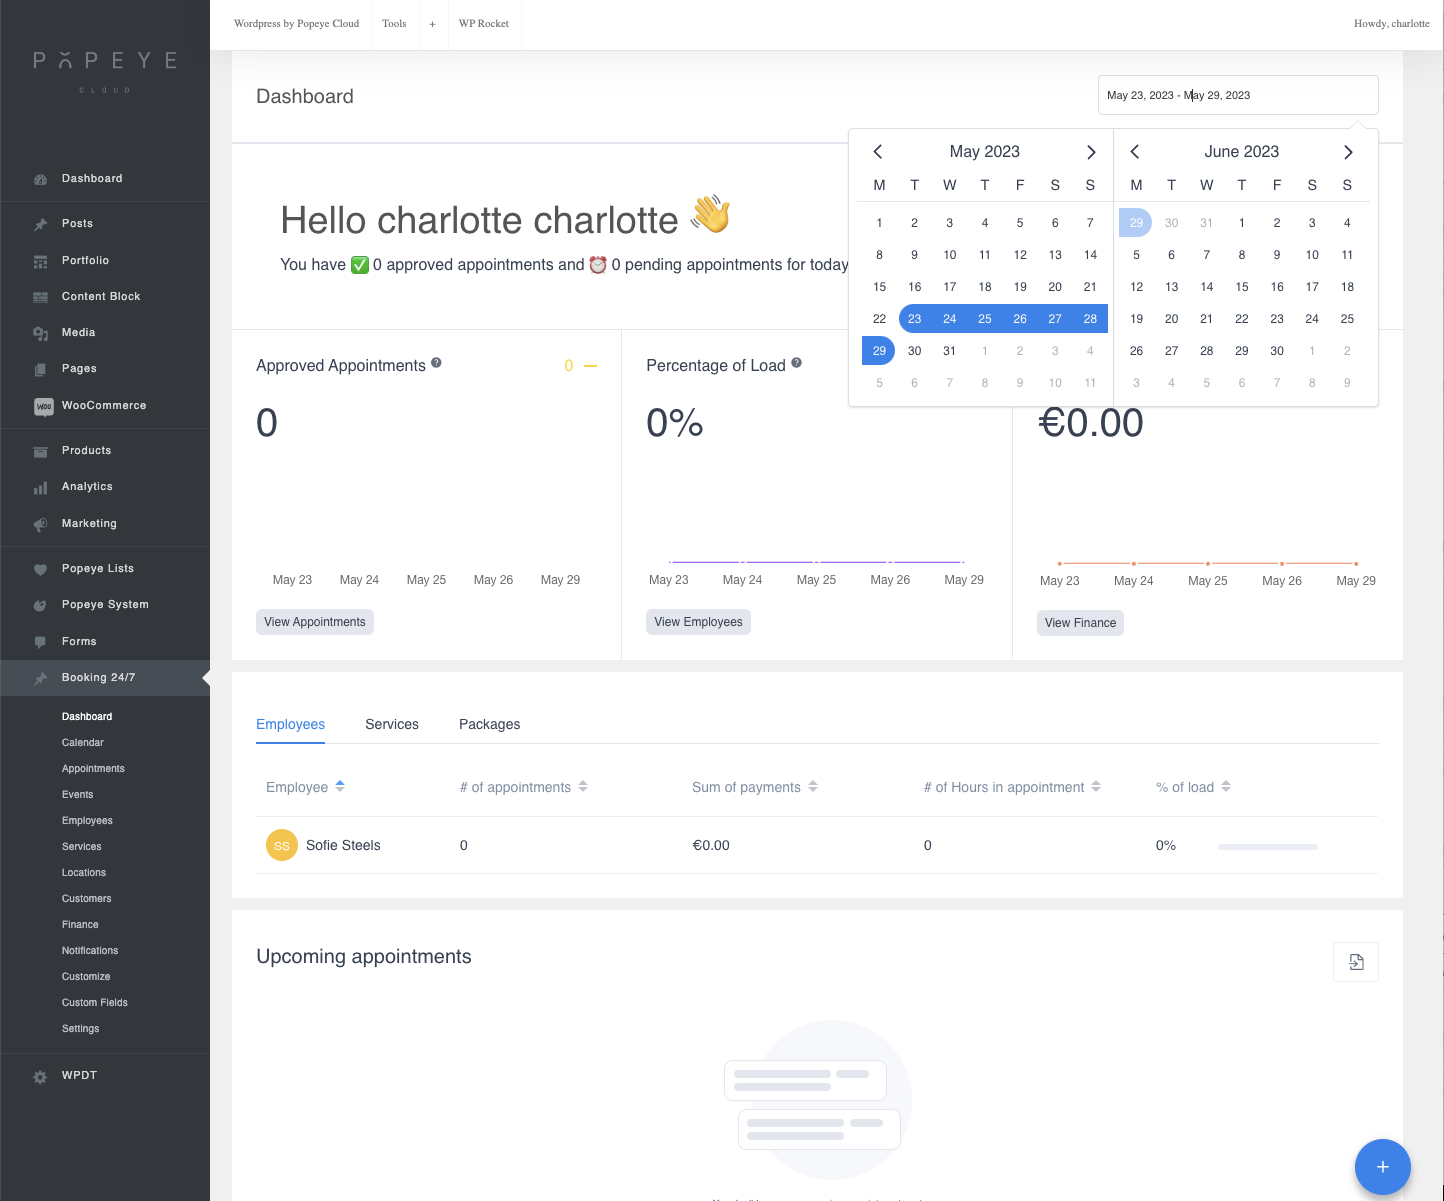
Dashboard: on your dashboard you have an overview of appointments made, employees and finances. You can set up a timeline through the calendar. You can also view upcoming appointments and different services.
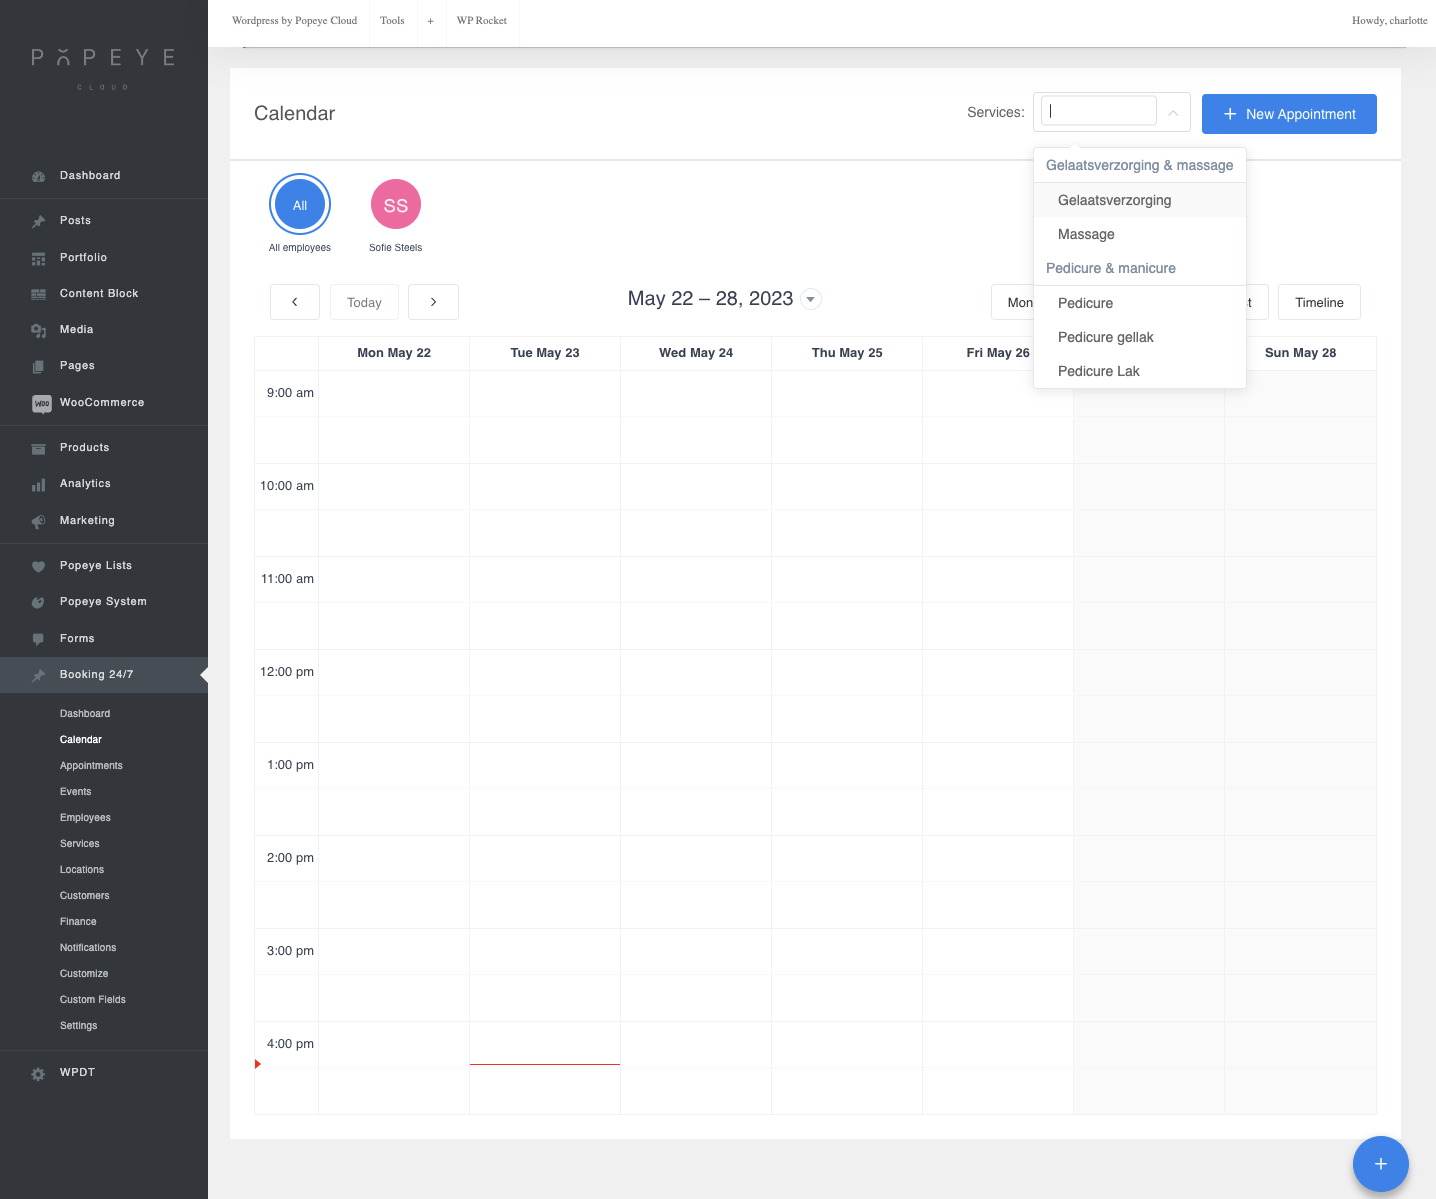
2. Calendar: an overview of all the appointments that are made. There are different views you can view the calendar in by month, week, day, list or timeline. You can filter by employee or by service or you can quickly add a new appointment.
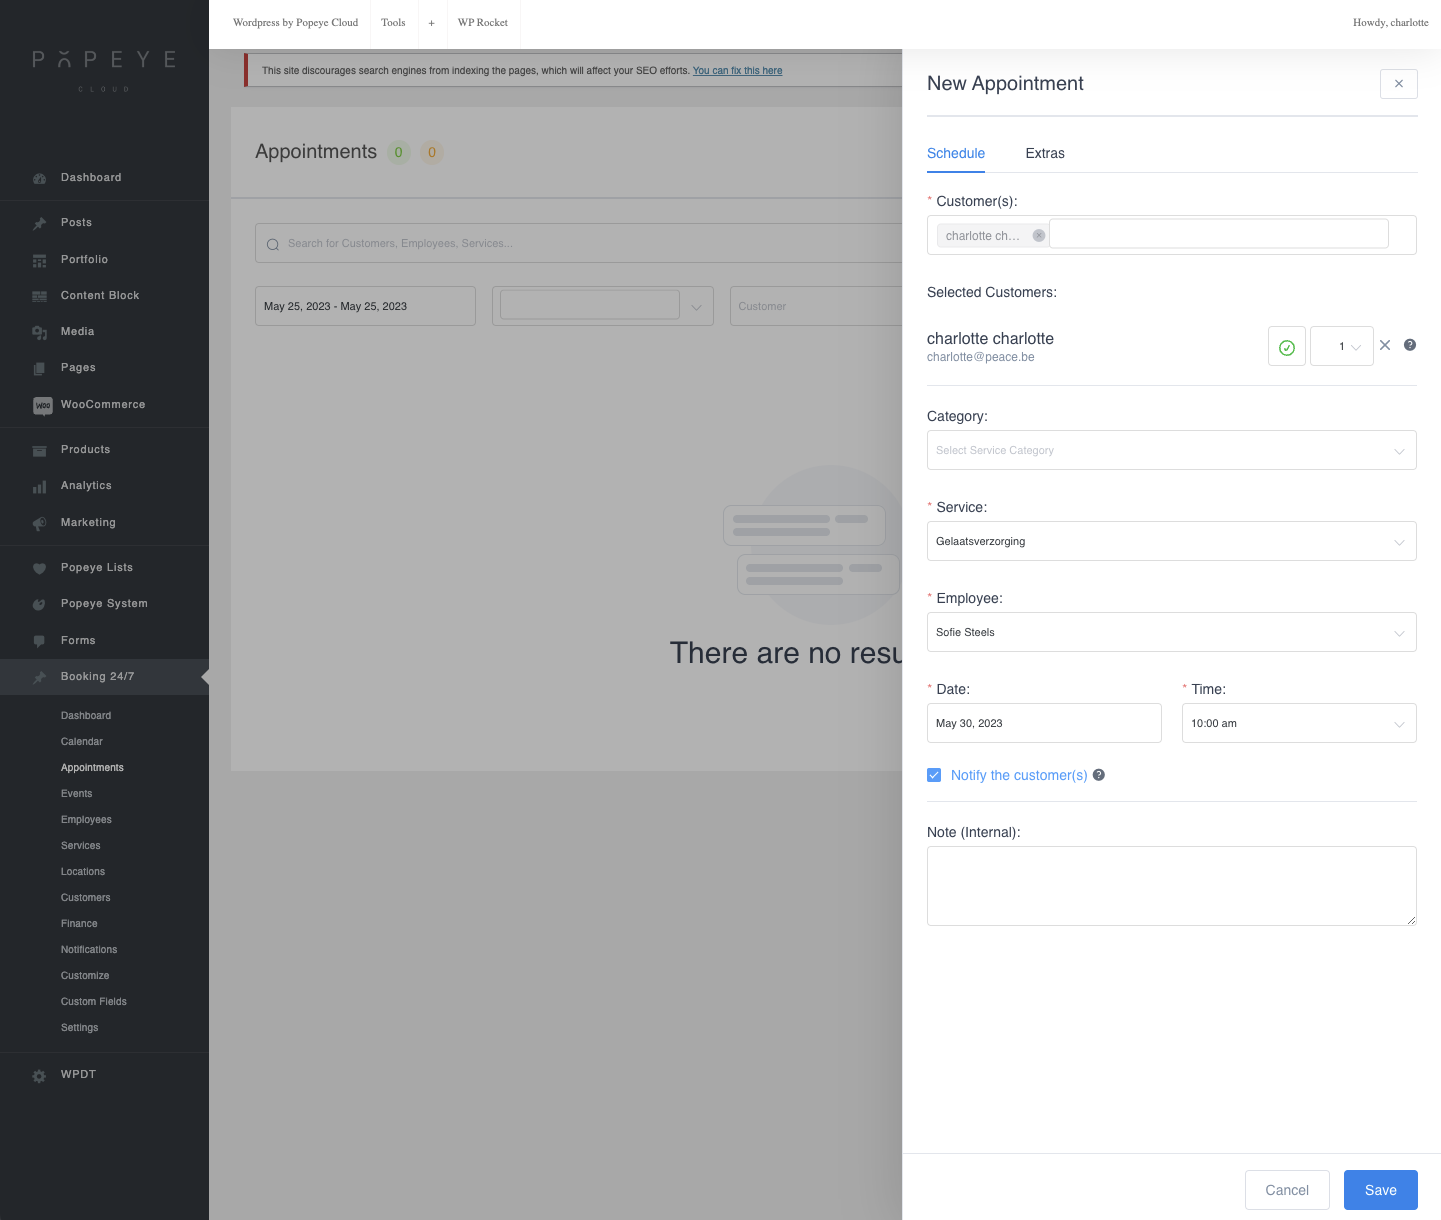
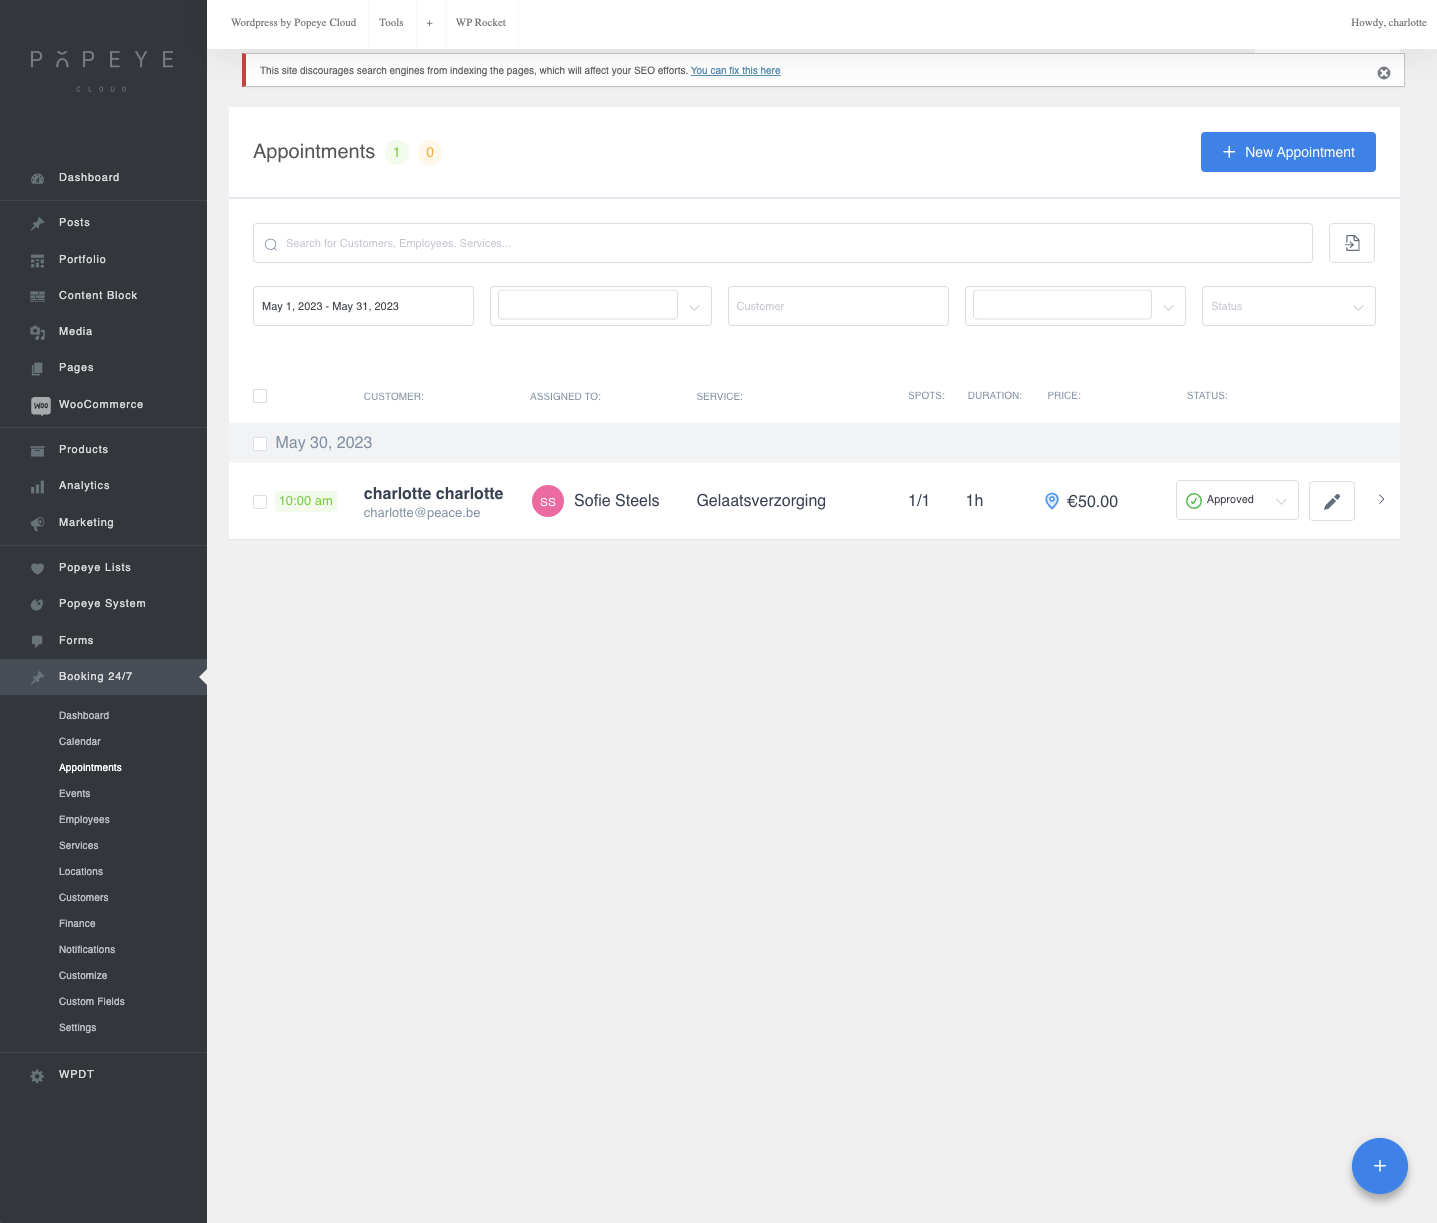
3. Appointments: Using the appointments tab, you can manually add an appointment in the backend. This gives the same result as a customer making an appointment in the frontend. To add an appointment press 'appointment' on the right. Add a customer. You can choose an existing client or create a new one. Select a service for which the customer wants to create an appointment and assign the appointment to an employee. Then you can enter the date and time. Press 'save'.
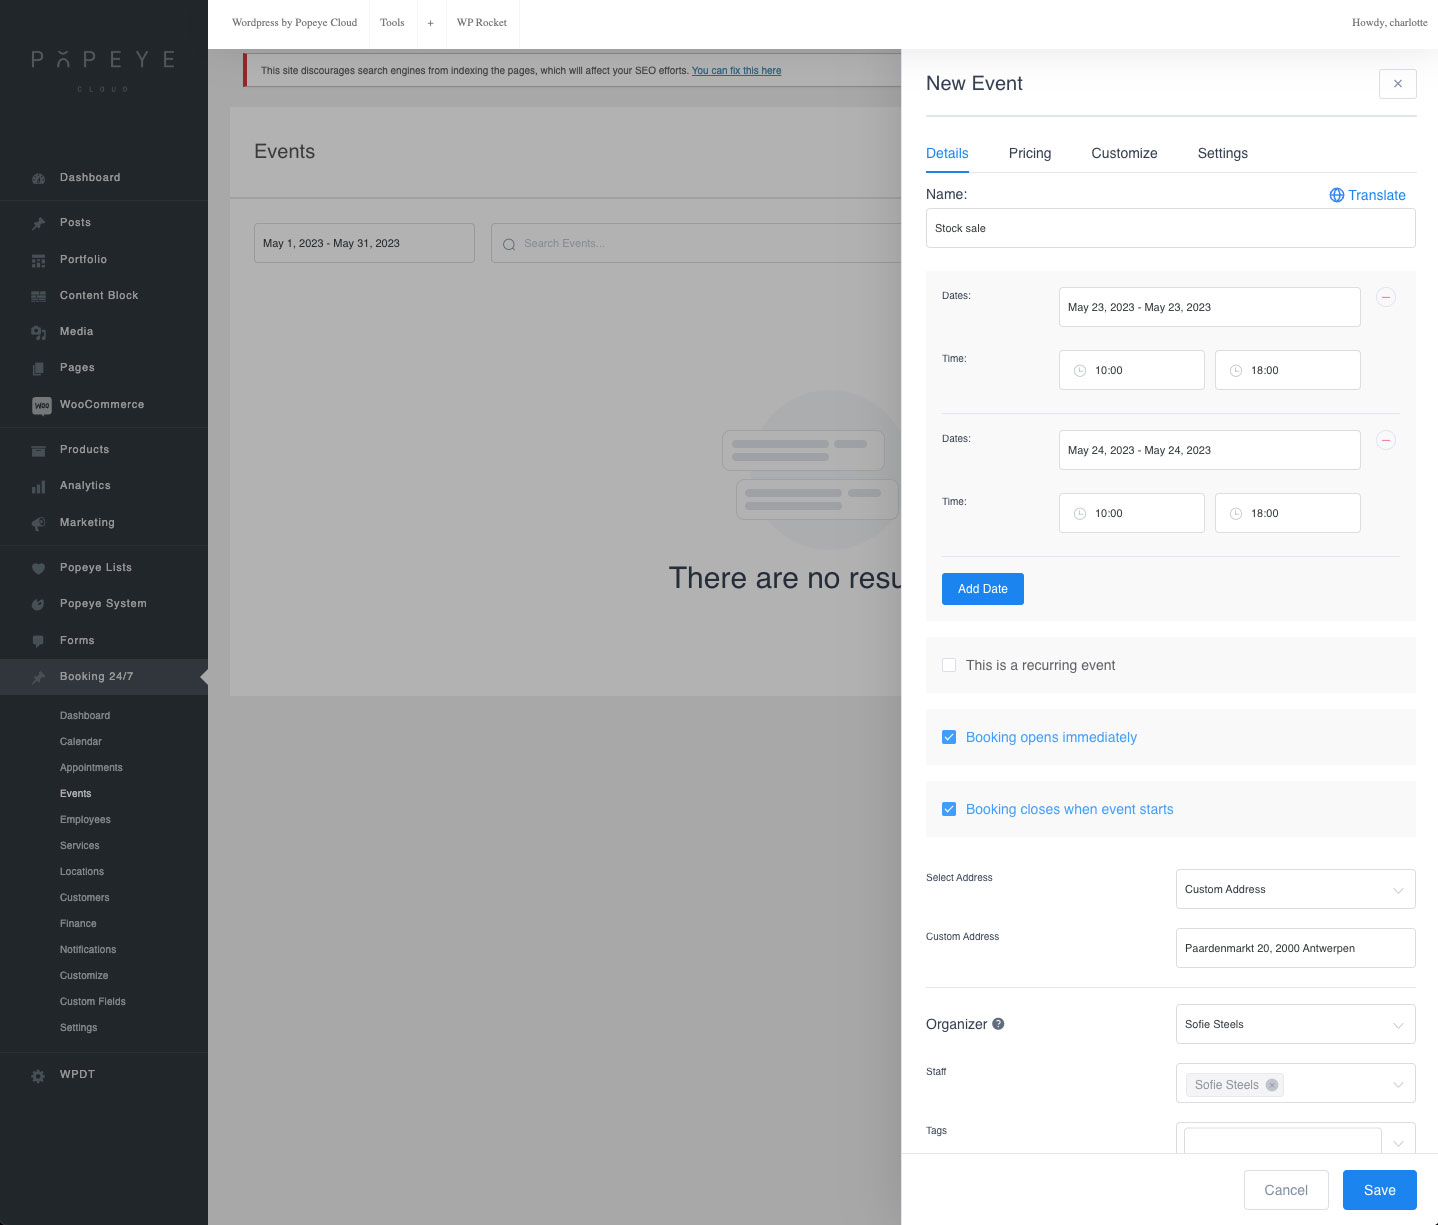
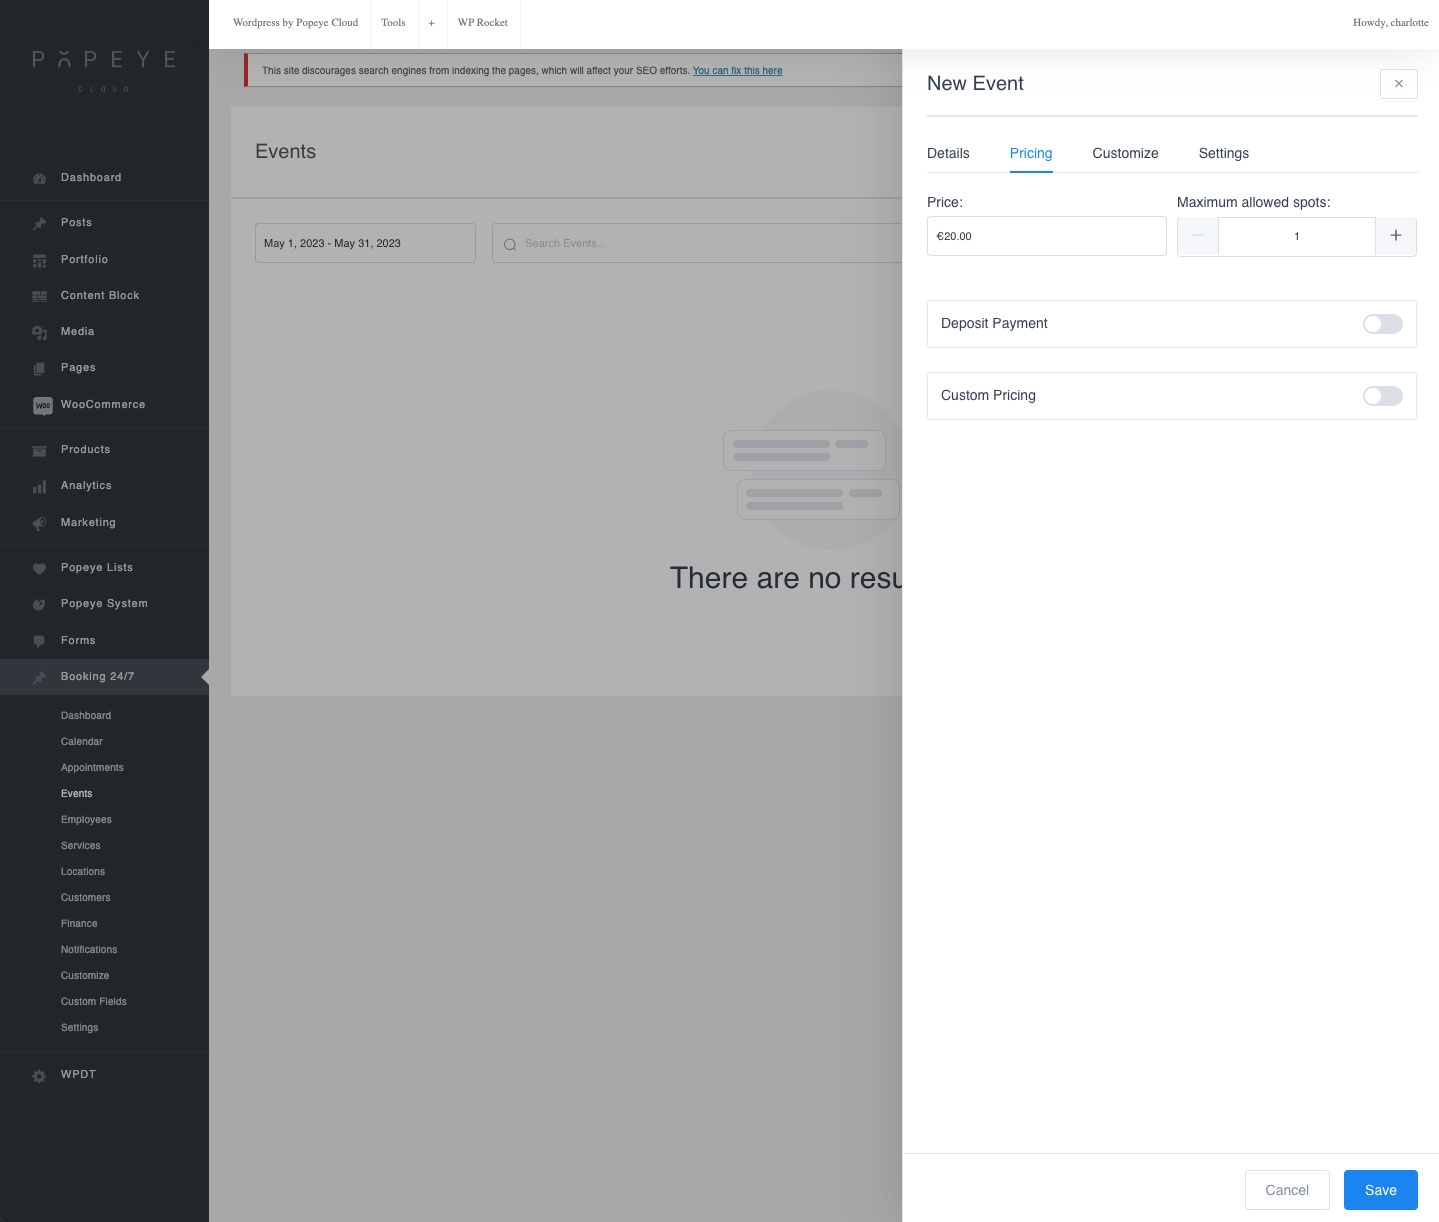
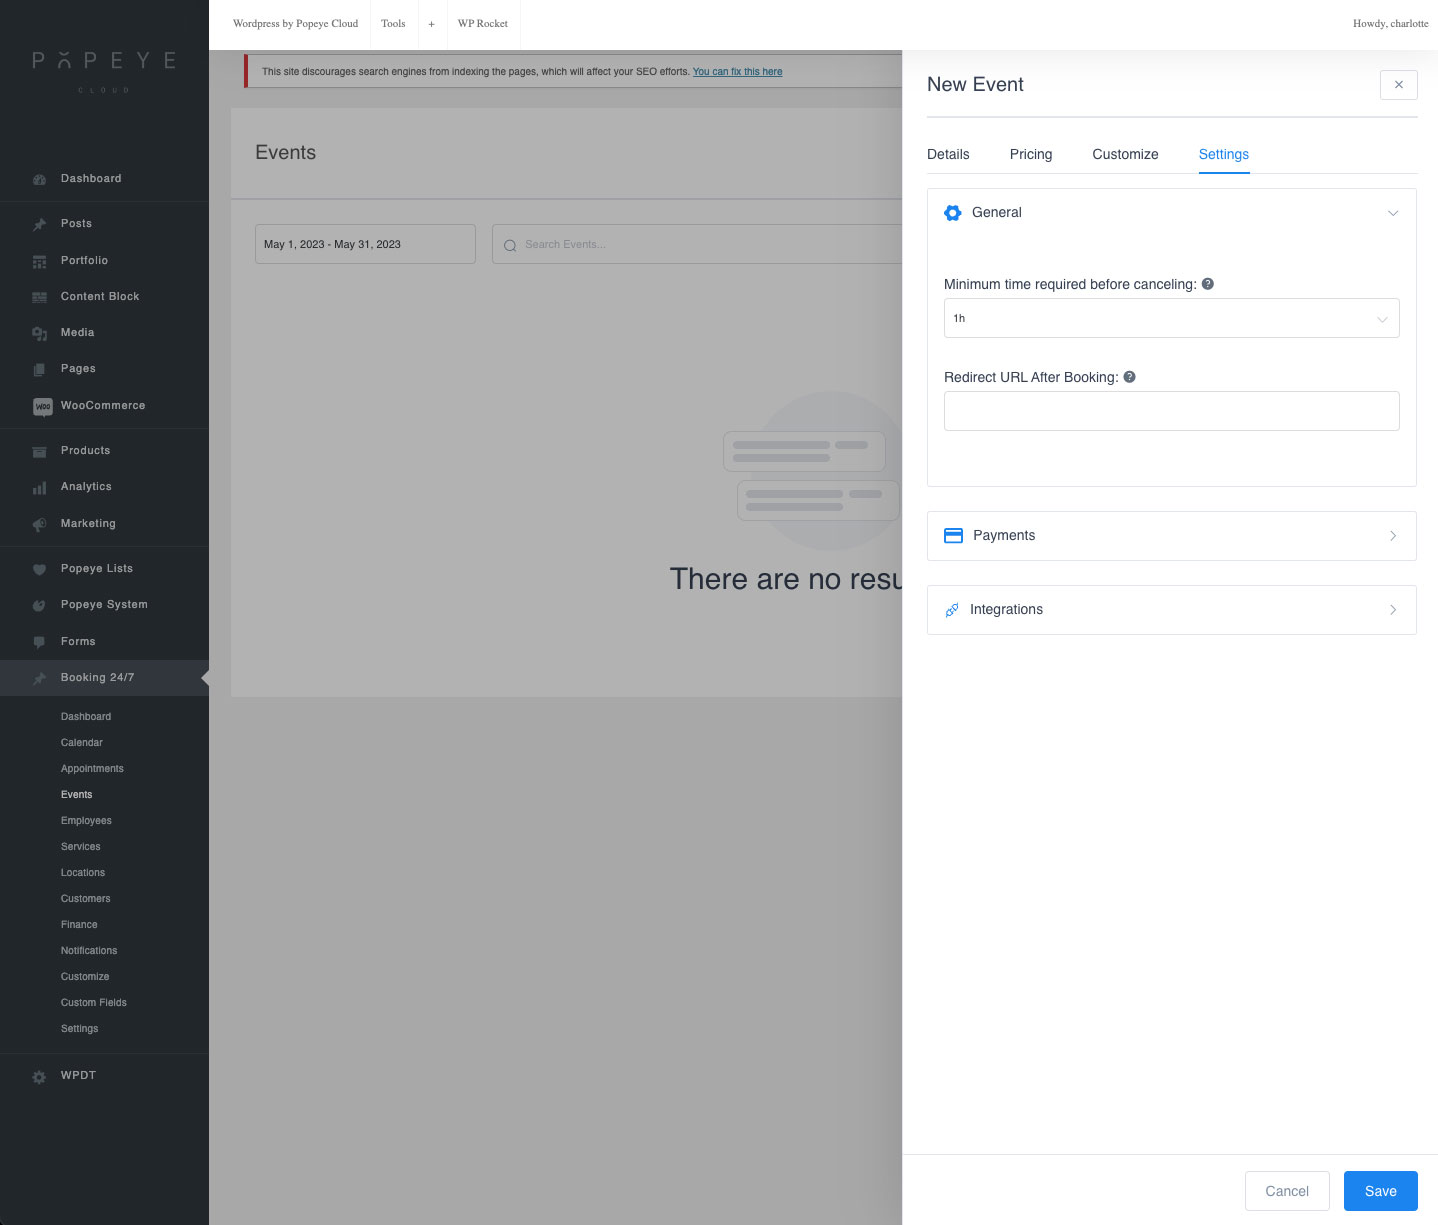
4. Events: Under the events tab you can add an event where a time slot must be booked. This can be useful if you are organizing a stock sale, for example. You can enter a date and time when the event takes place. You can also add an address where the event takes place and the organizer. At price you can set a price if they have to pay in advance when making the appointment. At settings you can set a time at which they can cancel and a redirect URL after booking if needed. Press save.
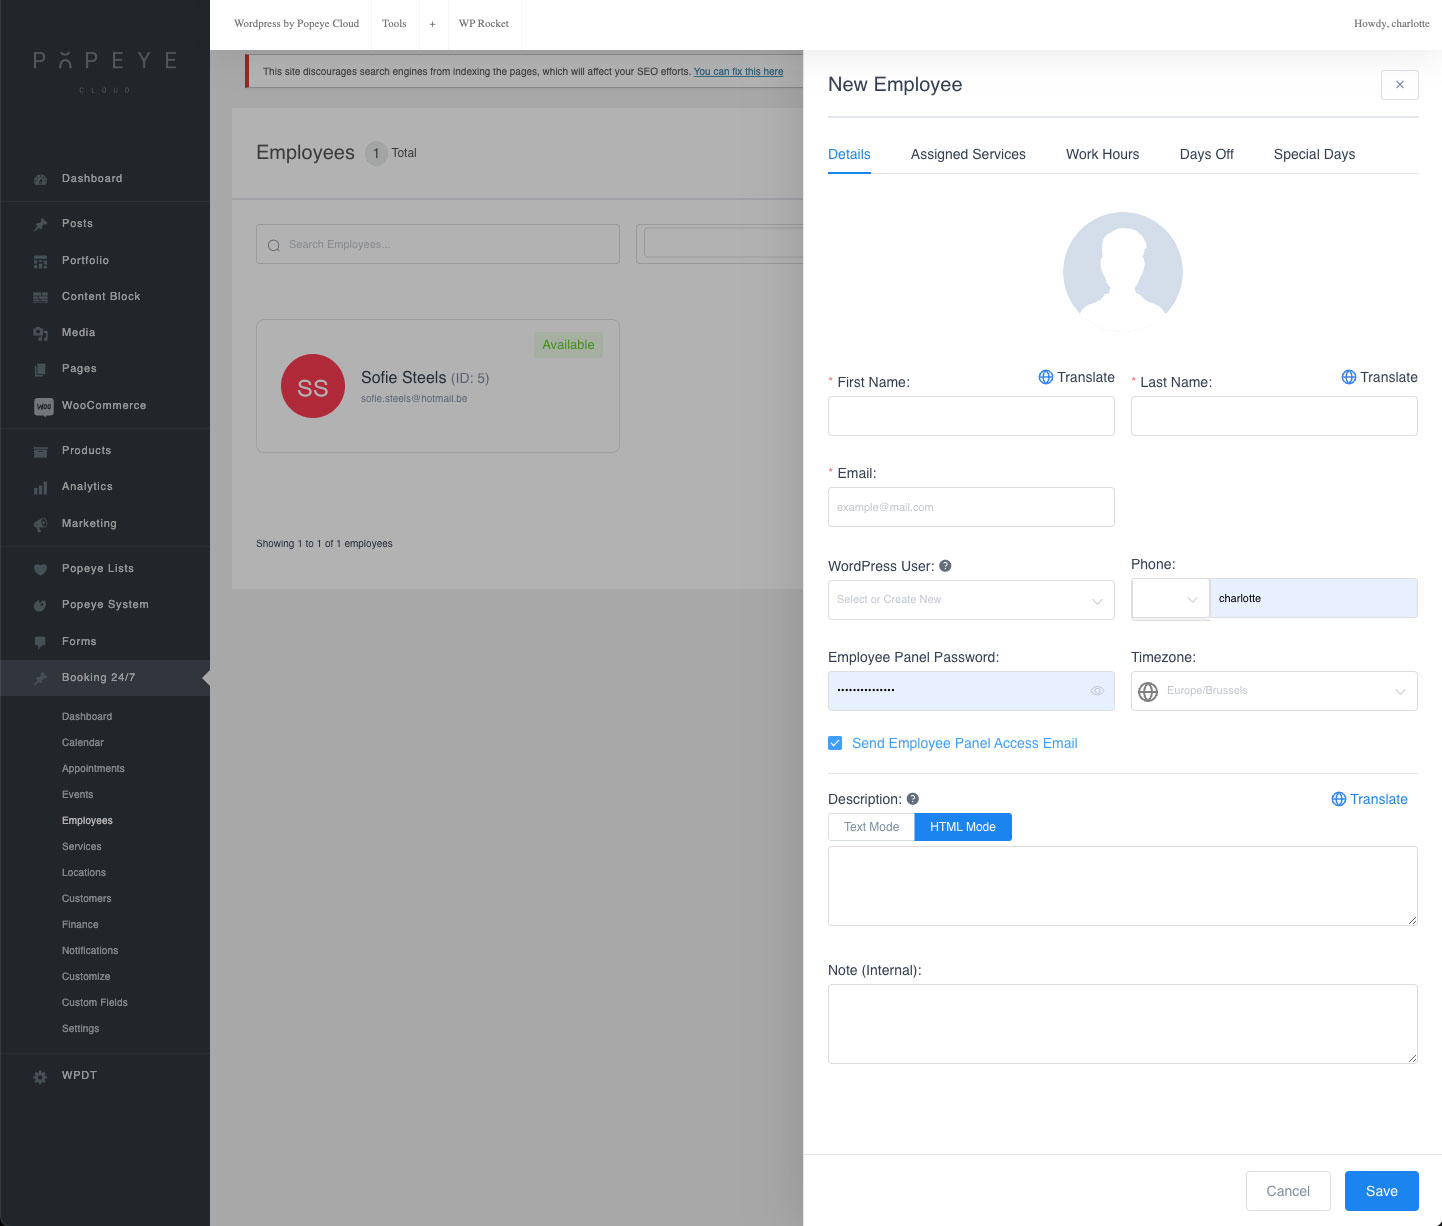
5. Employees: under the employees tab you can add a new employee by right clicking add employee. Here add the name, email, phone,... under assigned services you can assign a specific service to an employee. You can also set custom work hours per day or set a fixed day off. Press save.
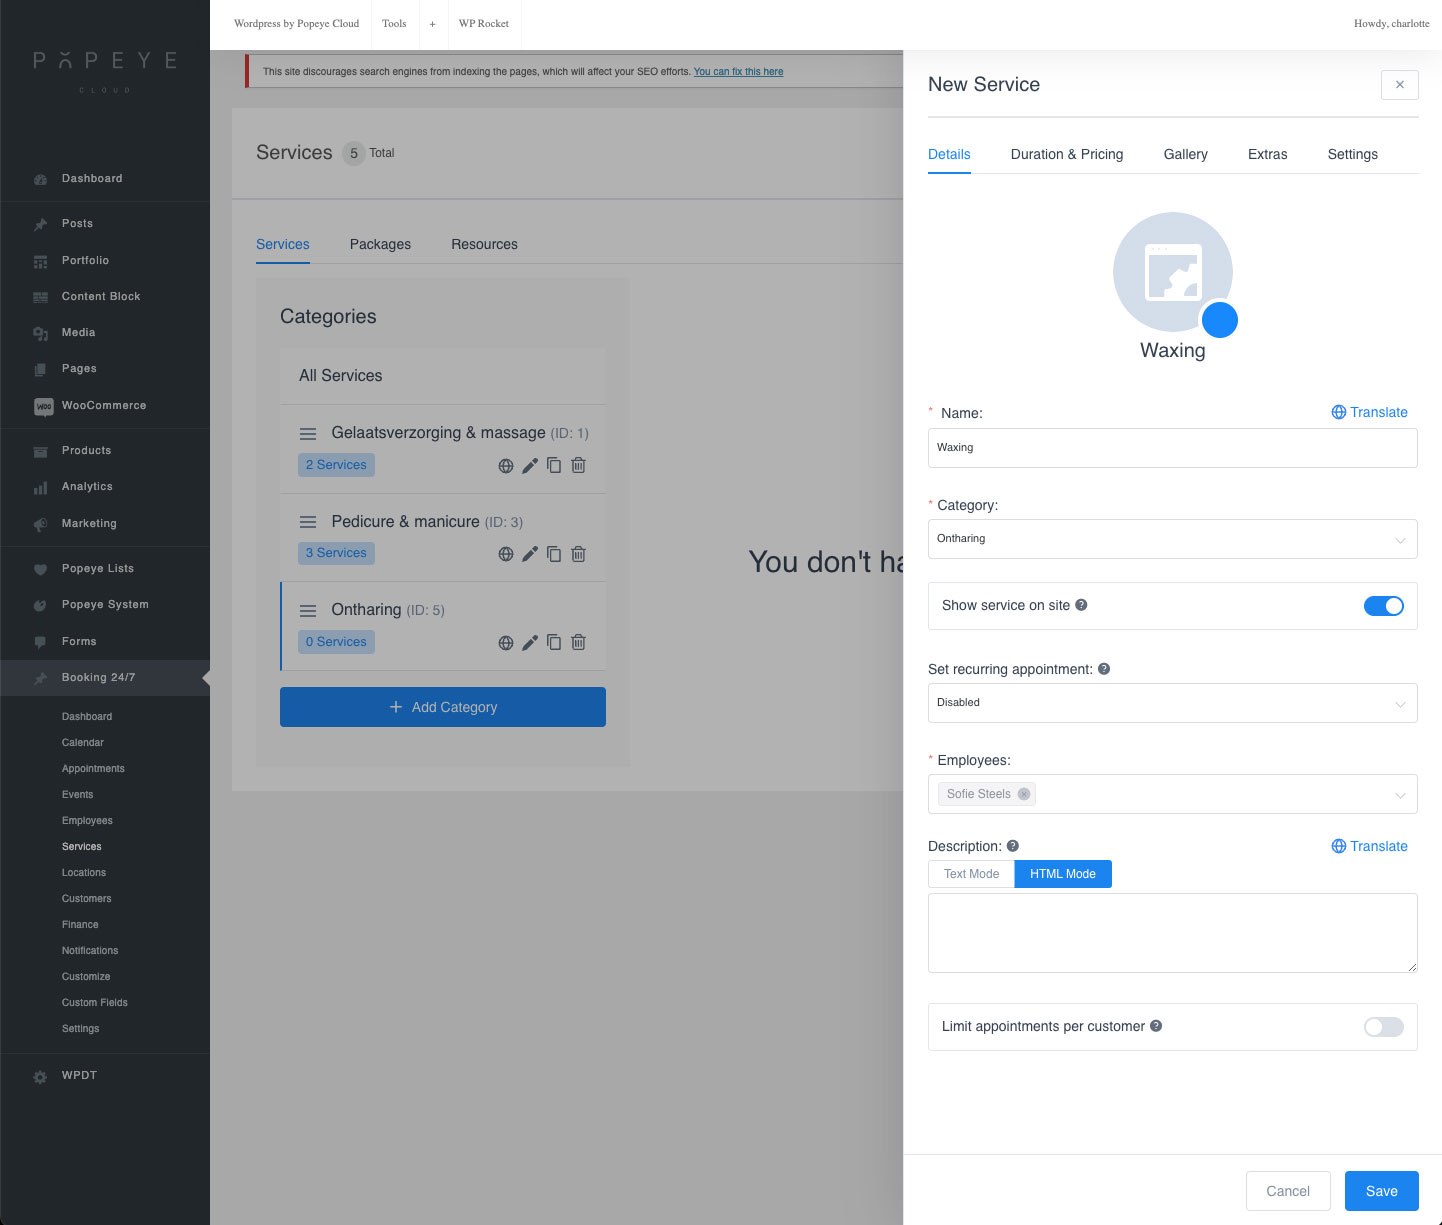
6. Services: under the services tab you can add a new service. You are always going to assign it to a category so first add a category by choosing 'add category'. Categories are an umbrella name for the different services that you offer. E.g. the category name is hair removal with the service waxing, epilation,... Press enter to save the category. You can set a price and time for each service in the next tab. Press save.
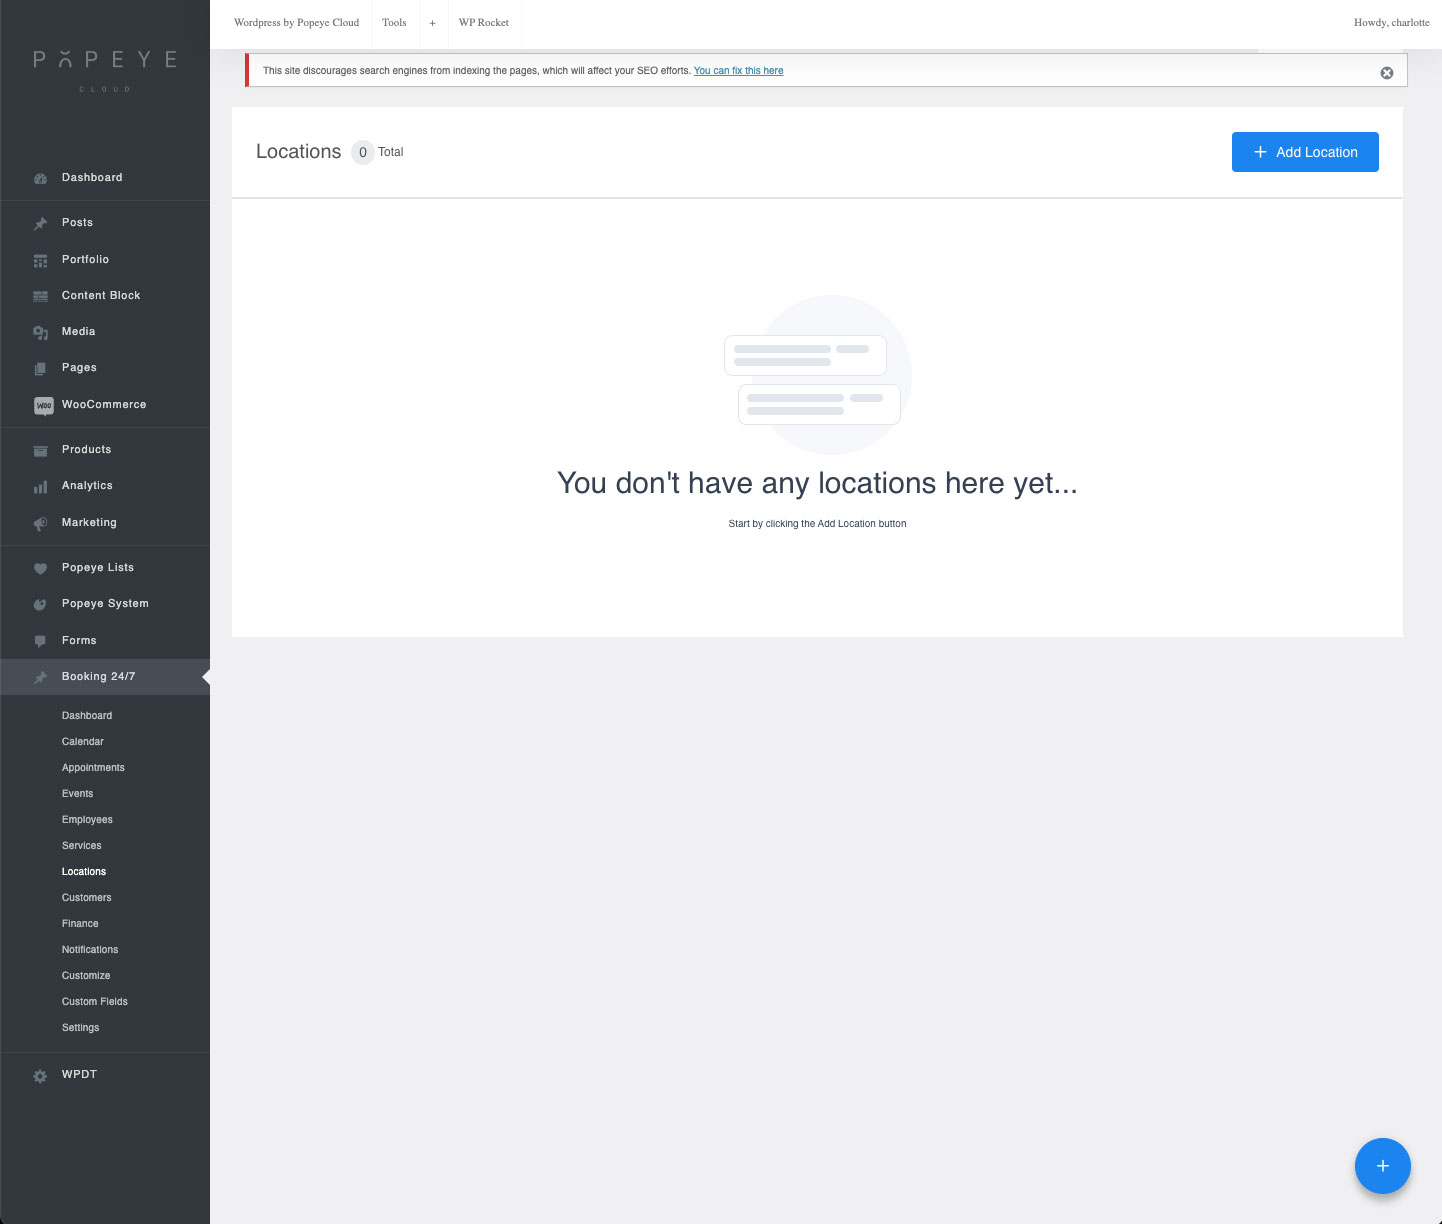
7. Locations: you can add the location of your business or event here.
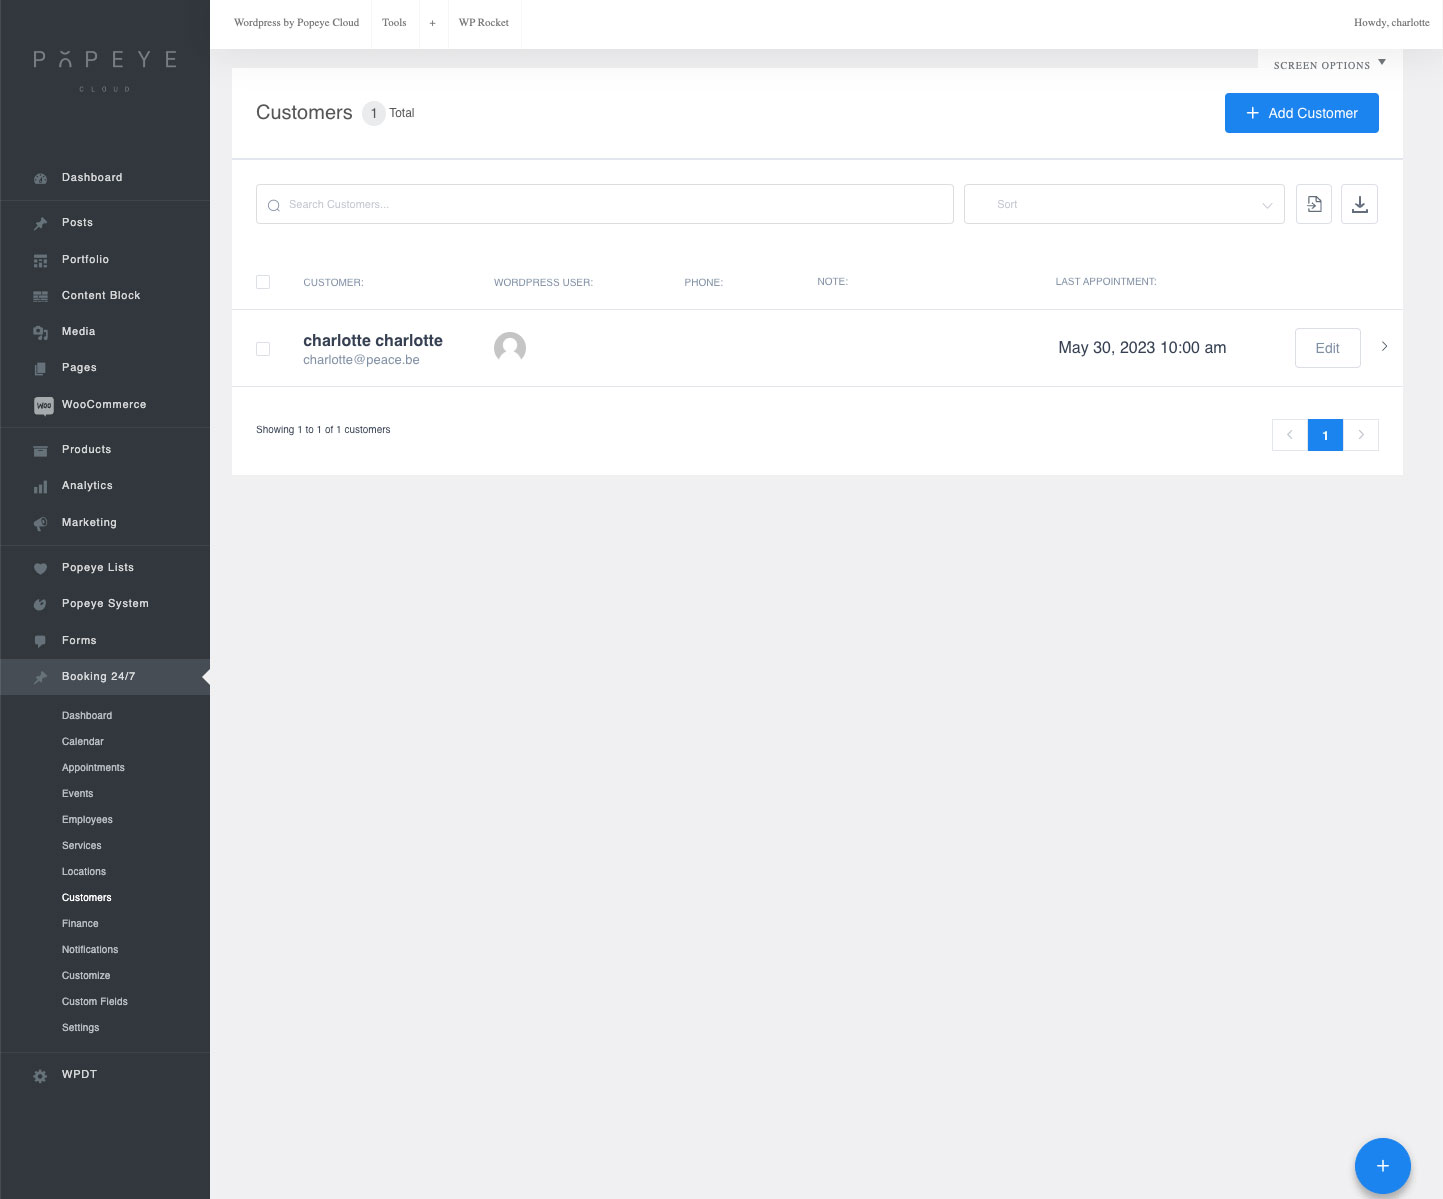
8. Customers: Here you see an overview of all the customers who made an appointment. You can also add a new customer manually. Here is the options to export a list of customers in CSV file or to import a CSV file.
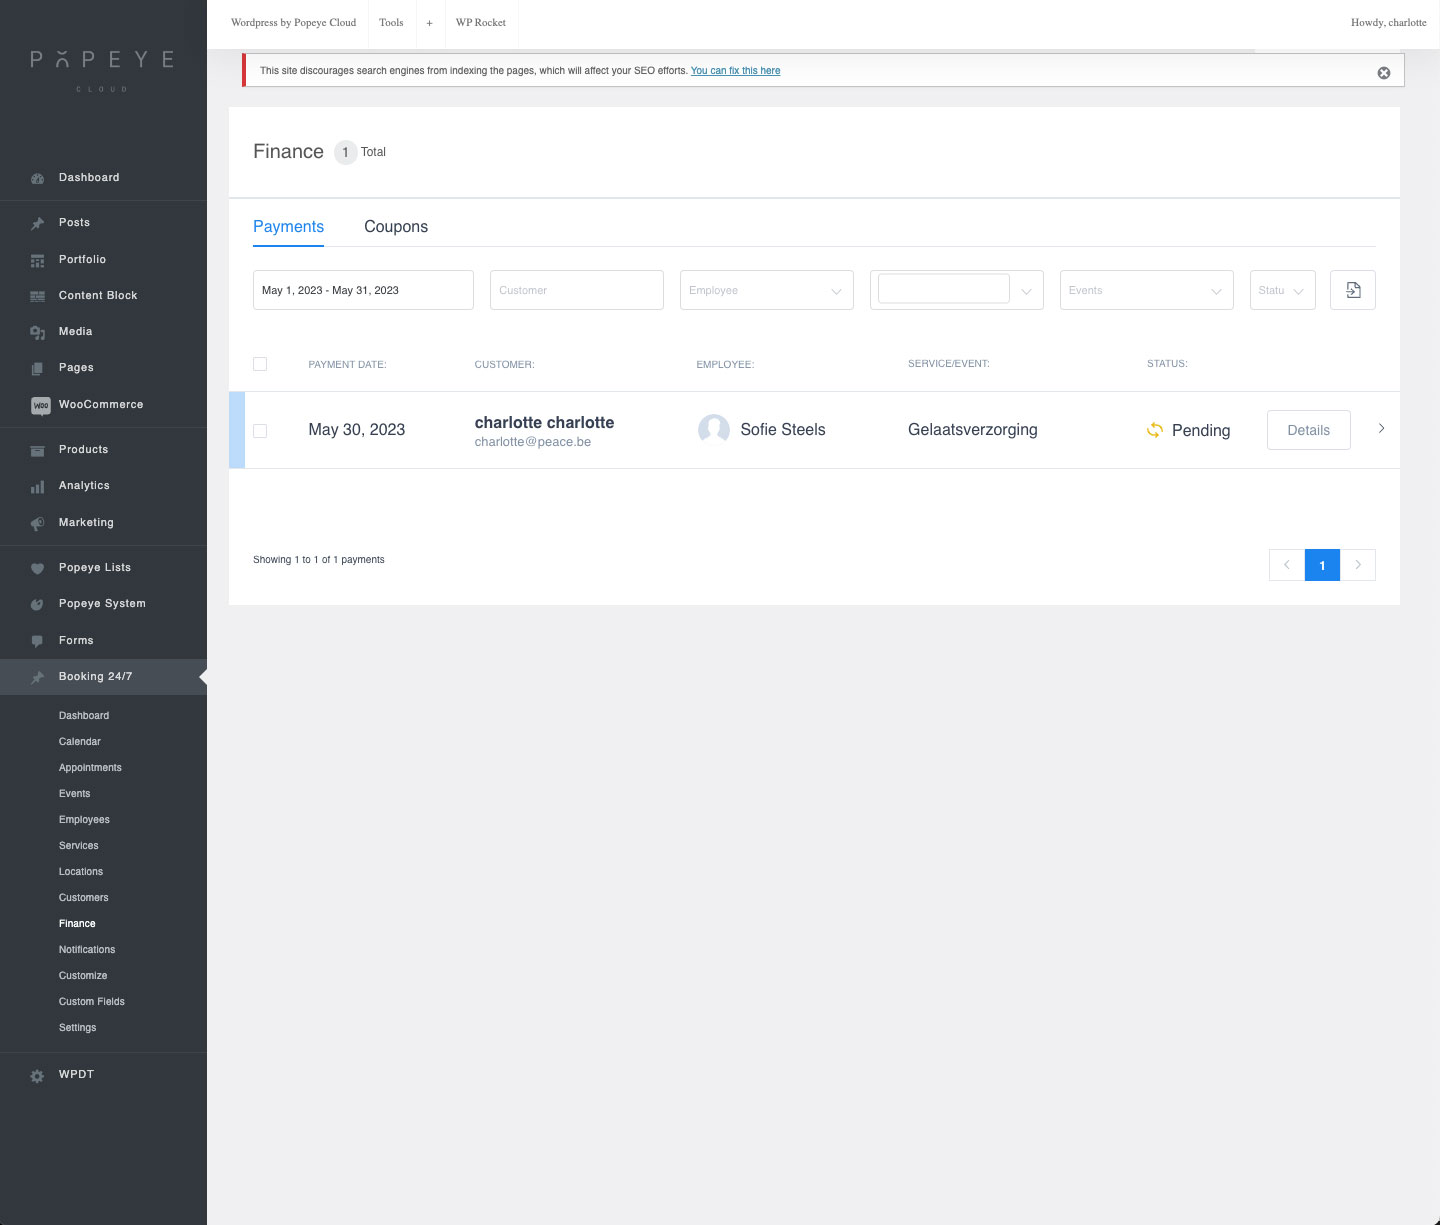
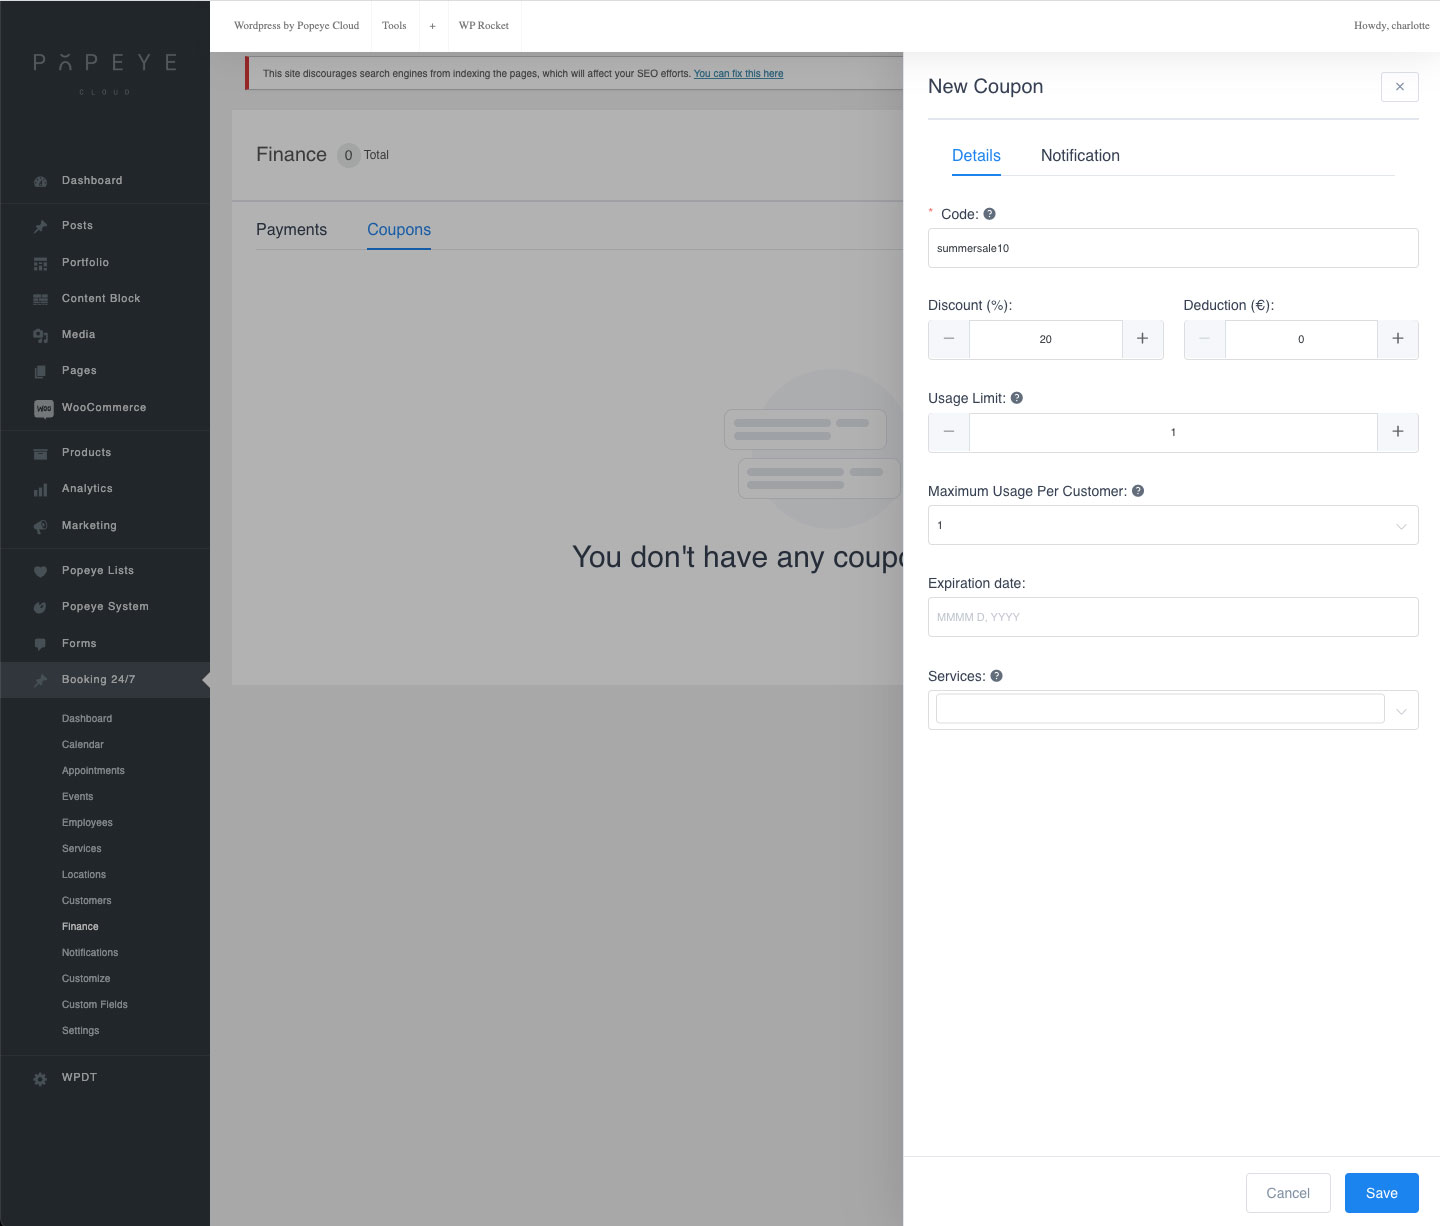
9. Finance: Under payments you can view all the payments. You can export a list of the payments to a CSV file. In the other tab coupons you can create a coupon. Here you need to define a coupon code which customers will enter in their booking so they can get a discount.
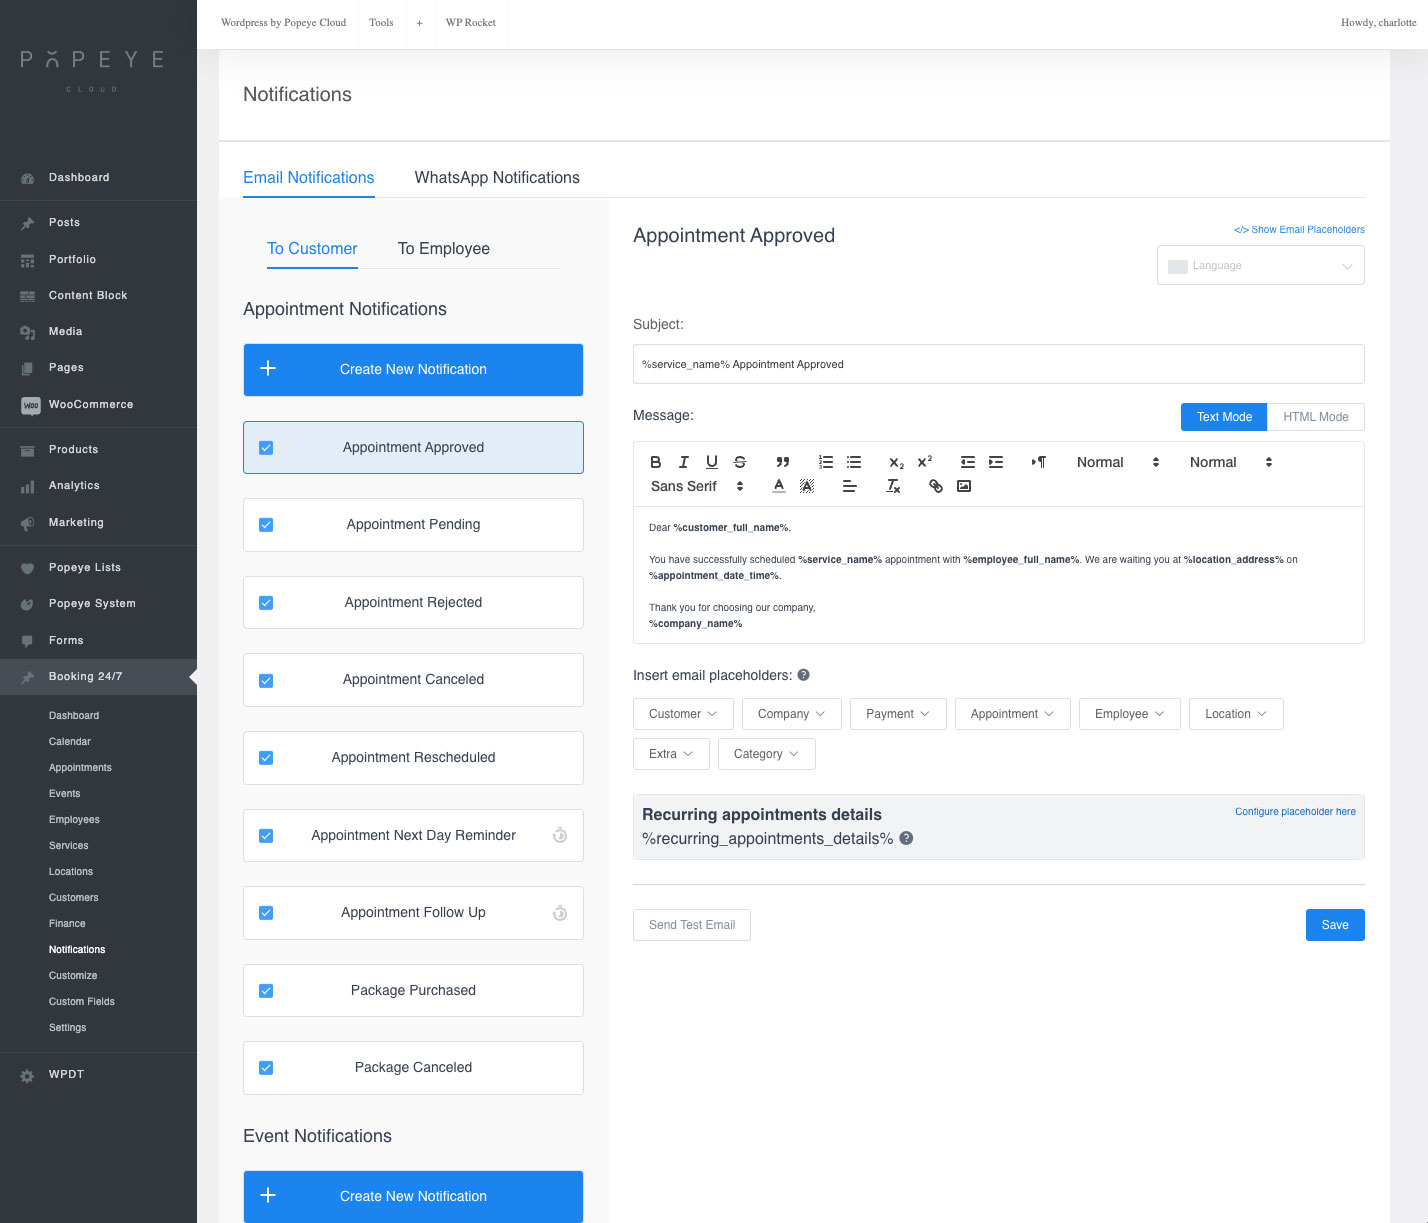
10. Notifications: The system sends automatic emails to the customer and to employees. Should you still want to customize this you can personalize it here under the notifications tab.
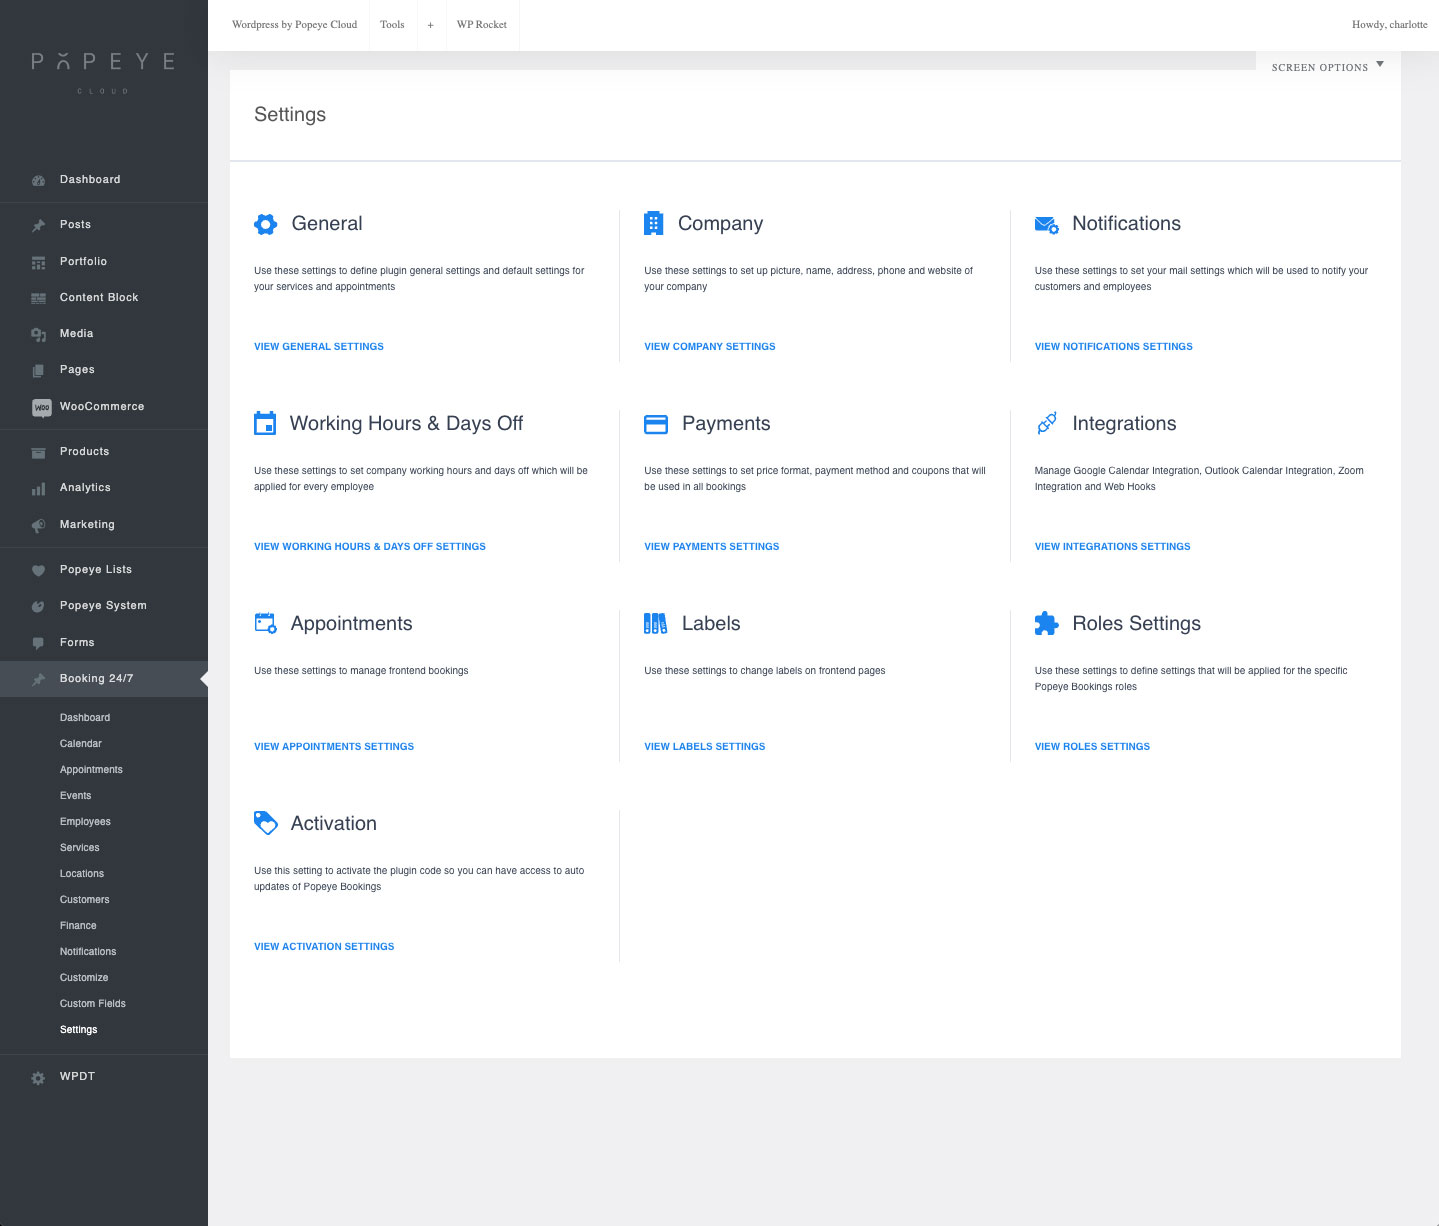
11. Settings: Under the settings tab you can make various general settings that apply to the entire company.