
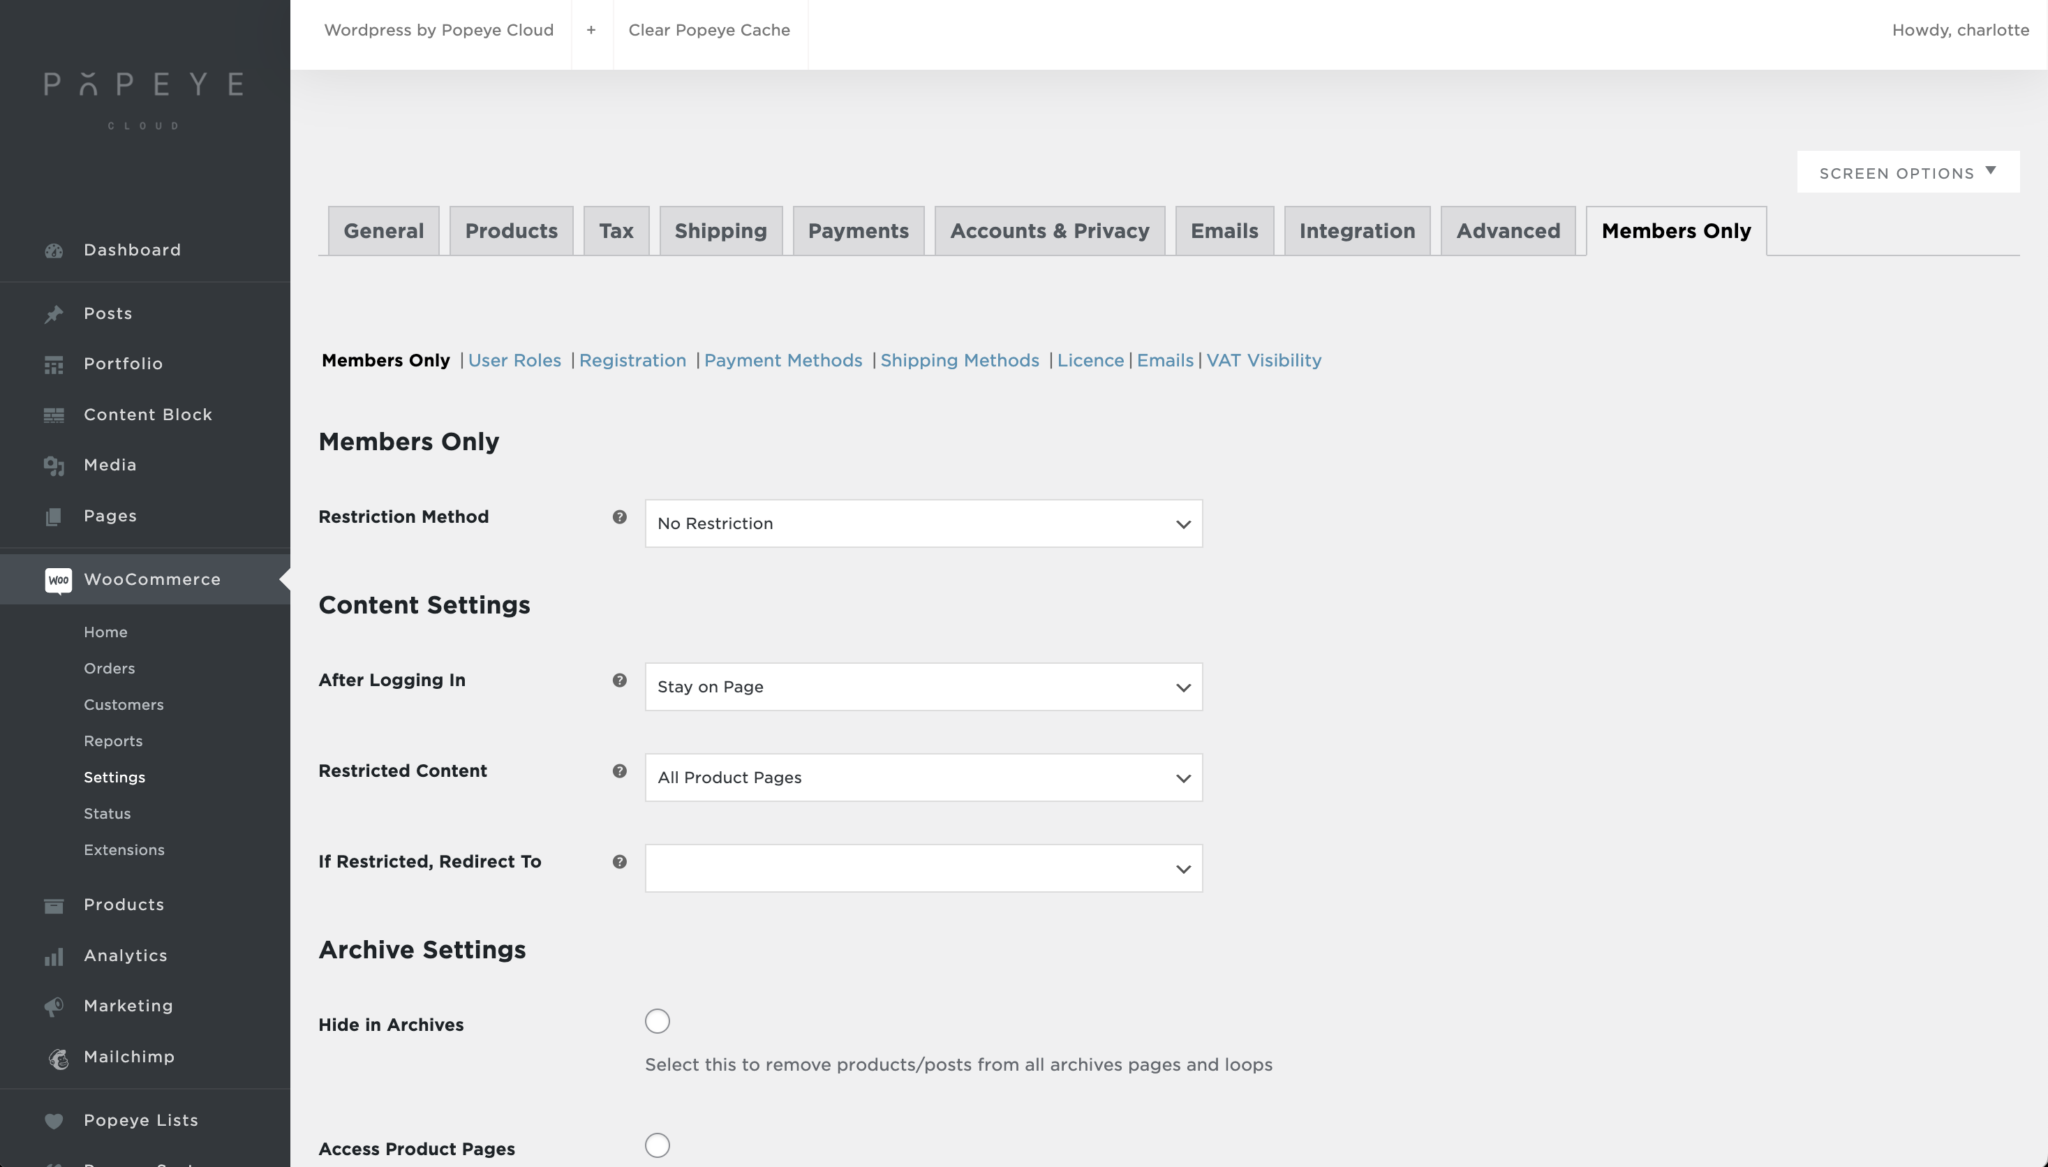
Members only
With the members only plugin you can add and manage different users in your WooCommerce shop.
Getting started
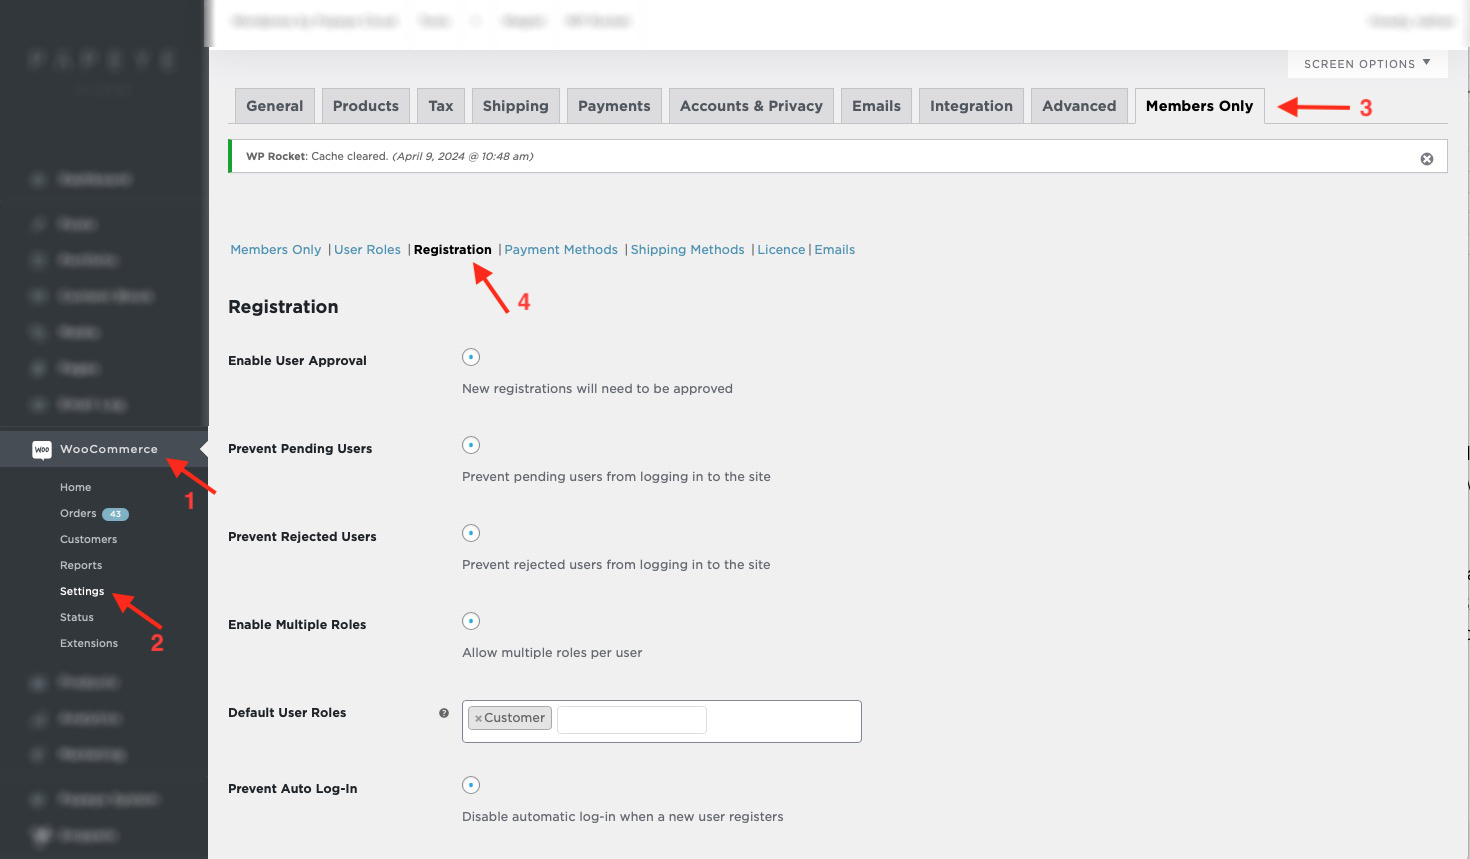
Go to your dashboard > WooCommerce > Settings > Members only
User roles
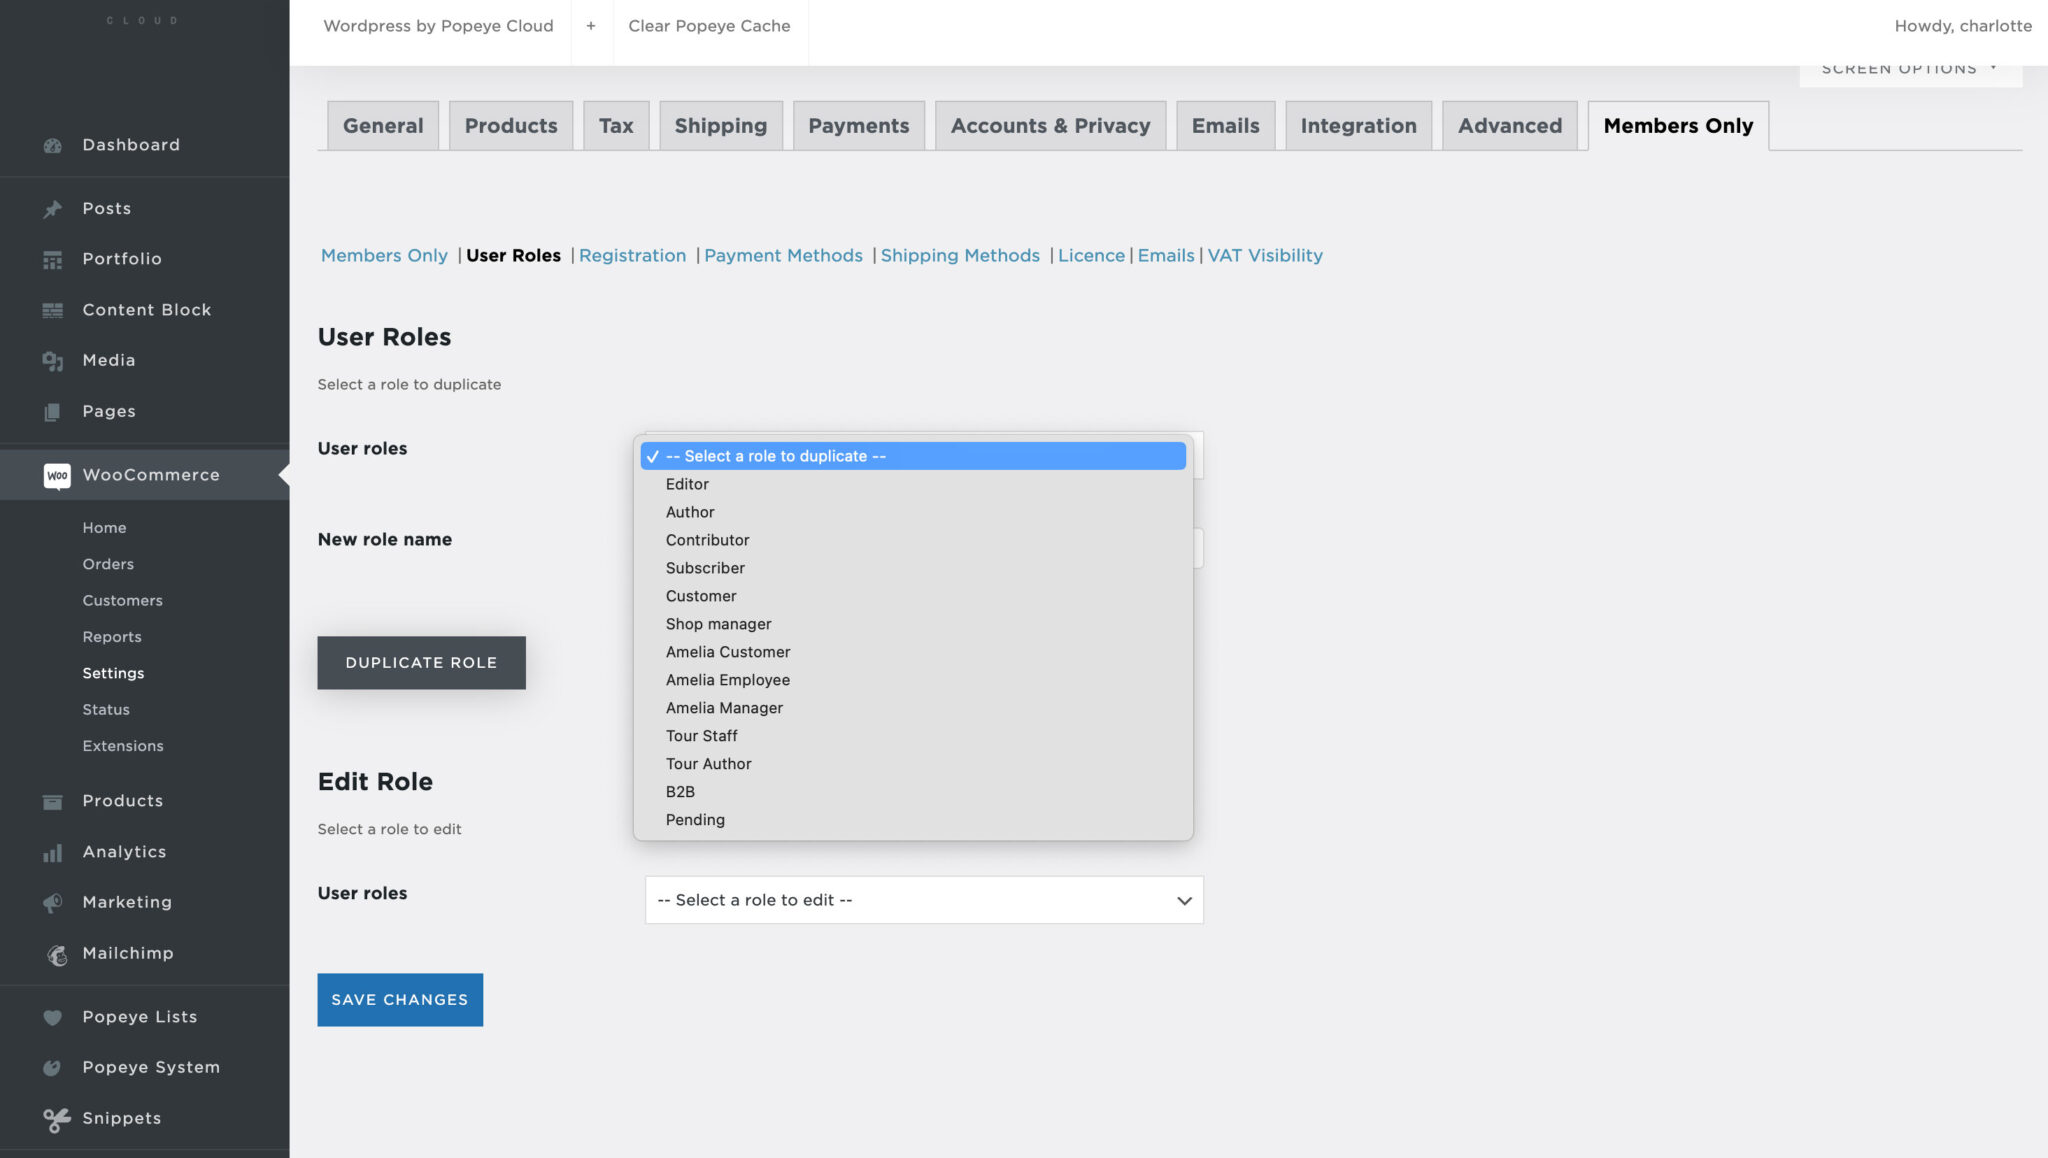
The next tab 'User Roles' allows you to add, duplicate and edit user roles. There are already a number of user roles in the WooCommerce system by default.
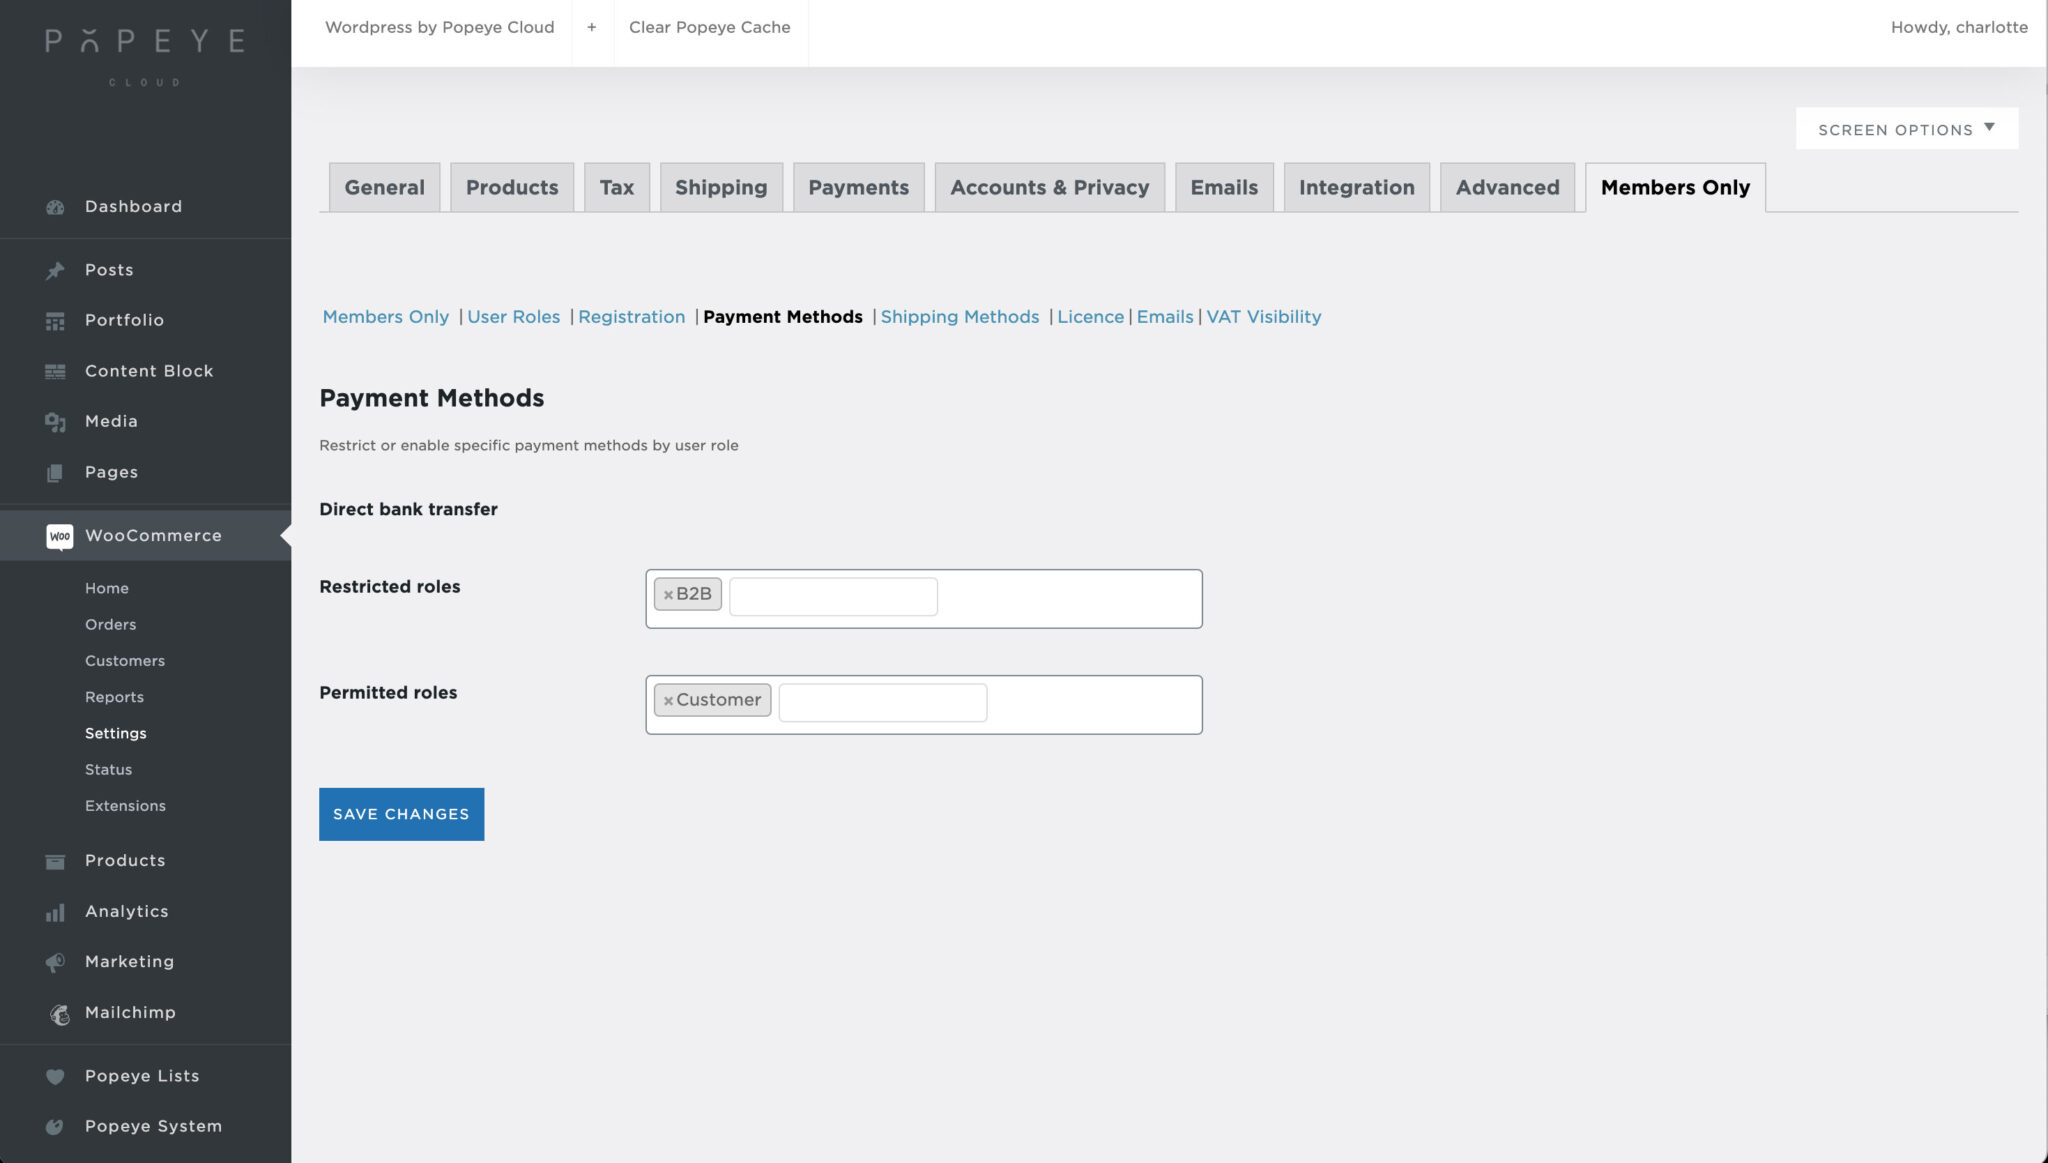
Payment methods
Based on the user roles that have been created you can set some payment options. Based on which payment methods are available on the website (setup through Mollie), you can determine here for which user roles these are restricted or permitted.
Shipping methods
In the shipping methods tab, you can also decide for the different shipping methods which user roles are restricted or permitted.

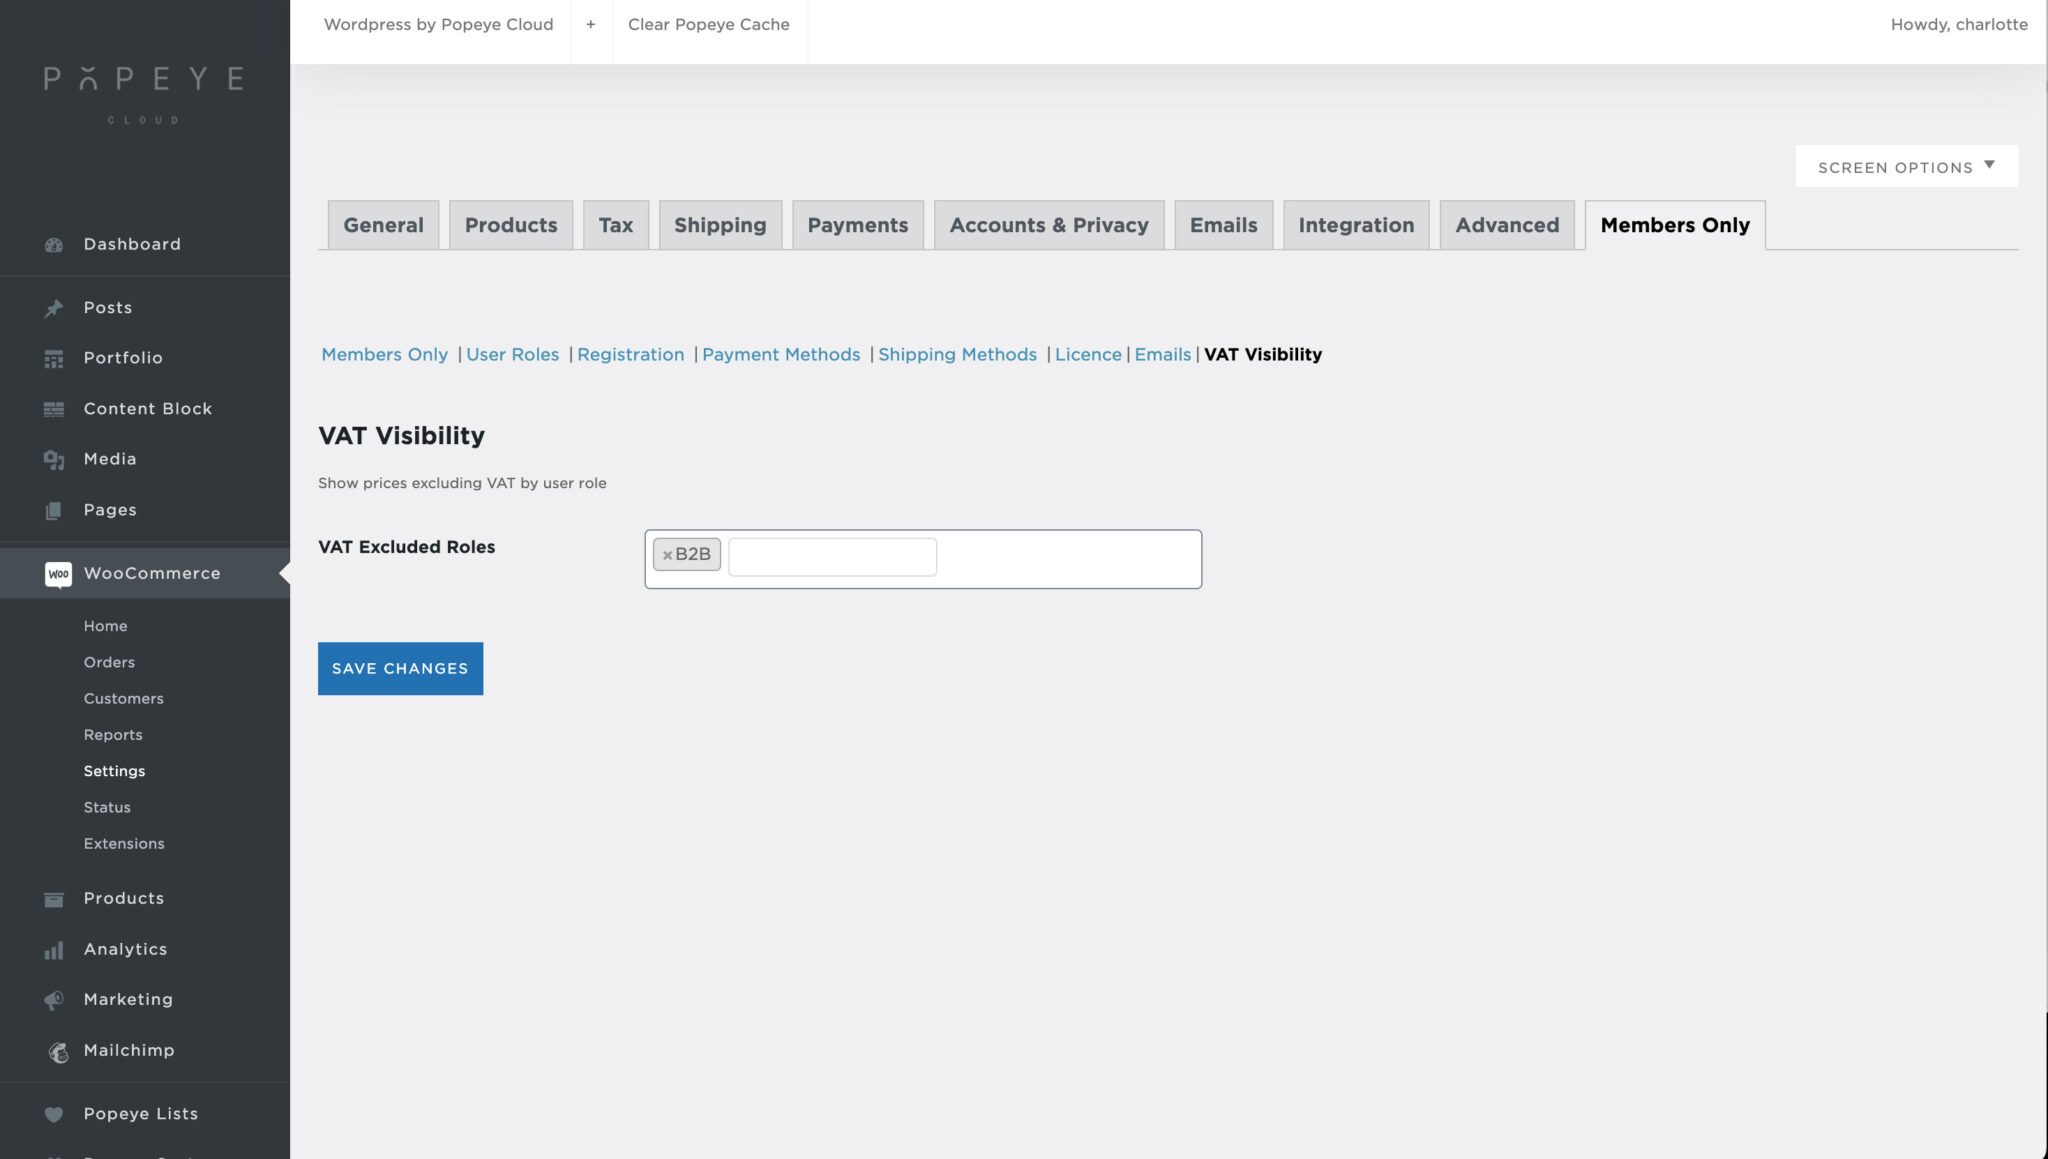
VAT visibility
Under the VAT visibility tab you can determine for which user roles the VAT incl. is shown and for which user roles the prices excl. VAT are shown.
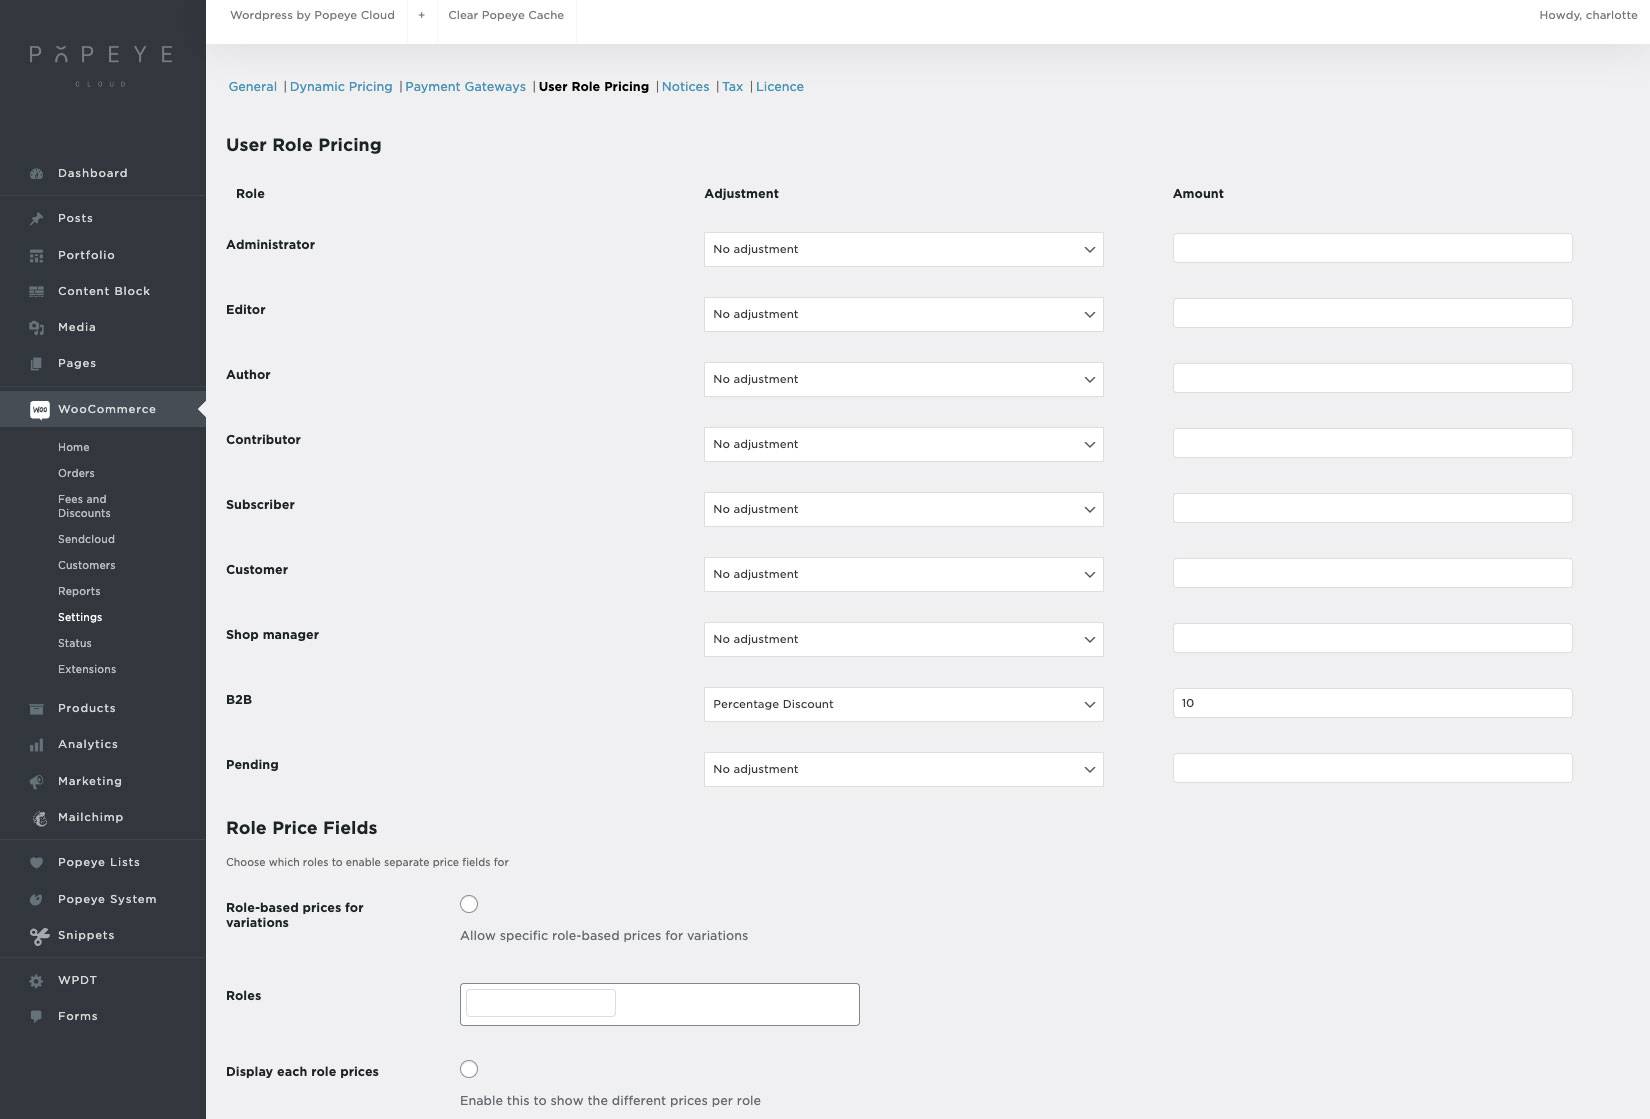
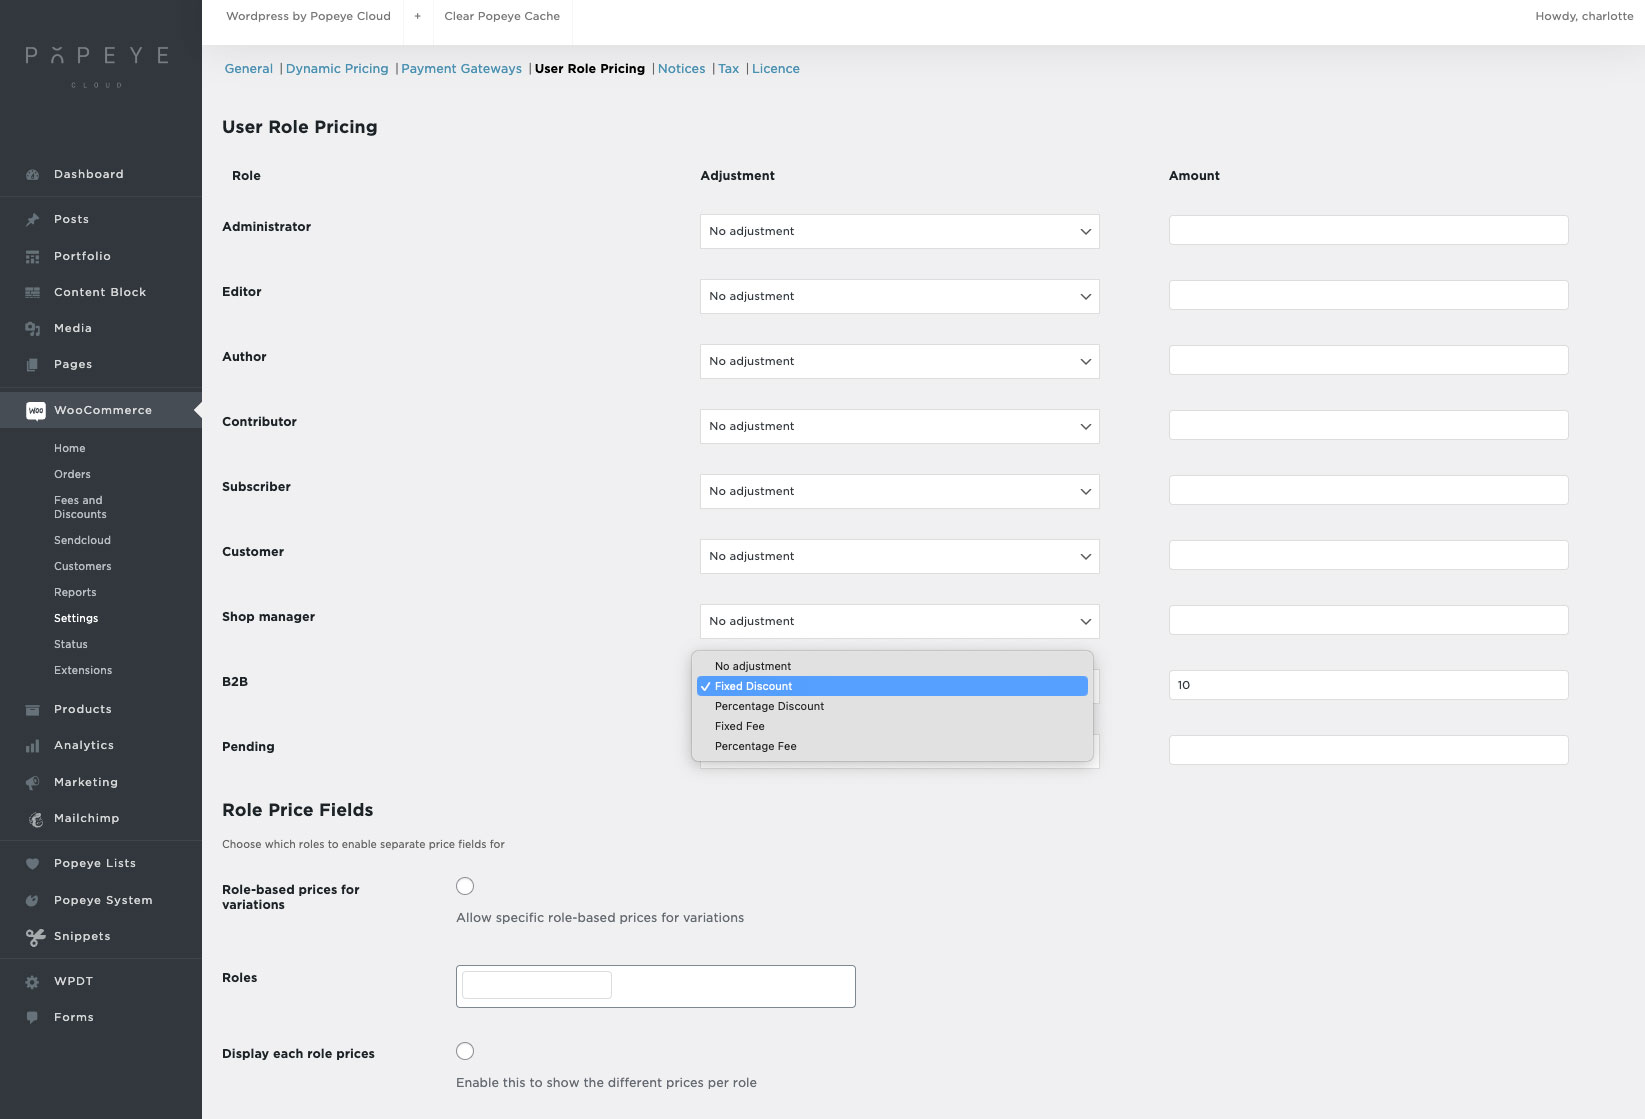
Set different prices for different users
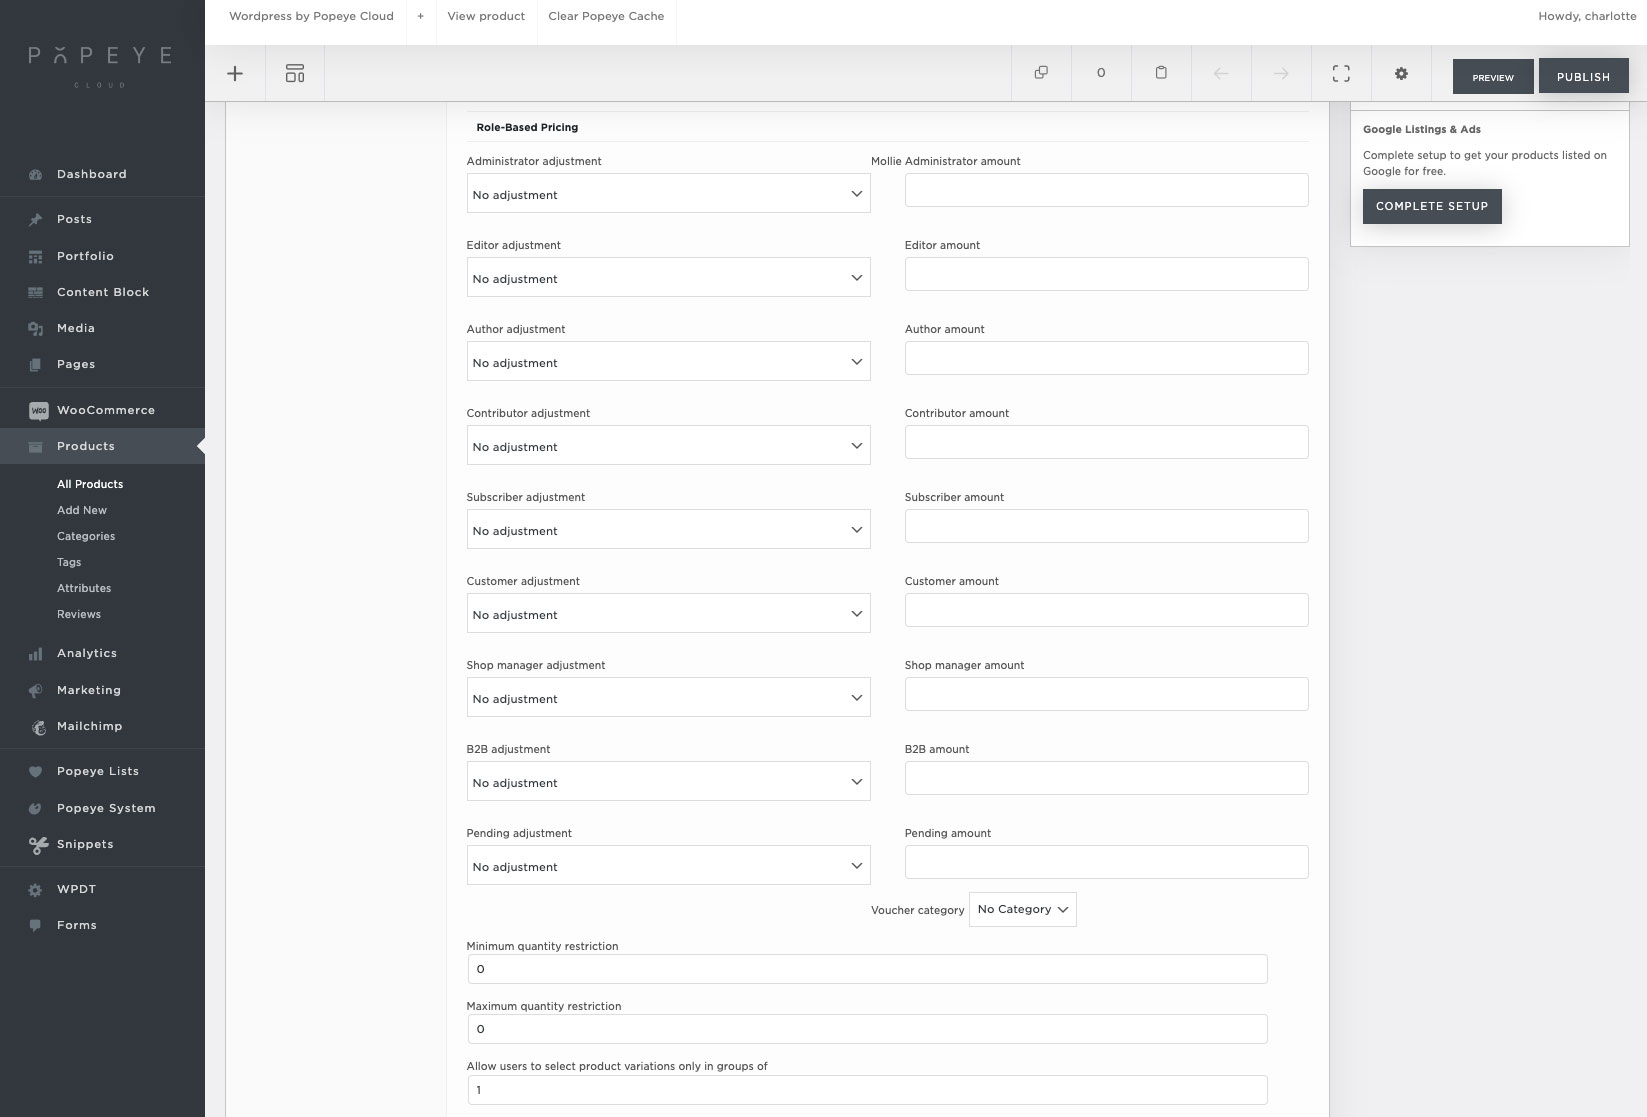
Go to WooCommerce > Settings > Fees and discounts The user roles that you have created in the Members Only options (the steps above) will automatically appear here for you to define. Here you have the option to give a certain user role a fixed discount, percentage discount, fixed fee or percentage fee.These settings are added to all products. It is also possible to override this and set it per product. You can add this if you select a product > variations and down there at 'role-based Pricing'. This is going to override the settings of in the WooCommerce settings.I recommend to set it for the whole shop through WooCommerce settings and if you have a separate setting for a specific product to do this at product level.
Add a new field to the account registration form
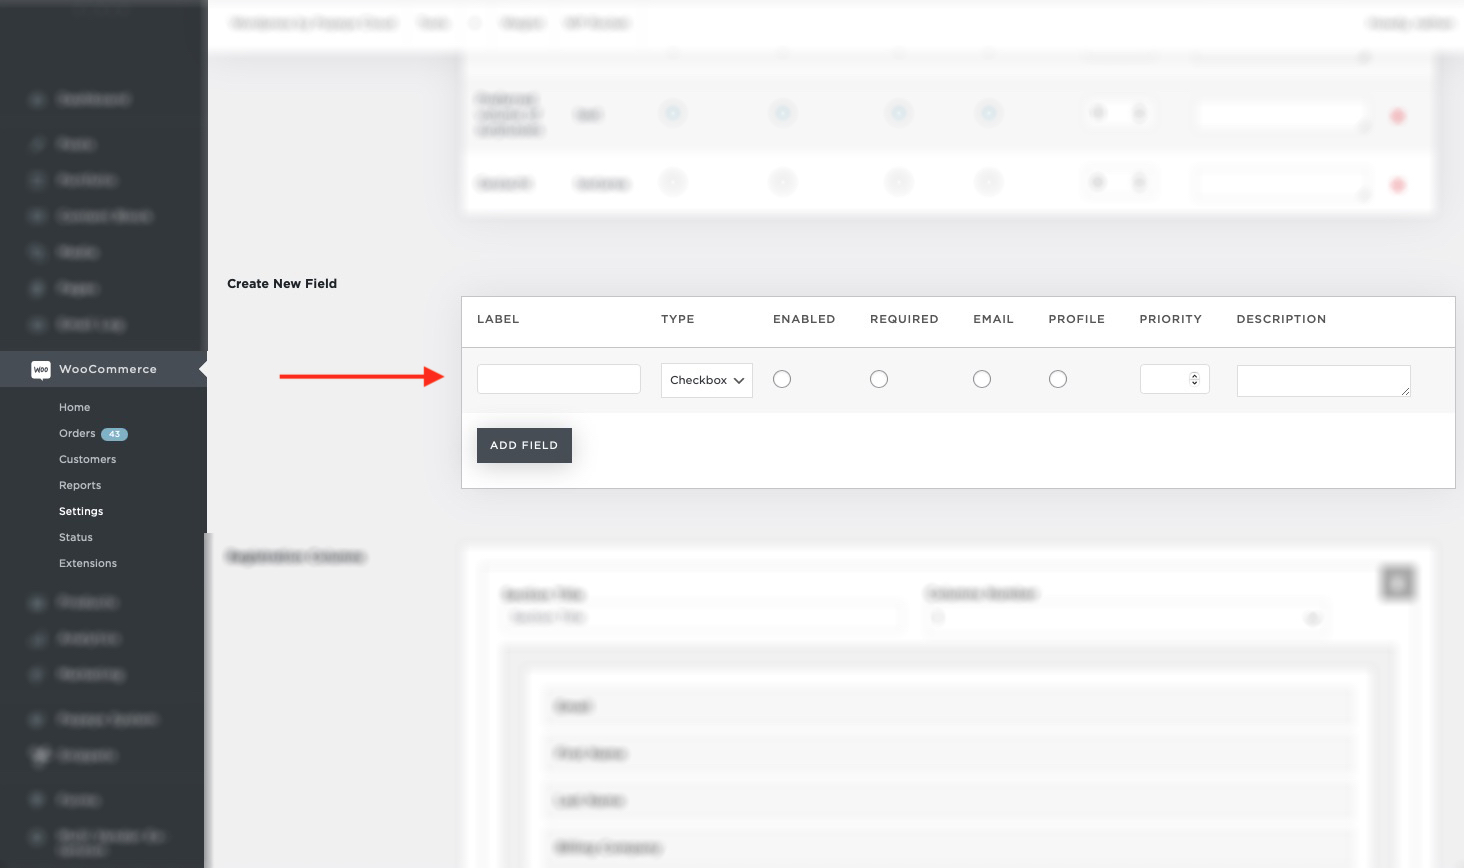
Go to WooCommerce > Settings > Members Only > Registration Scroll down to the section 'Create New Field'. Here you can add a new field by selection the options needed followed by clicking ADD FIELD. Under the label segment you choose what the display name of the field will be. Under type you choose the role of that field (Checkbox, Text, Upload, Select, Textarea, Country, etc). Make sure to enable it by checking the ENABLED box. When added, you will find the newly added field under 'Additional Registration Fields' just above. The new field will be shown at the bottom of this list. Double check if the enable button is checked. When so, click SAVE CHANGES at the bottom of the page. When all is done, make sure to empty the cache memory of the website to make certain the last changes are shown. You can check this by making an account on a private window to see if the newly added field is shown here.