
Points and rewards
With the YITH WooCommerce Points and Rewards plugin, your store customers can accumulate points and redeem them for discounts on future purchases. These discounts can be customized based on factors such as specific products, categories, user roles and levels that you can configure through the plugin settings.
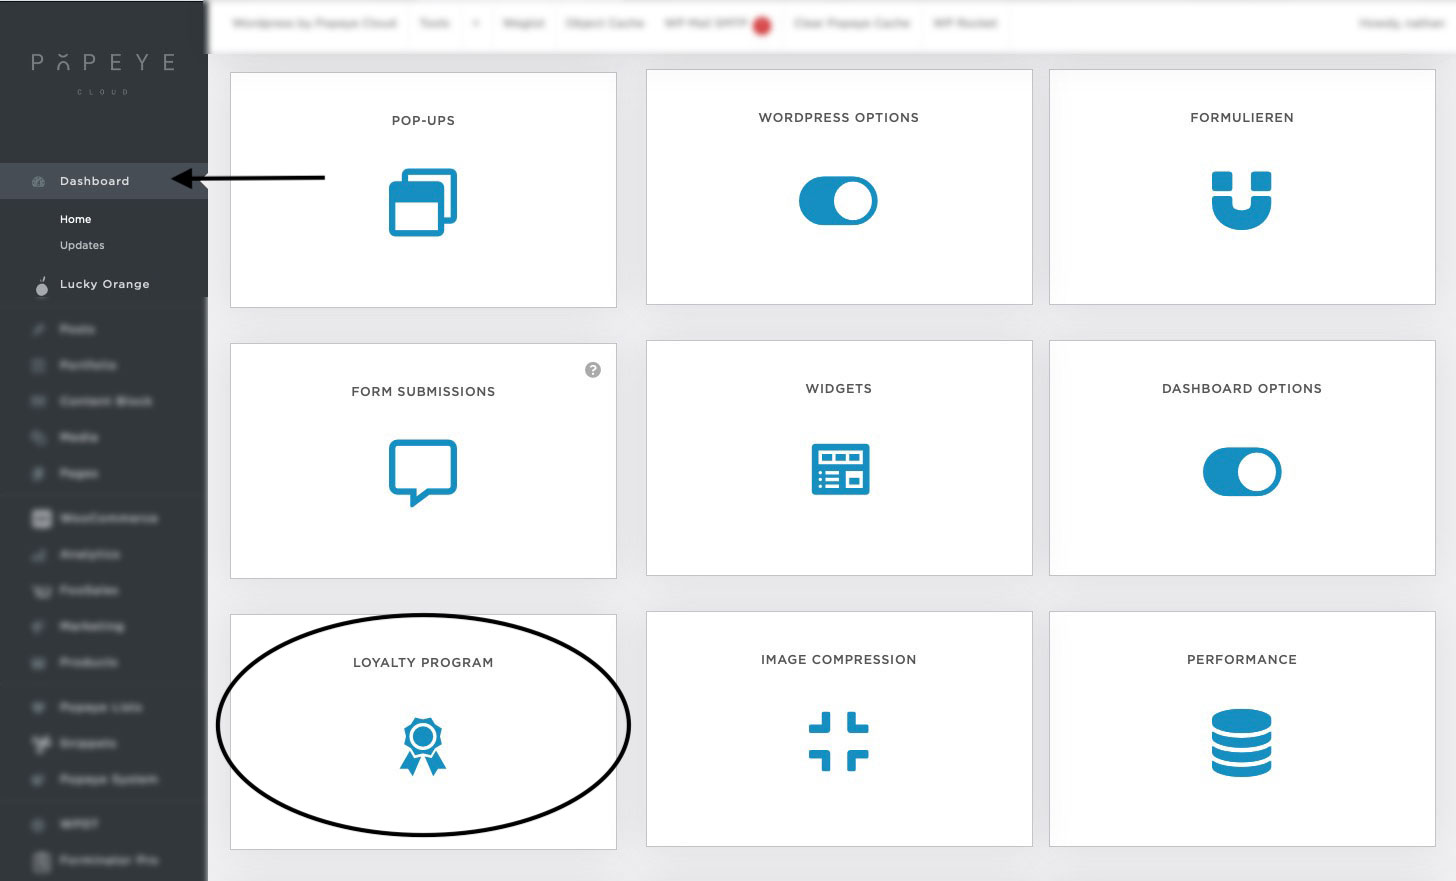
Getting started
Go to your dashboard > Loyalty Program
Customers points
In the "Customers points" section, you have the ability to oversee and control the points accumulated by your customers. Within the table provided, you'll find a comprehensive list of users along with details on the points they've earned, their current points balance, and their respective ranking.

Points options
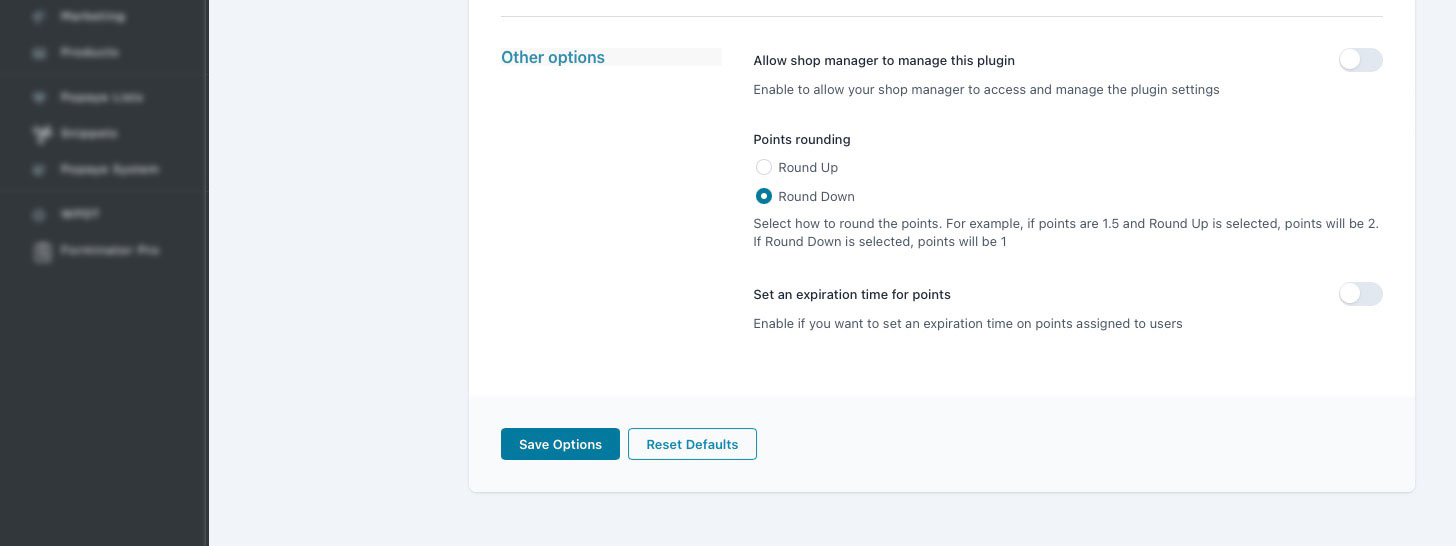
Within the "Points options" section, you'll encounter various subsections tailored to fine-tuning the parameters and regulations dictating point generation, spanning from orders to bonus points, user levels, and restrictions. The first subsection is "Points assignments". Here you can configure the global options:

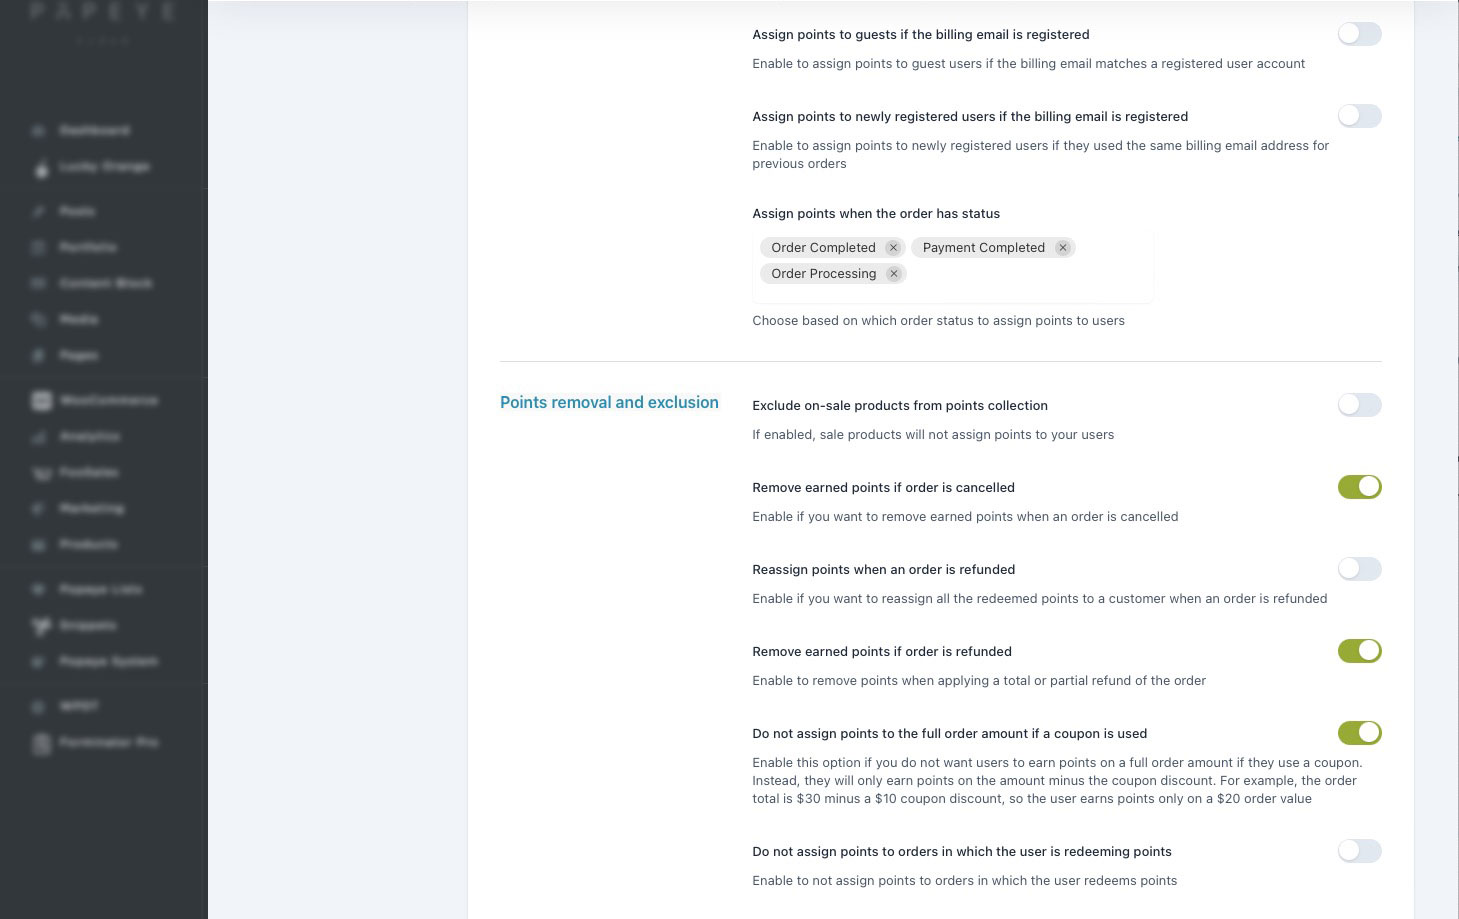
In the Points Rule subsection found in Points Options, you can configure many more supplementary rules for your points.
Discover here your configured rules, easily toggling them on/off with the switch button. Utilize quick actions to edit, duplicate, sort via drag-and-drop, or discard any rule.
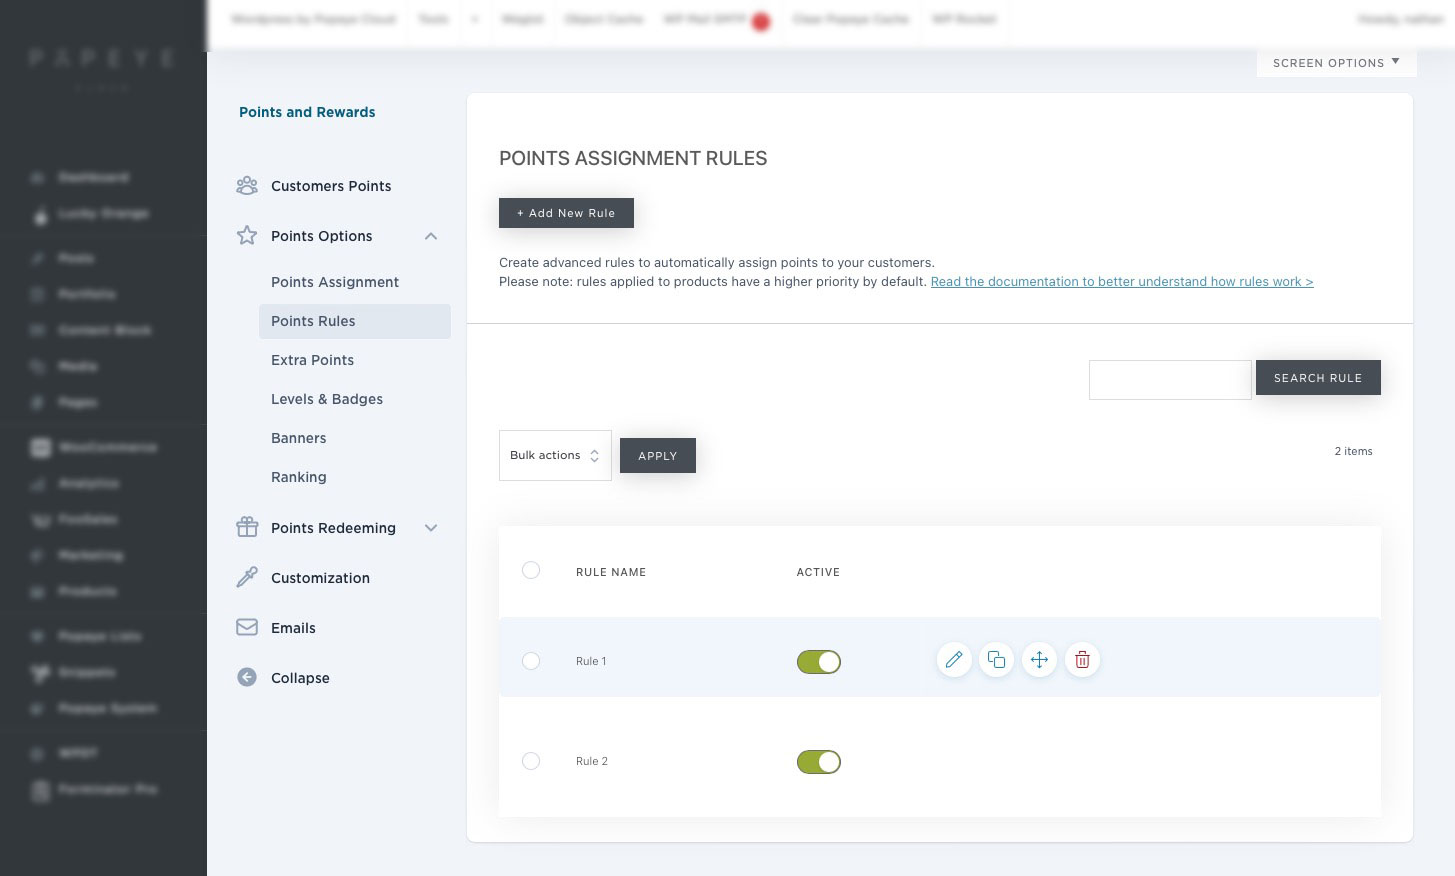
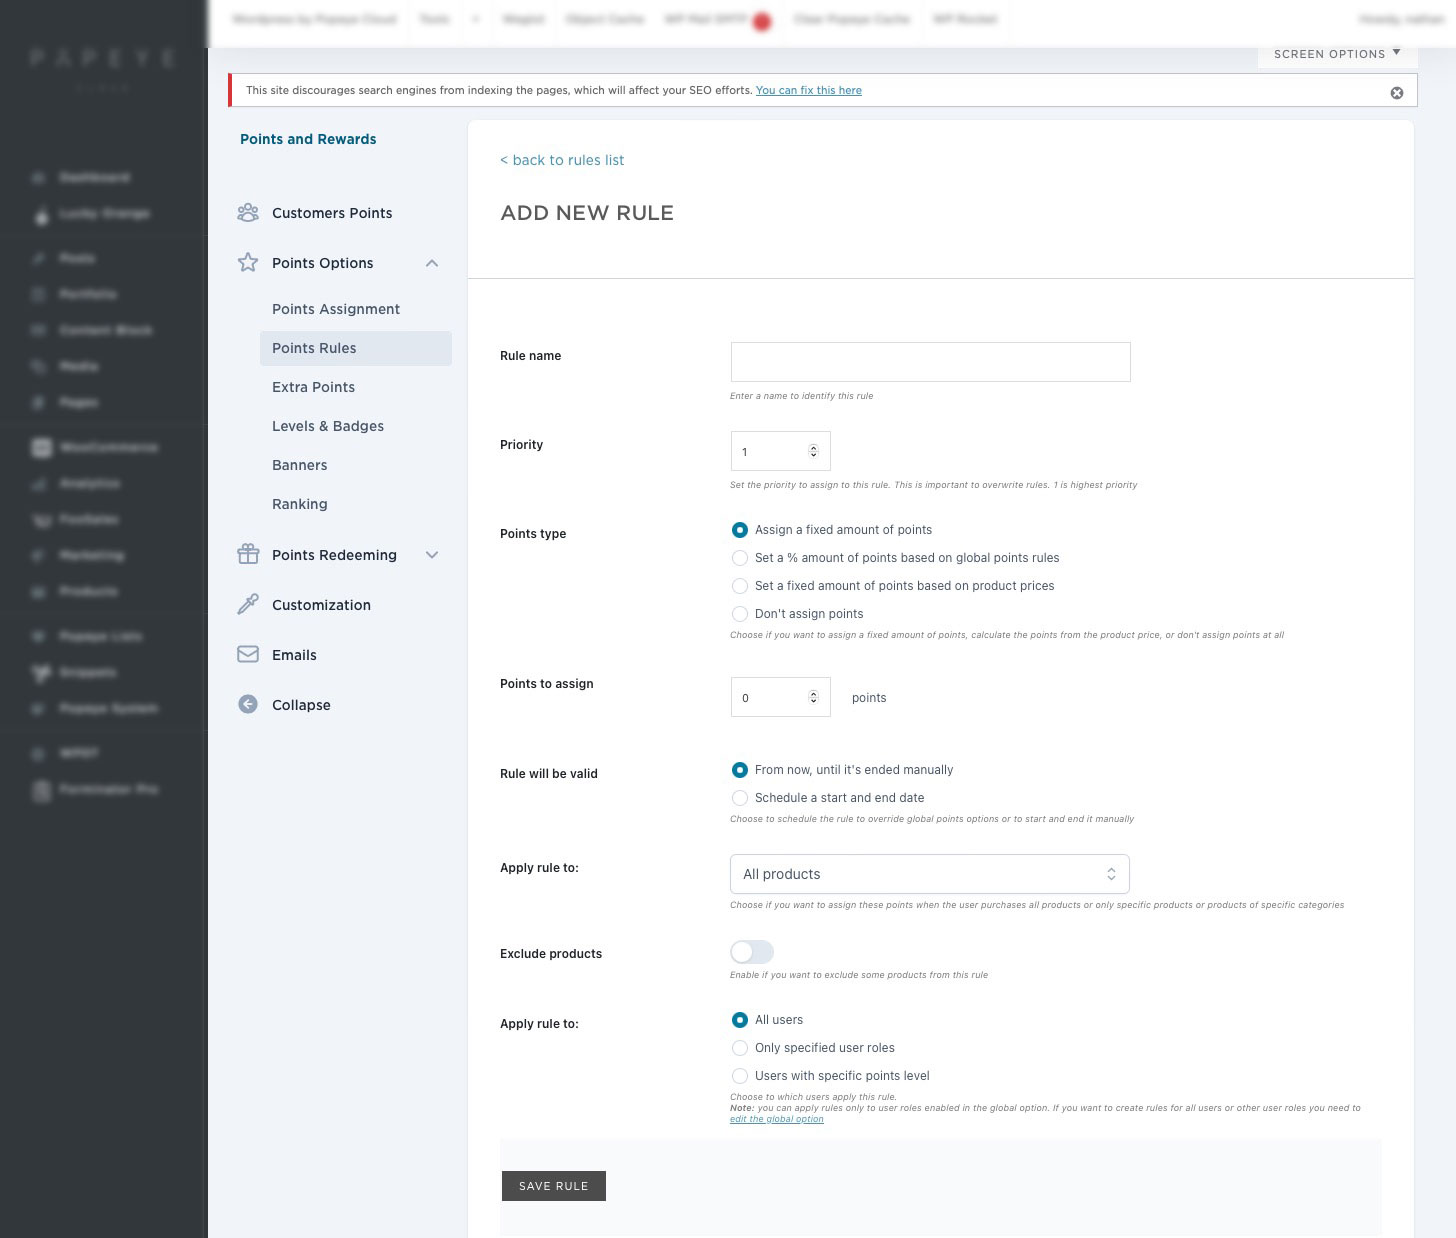
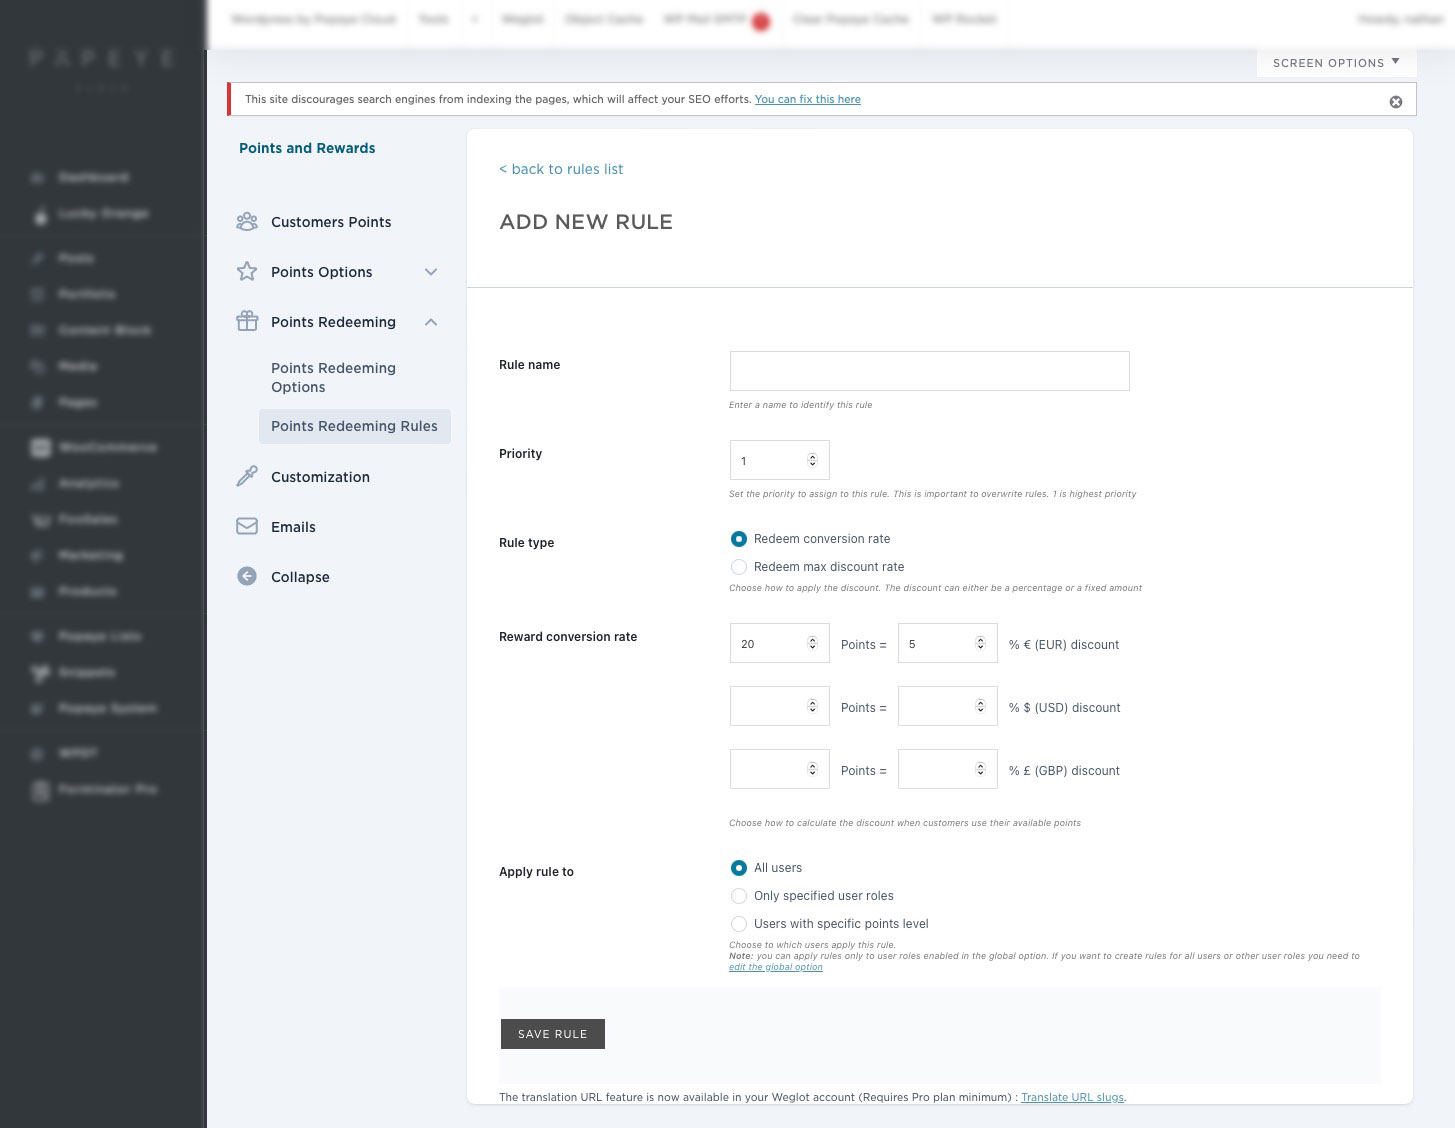
Click + Add new rule to create a new rule. These are the different settings:
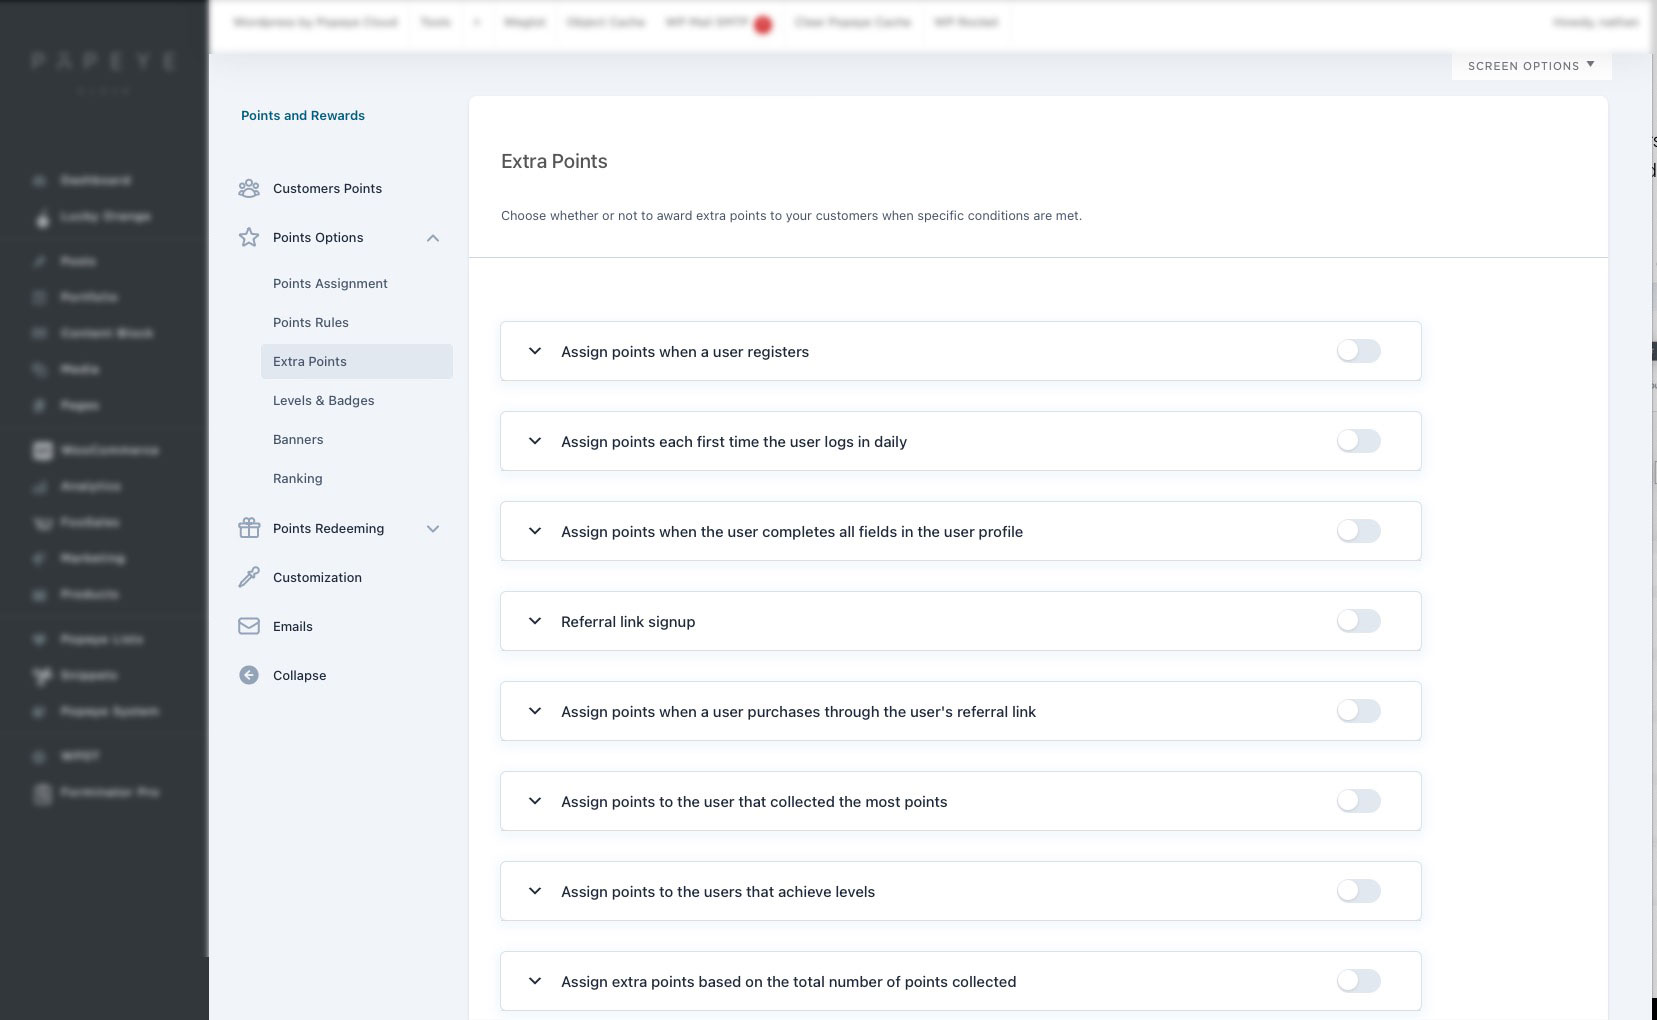
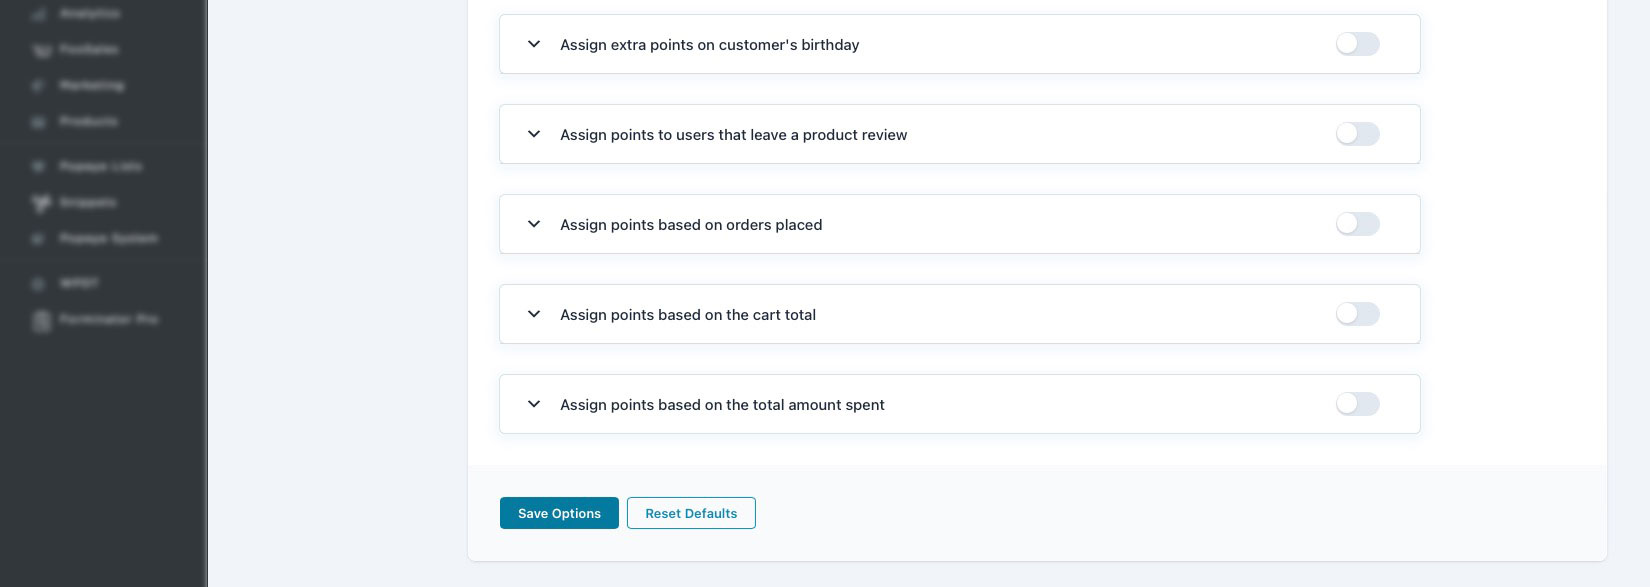
In the Extra Points subsection, you can set up additional rules to assign points to specific conditions:
User registration First daily login Completed profile Referrals Referral purchase User that collected the most points Users that achieve specific levels Points incentive on total collected points Users’ birthday Reviews Orders Cart total Amount spent
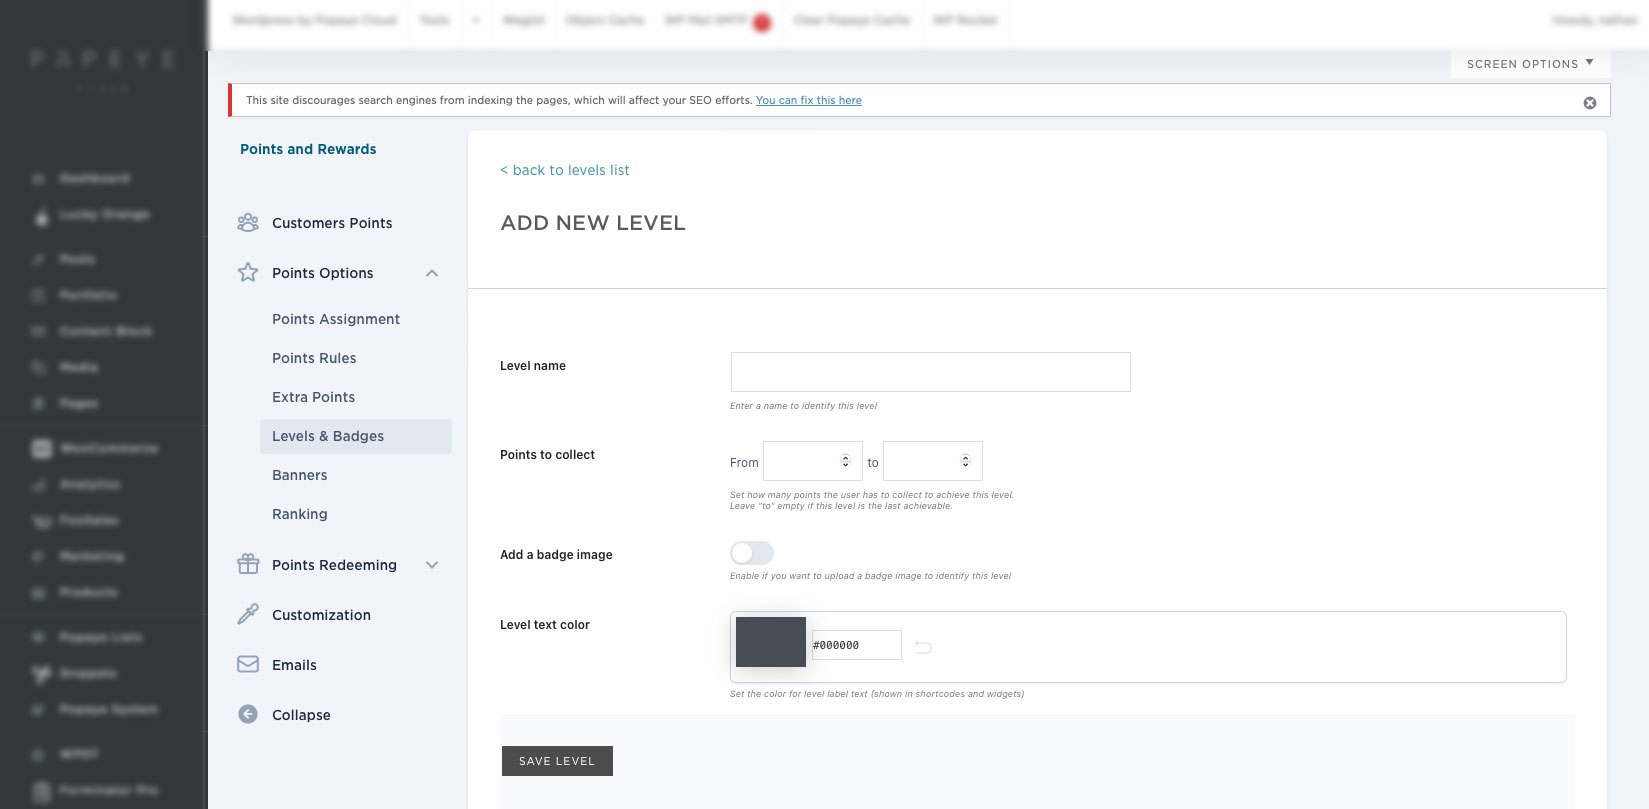
From the Levels & Badges subsection, you can create levels and assign badges to refine your powerful gamification strategy.
You can change the following settings:
Level name: Enter the name of the level here. This will be displayed in both the backend and frontend for your customers to see. Points to collect: Specify the number of points users need to collect to reach this level. Leave the "to" field blank if this is the final achievable level. Add a badge image: Activate to upload an image that represents this level. Upload Badge: Import the image here. Level Text Color: Choose the color for the level label text, visible in shortcodes and widgets.
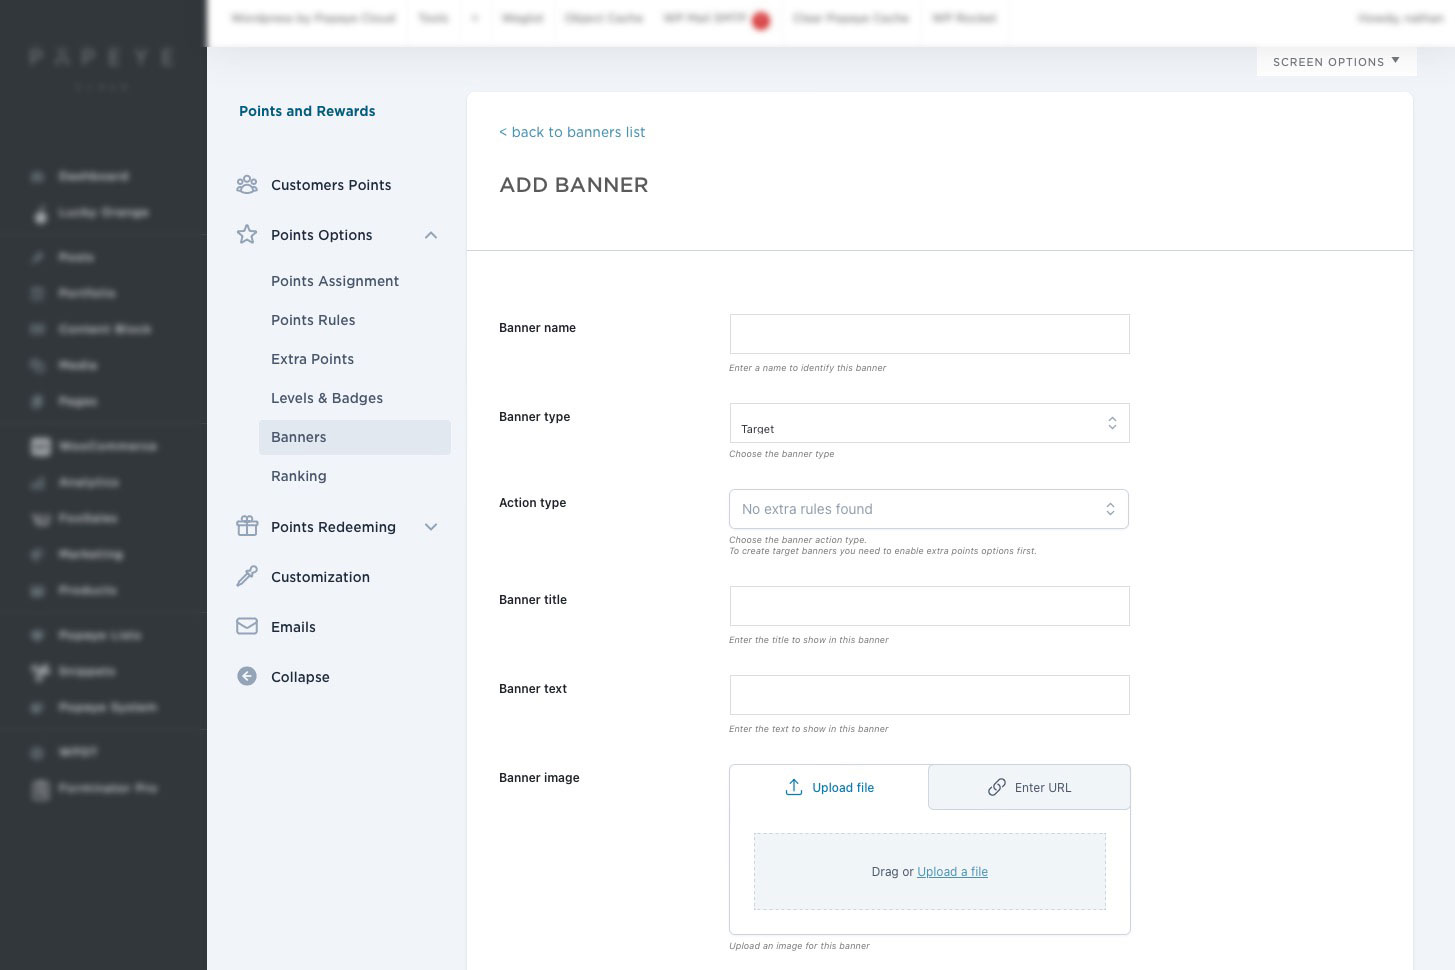
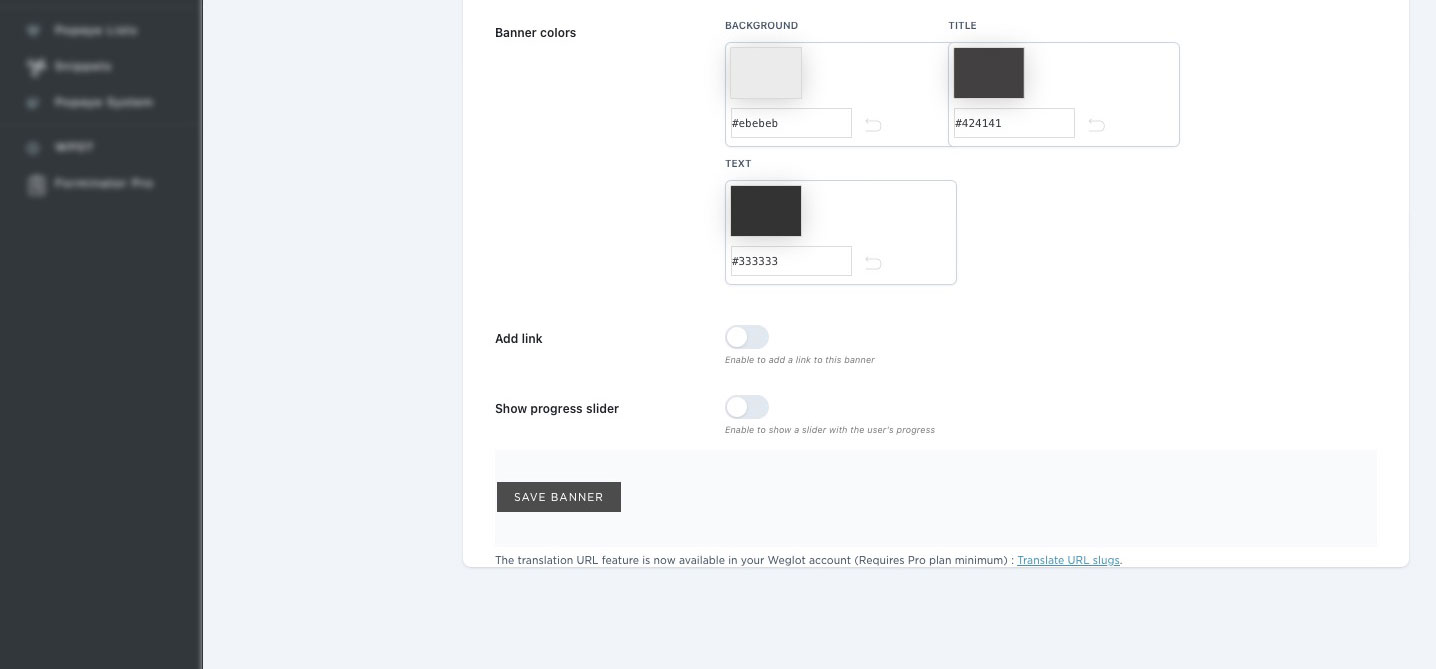
In the Banners section, you can configure the Banners, which lets you inform your users about all the available actions they can take to get more points. On this page, you can swiftly enable/disable, edit, duplicate, sort via drag-and-drop, and discard a banner.
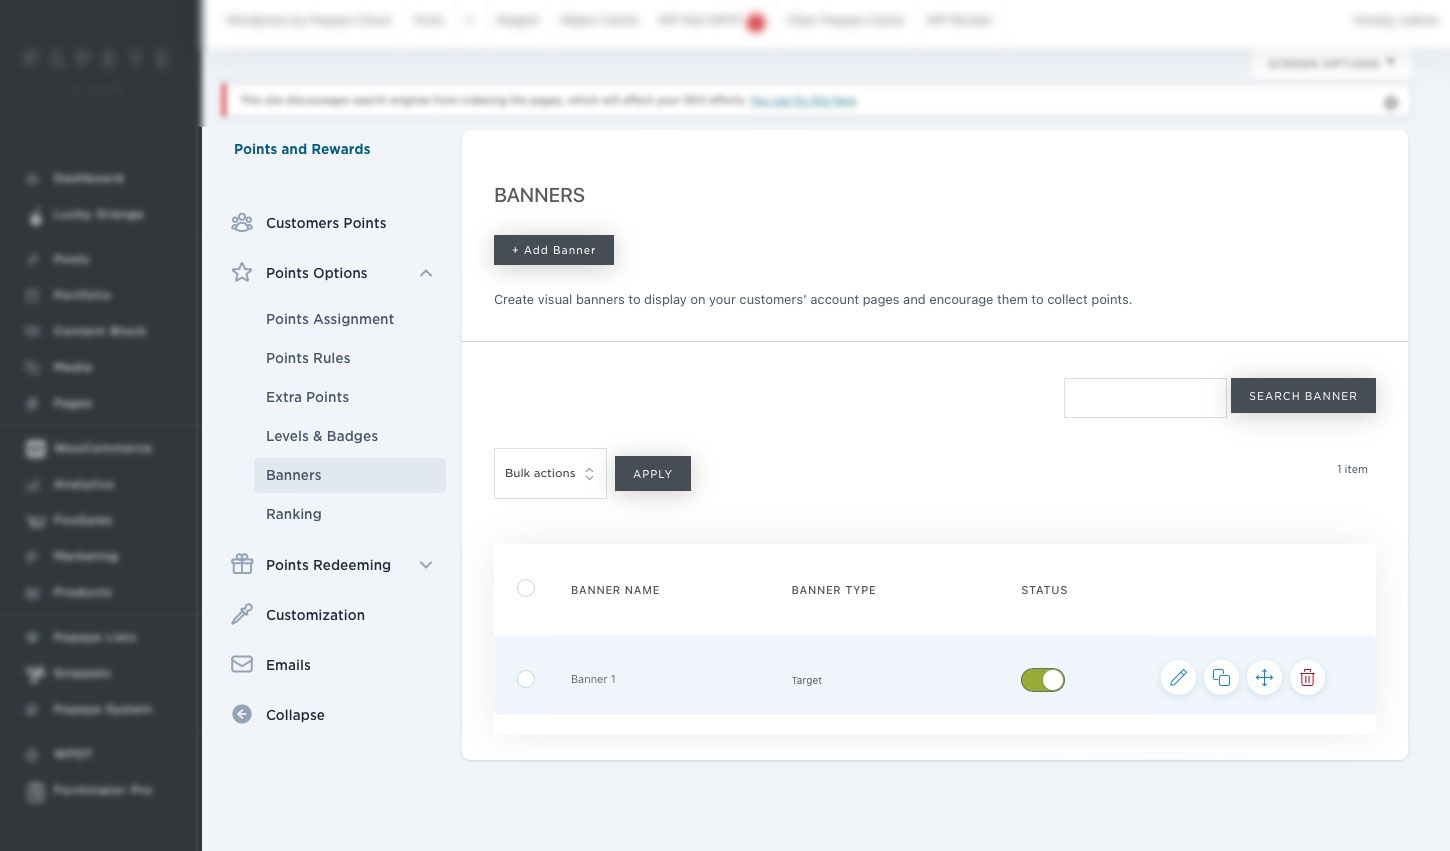
To create a new banner, simply select + New banner. Let's explore the full range of available options:
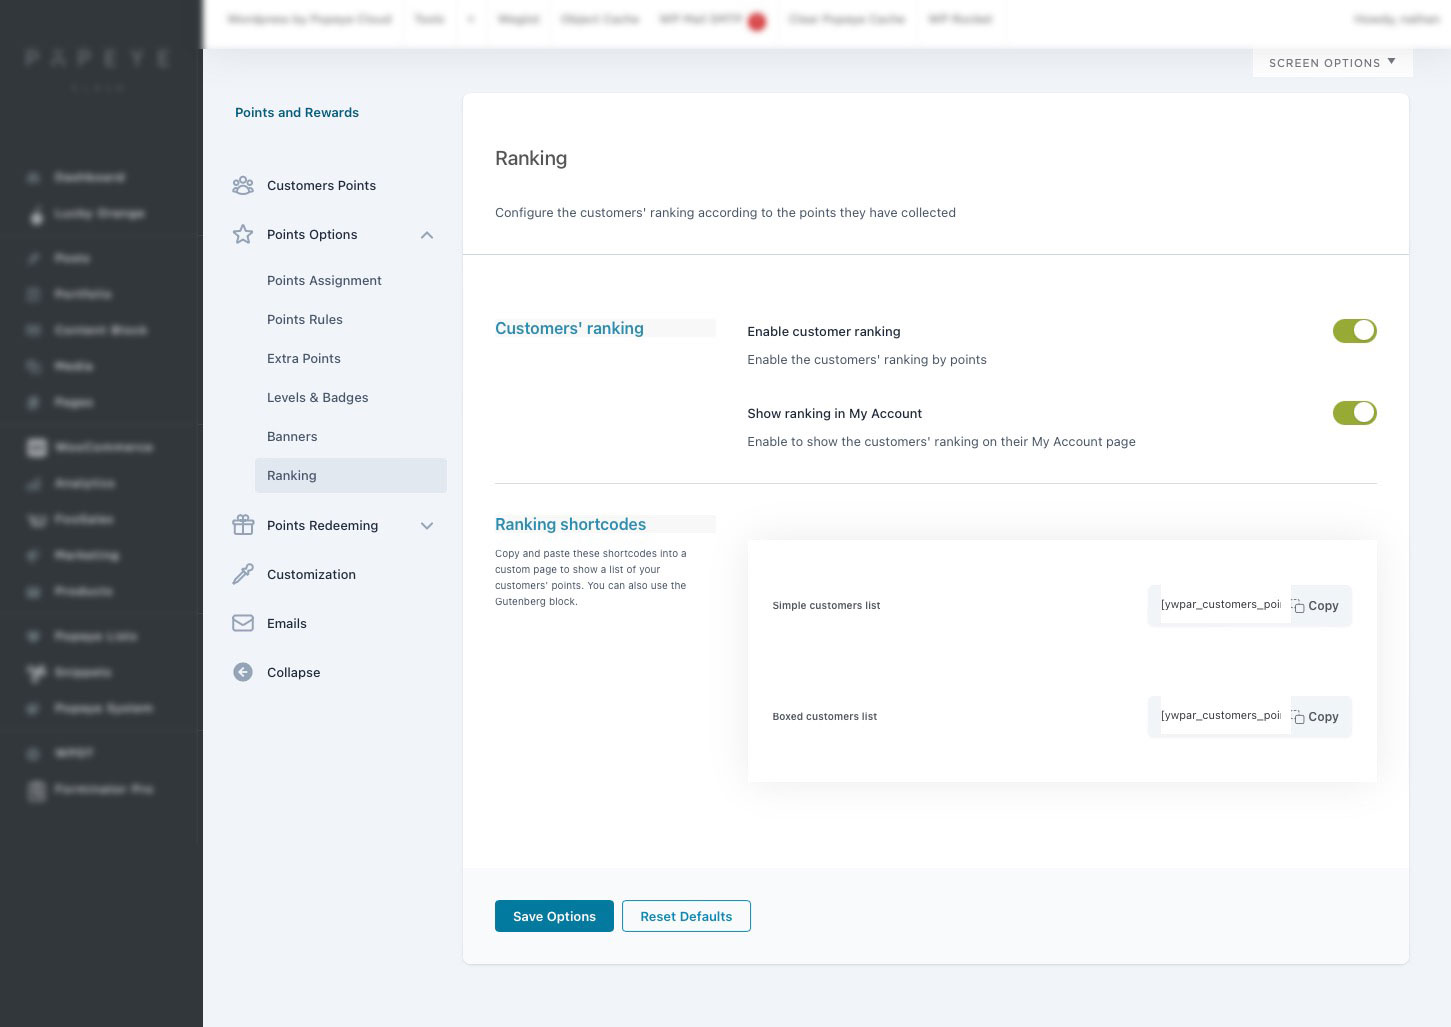
In the final subsection, you'll discover the ranking options along with the corresponding shortcodes, ready for easy copying and pasting.
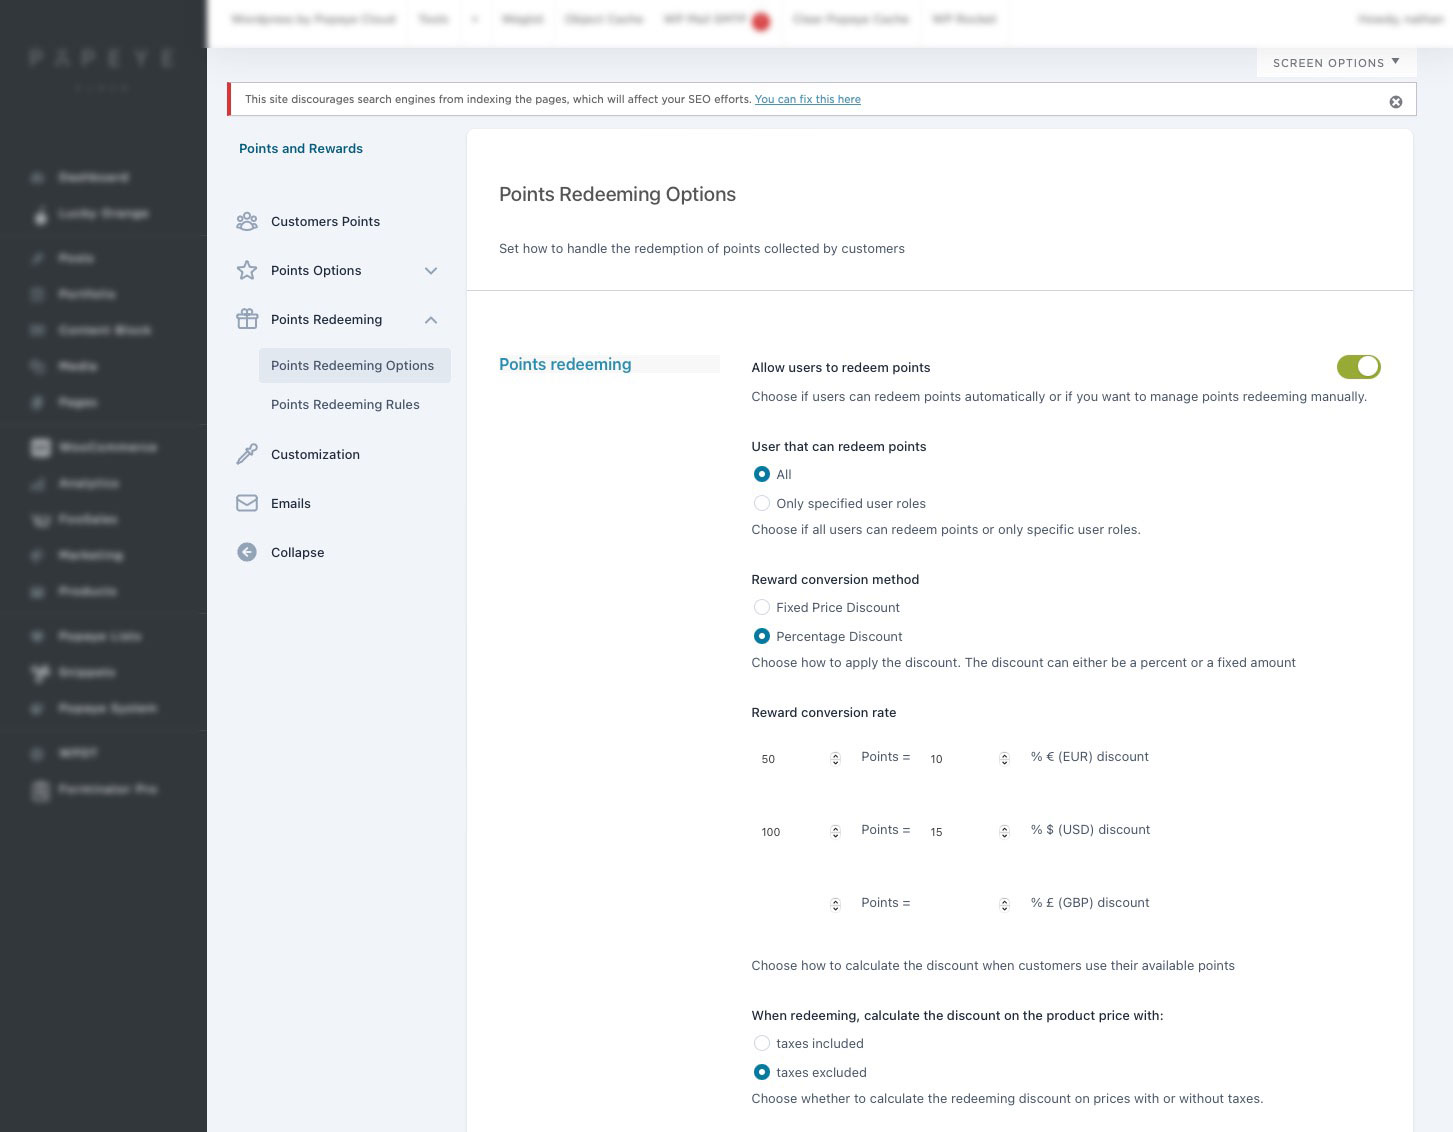
Points redeeming
Within the Points Redeeming section, you'll find a comprehensive array of options and rules for redeeming points, establishing restrictions, and distributing points.
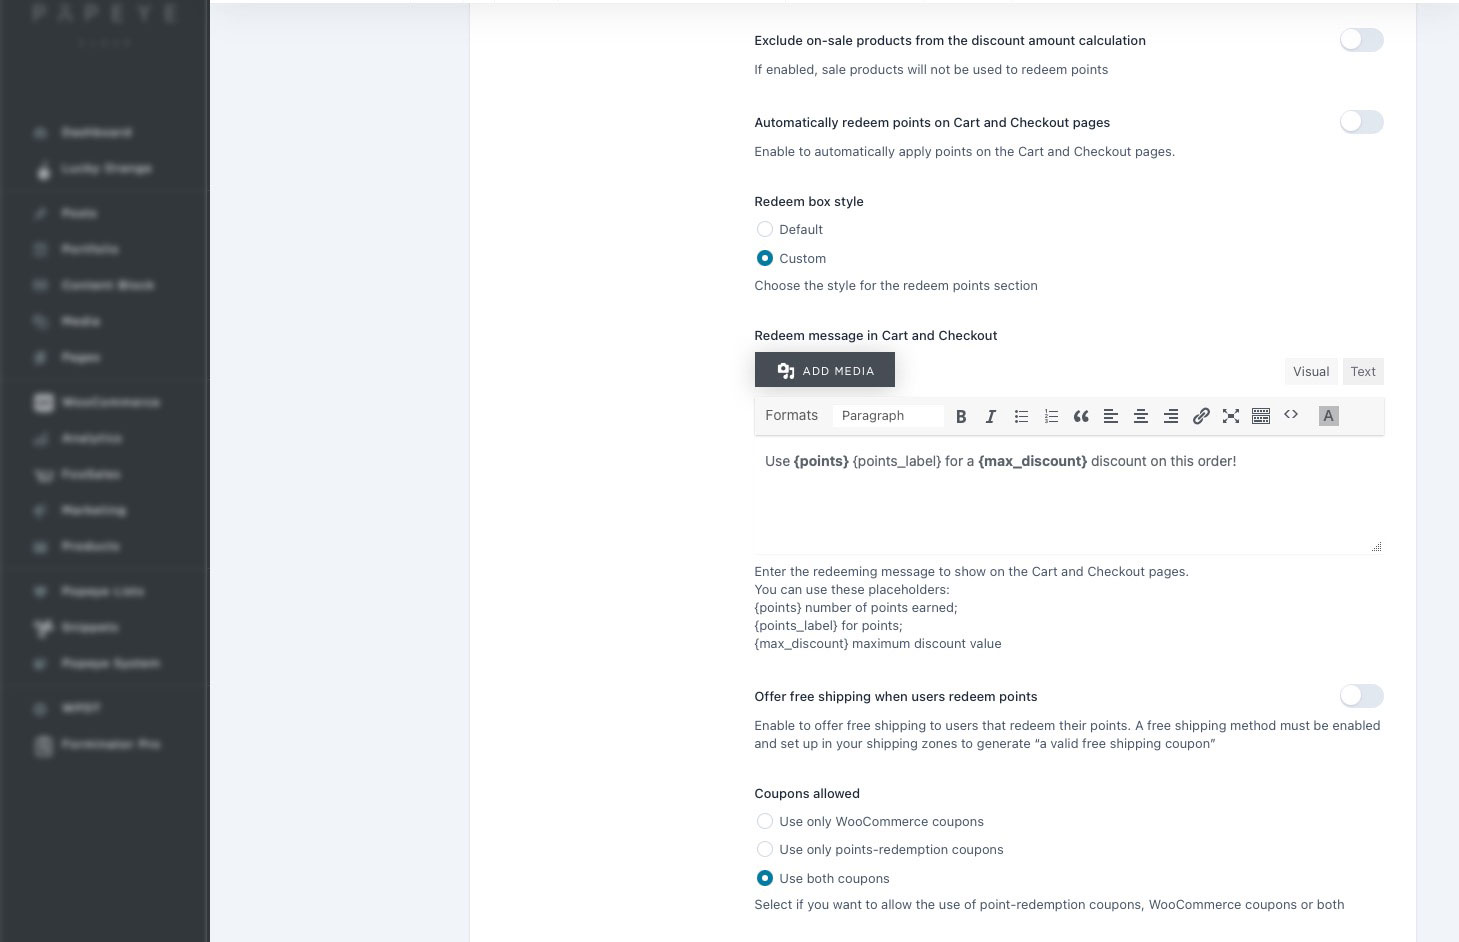
What's the process for customers to redeem their points? Upon visiting, they'll be promptly notified of their accumulated points and the resulting discount applicable to their next purchase. This notification will be prominently displayed on the Cart page, giving them the option to utilize the points at their discretion.
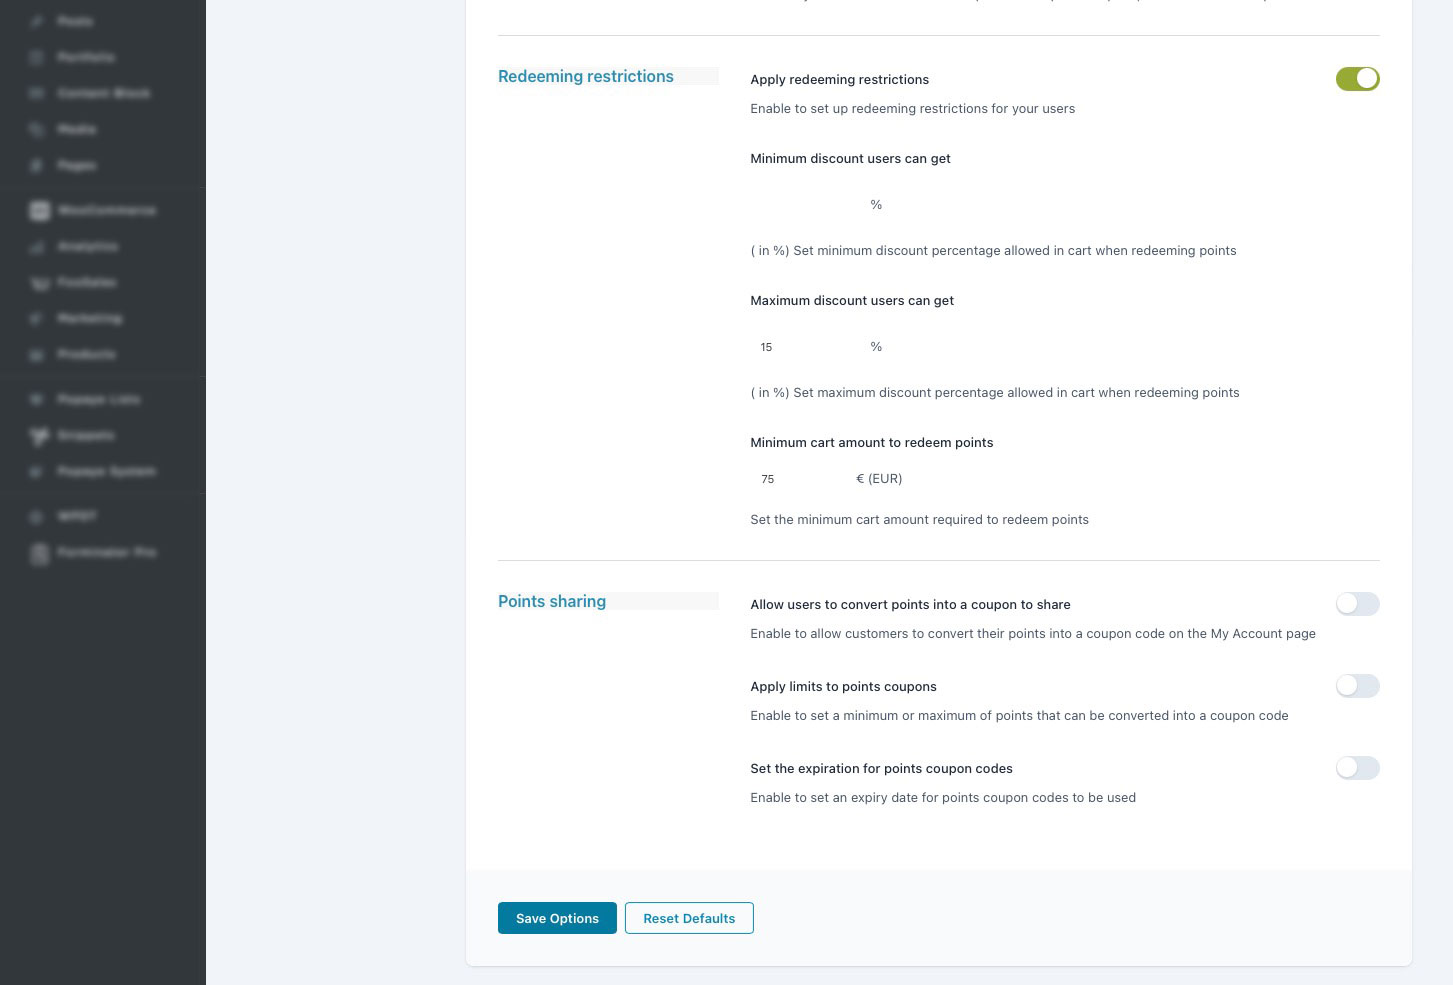
From the Points Redeeming Rules section, you can generate customized rules that override the global redeeming options. These rules can be allocated to particular users and user roles, as well as specific categories or products.
Points redeeming
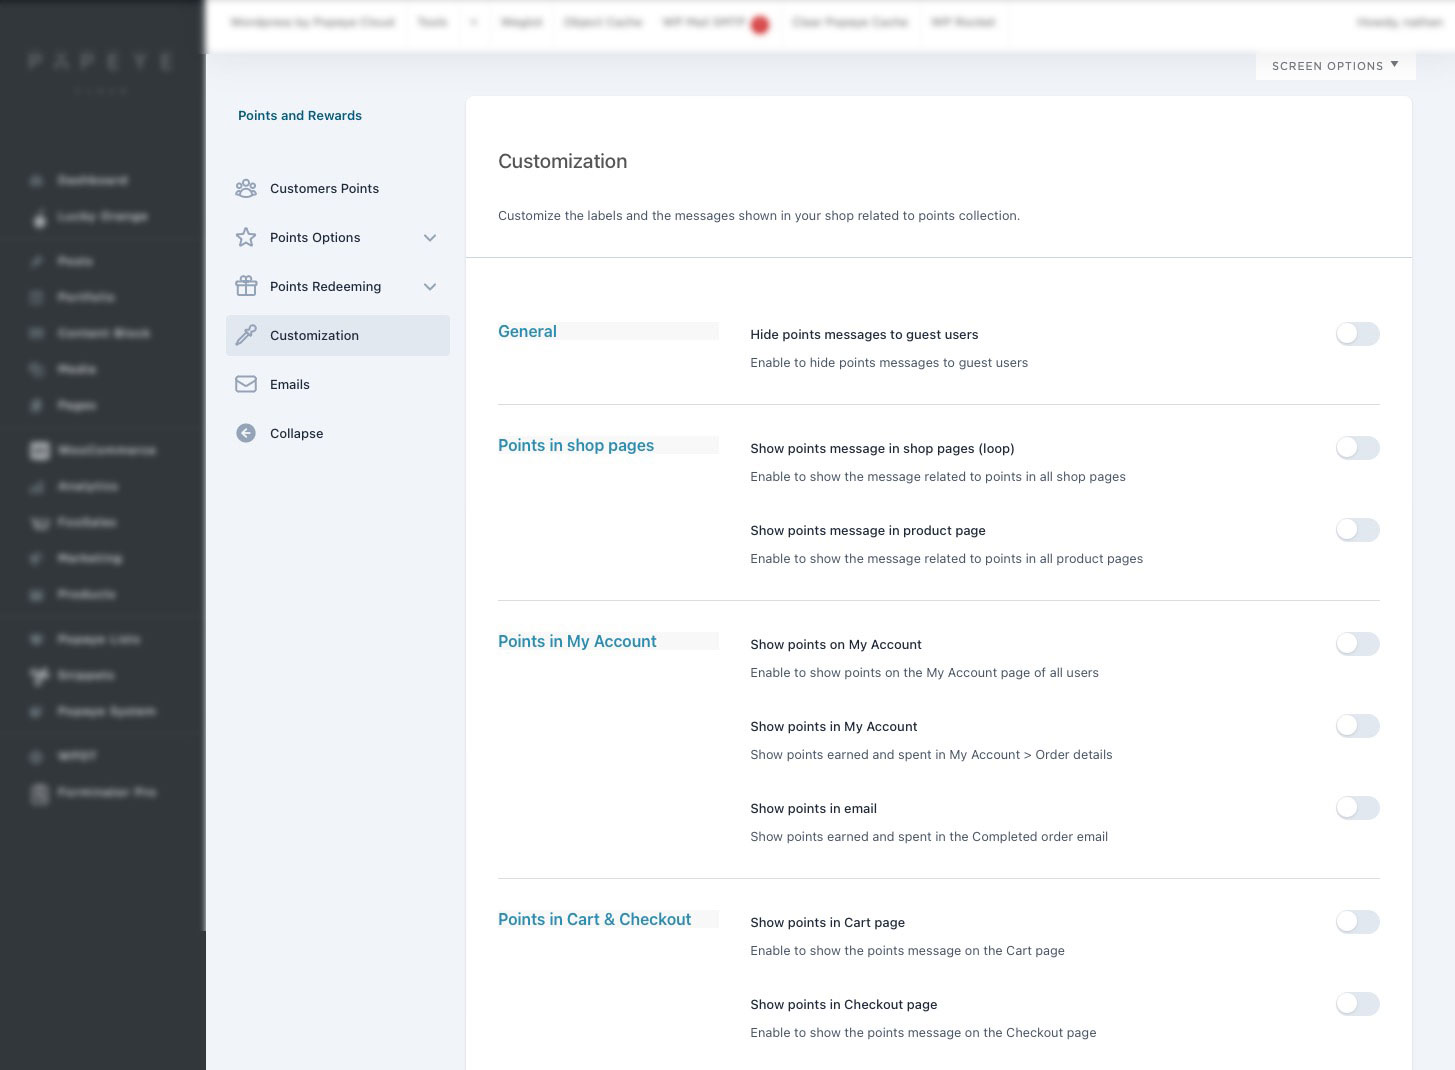
In the Customise section, you can edit all the options to customise the style of your plugin to match your website.It consists of several sections:
General Points in shop page Points in product page Points in My Account Points in Shopping Cart & Checkout Tags
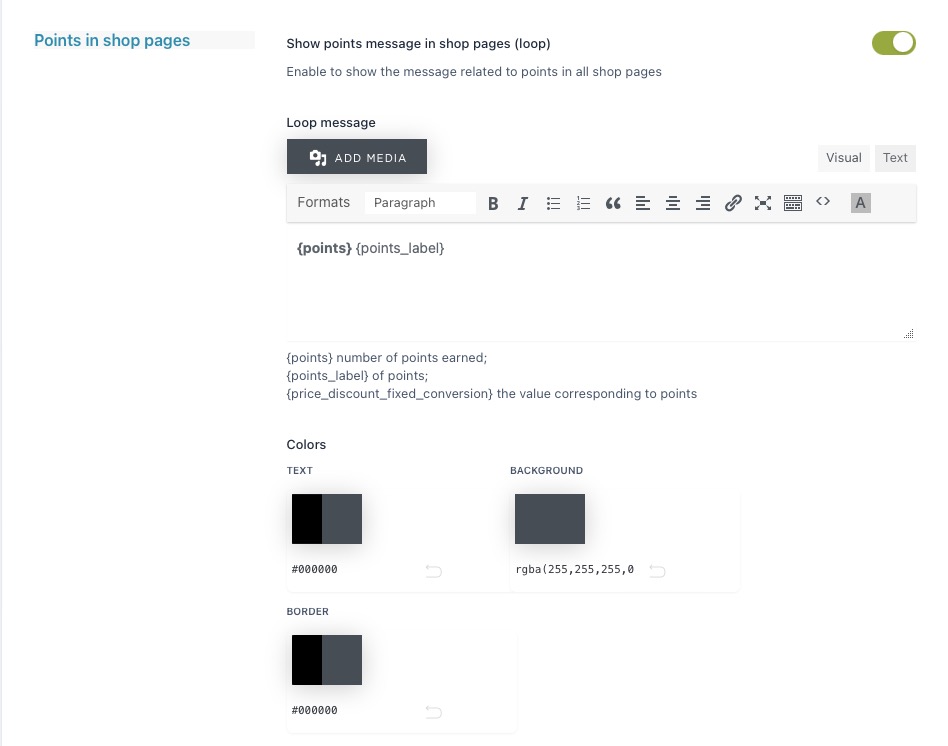
From this section, you can configure the texts and colors of what appears on the frontend on the Shop page, archive pages (like category or tag pages), and on the product page. Let’s check all the available options:
Show points messages in shop pages (loop): enable this option to show the points message on all archive pages (Shop, category and tag pages). Loop message: you can use the standard editor to customize the text and upload also media files. You can also use the following available placeholders: {points} number of points earned;{points_label} of points;{price_discount_fixed_conversion} the value corresponding to pointsColors: finally you can customize the colors of the text, background and border of this message.
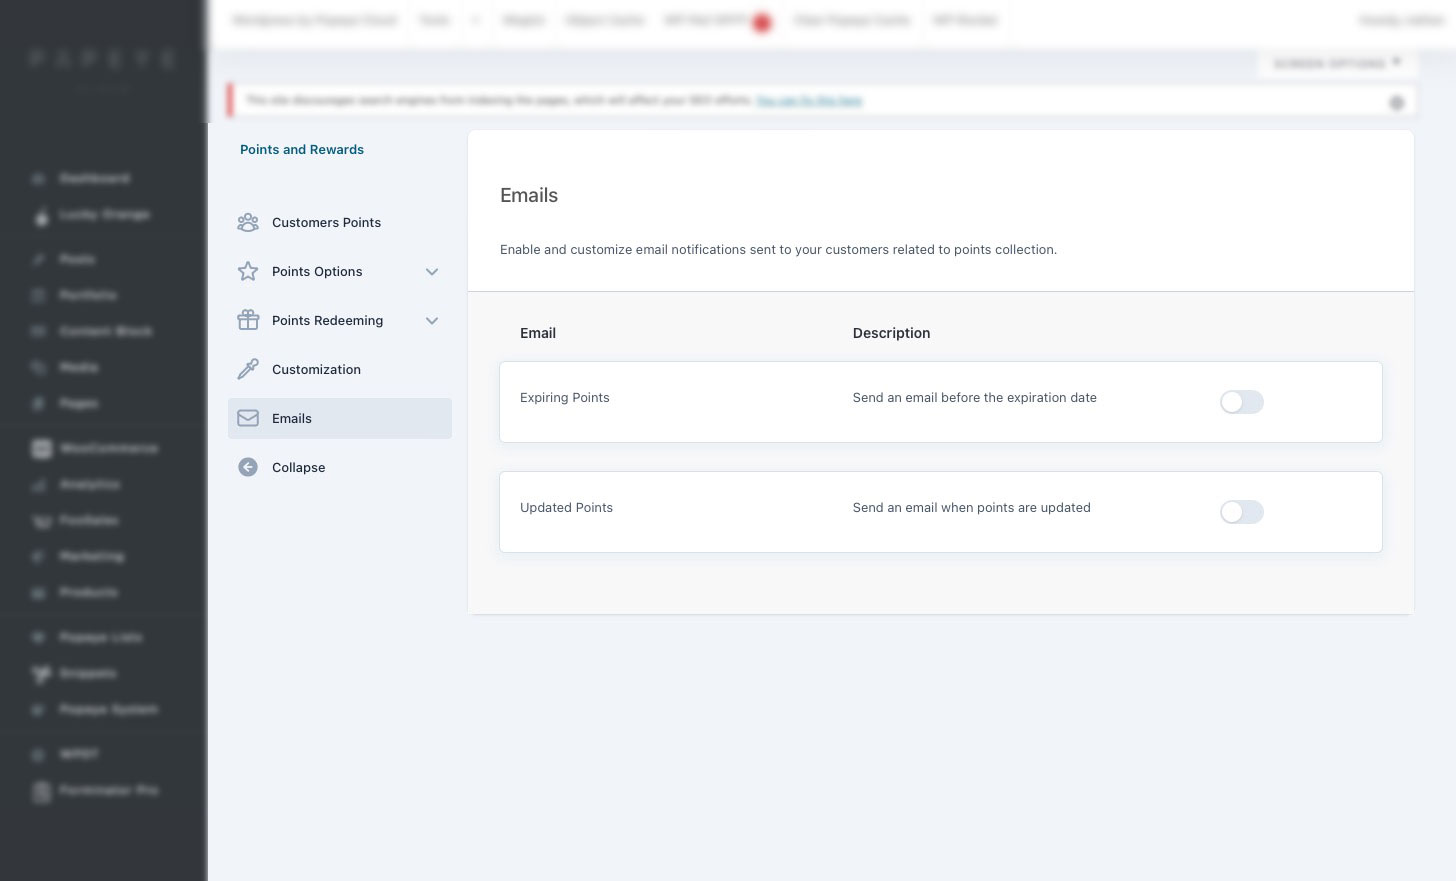
Emails
Configure and edit the two emails sent by the plugin.