

How to configure my Basic mailbox on iPhone / iPad?
How to configure my Basic mailbox on iPhone / iPad?
— To set up your email account on your iPhone / iPad, please follow the steps below
On your phone
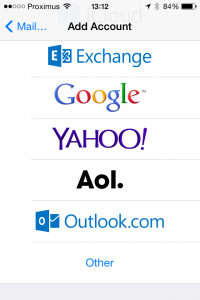
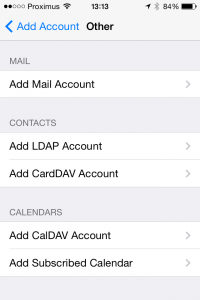
- Unlock your iPhone / iPad and follow “Settings” > “Passwords & Accounts” > “Add Account” > “Other” > “Add Mail Account”.

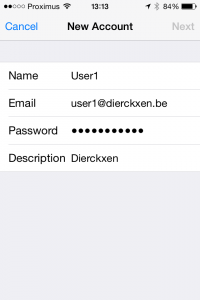
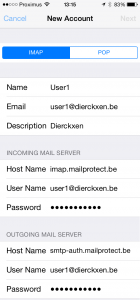
2. Enter your names, full email address that you want to setup (ex. mail@mydomain.com), the password of that account and a description that speaks to you (ex. Work Email or Personal 2, etc.) and click on “Next”.
3. Choose between “IMAP” and “POP3”.
-> 1. For Host Name use your IMAP / POP3 server. —-> POP3:pop3.mailprotect.be(port:110; SSL port: 995)
—->2 IMAP:imap.mailprotect.be(port: 143; SSL port: 993)
2. For User Name use your whole email address (ex. mail@mydomain.com).
3. For Outgoing mail server, use your SMTP server.
—> 1.SMTP:smtp-auth.mailprotect.be(port: 2525; SSL port: 465)
4. Enter your email and password once again.
5. Click on “Next”.
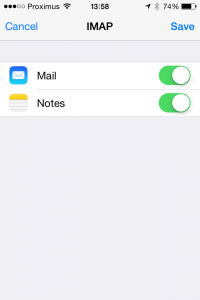
6. Click on “Save”
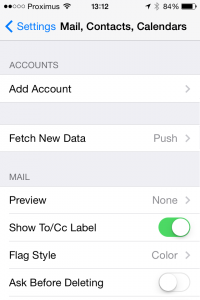
4. Now it is time to tinker the default settings.
-> 1. On your iPhone / iPad follow “Settings” > “Mail, Contacts, Calendars”.


2. Click on the account you just setup.

3. Click on the email address.
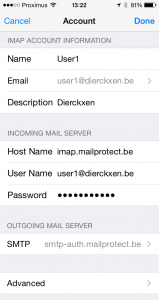
4. Scroll down and click on “SMTP”.
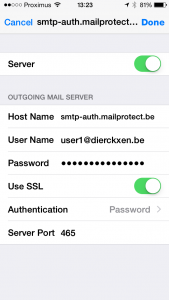
5. Click on the primary server.

6. Change your port to 465 and “Save”.
7. Go back to “< Account”.

8. Go back and click on “Done” at the top.
Tips 'n tricks
Change the display name that e-mail recipients see Outlook
Change the display name that e-mail recipients see
— There are many different types of email accounts you can add to Outlook, including Microsoft 365, Gmail, Yahoo, iCloud, and Exchange accounts.
Add a new account quickly
Most email accounts, including Microsoft 365, Exchange server accounts, Outlook.com, Hotmail.com, Live.com and Google accounts can be set up in a few quick steps.
- Select Outlook > Preferences > Account.
- Click the plus (+) sign > New Account.
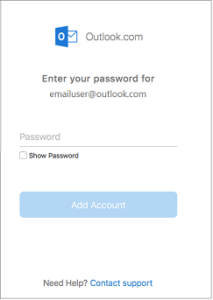
- Type your email address > Continue.

4. Type your password > Add Account. (Your screen might look different from this one depending on the account you’re adding.)
5. If adding a Yahoo, or other IMAP or POP account, you might be taken to those sites and asked to allow Outlook to access your mail, contacts, and calendars. Click Allow to continue.
6. If you are adding Gmail, you will get a prompt within Outlook to sign-in to your Google account. This is for users who are on Build 16.15.18070902 and higher.

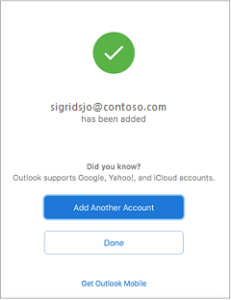
7. Select Done to start using Outlook 2016 for Mac.
Tips 'n tricks
Delete e-mails from the server if you chose a POP configuration. Make sure your online mailbox has not become full, by deleting deleted e-mails there too. Follow these extra steps for this. This is done automatically with an IMAP configuration. Delete e-mails from the server in Apple Mail (POP only)
Add an e-mail account to Outlook 2019
Add an e-mail account to Outlook 2016
— Once your Basic mailbox has been created, go to Outlook on your Windows computer to set up your mailbox.
Follow these steps on your Windows computer:
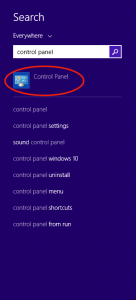
- Go to the Windows Control Panel
Use the Windows search function to get there (see image)
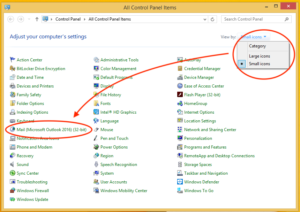
2. Click on “Mail (Microsoft Outlook)”
This item is only visible if you choose the view with large or small icons at the top right, not the category view (see image).
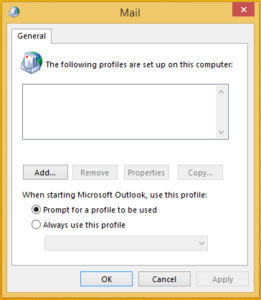
3. If you have not created a profile before, you will get the screen below (see image) where you have to click on “Add”.
Choose a name for your profile and confirm. Click “Apply” to continue.
4. Enter the details of your mailbox:
Your Name: Fill in your name (to appear in your email)
Email Address: Fill in your email address
Password: Fill in your password and repeat
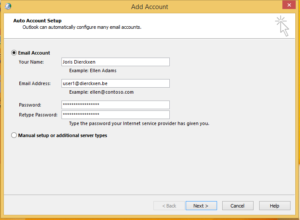
5. Click on “Next” to continue. Outlook will try to configure your mailbox automatically.
6. Click on “Next” to complete the configuration of your mailbox
Tips 'n tricks
Delete e-mails from the server if you chose a POP configuration
Make sure your online mailbox has not become full, by deleting deleted e-mails there too. To do this, follow these extra steps: Delete e-mails from the server in Outlook (only POP)
How to setup the width of your site ?
How to setup the width of your site ?
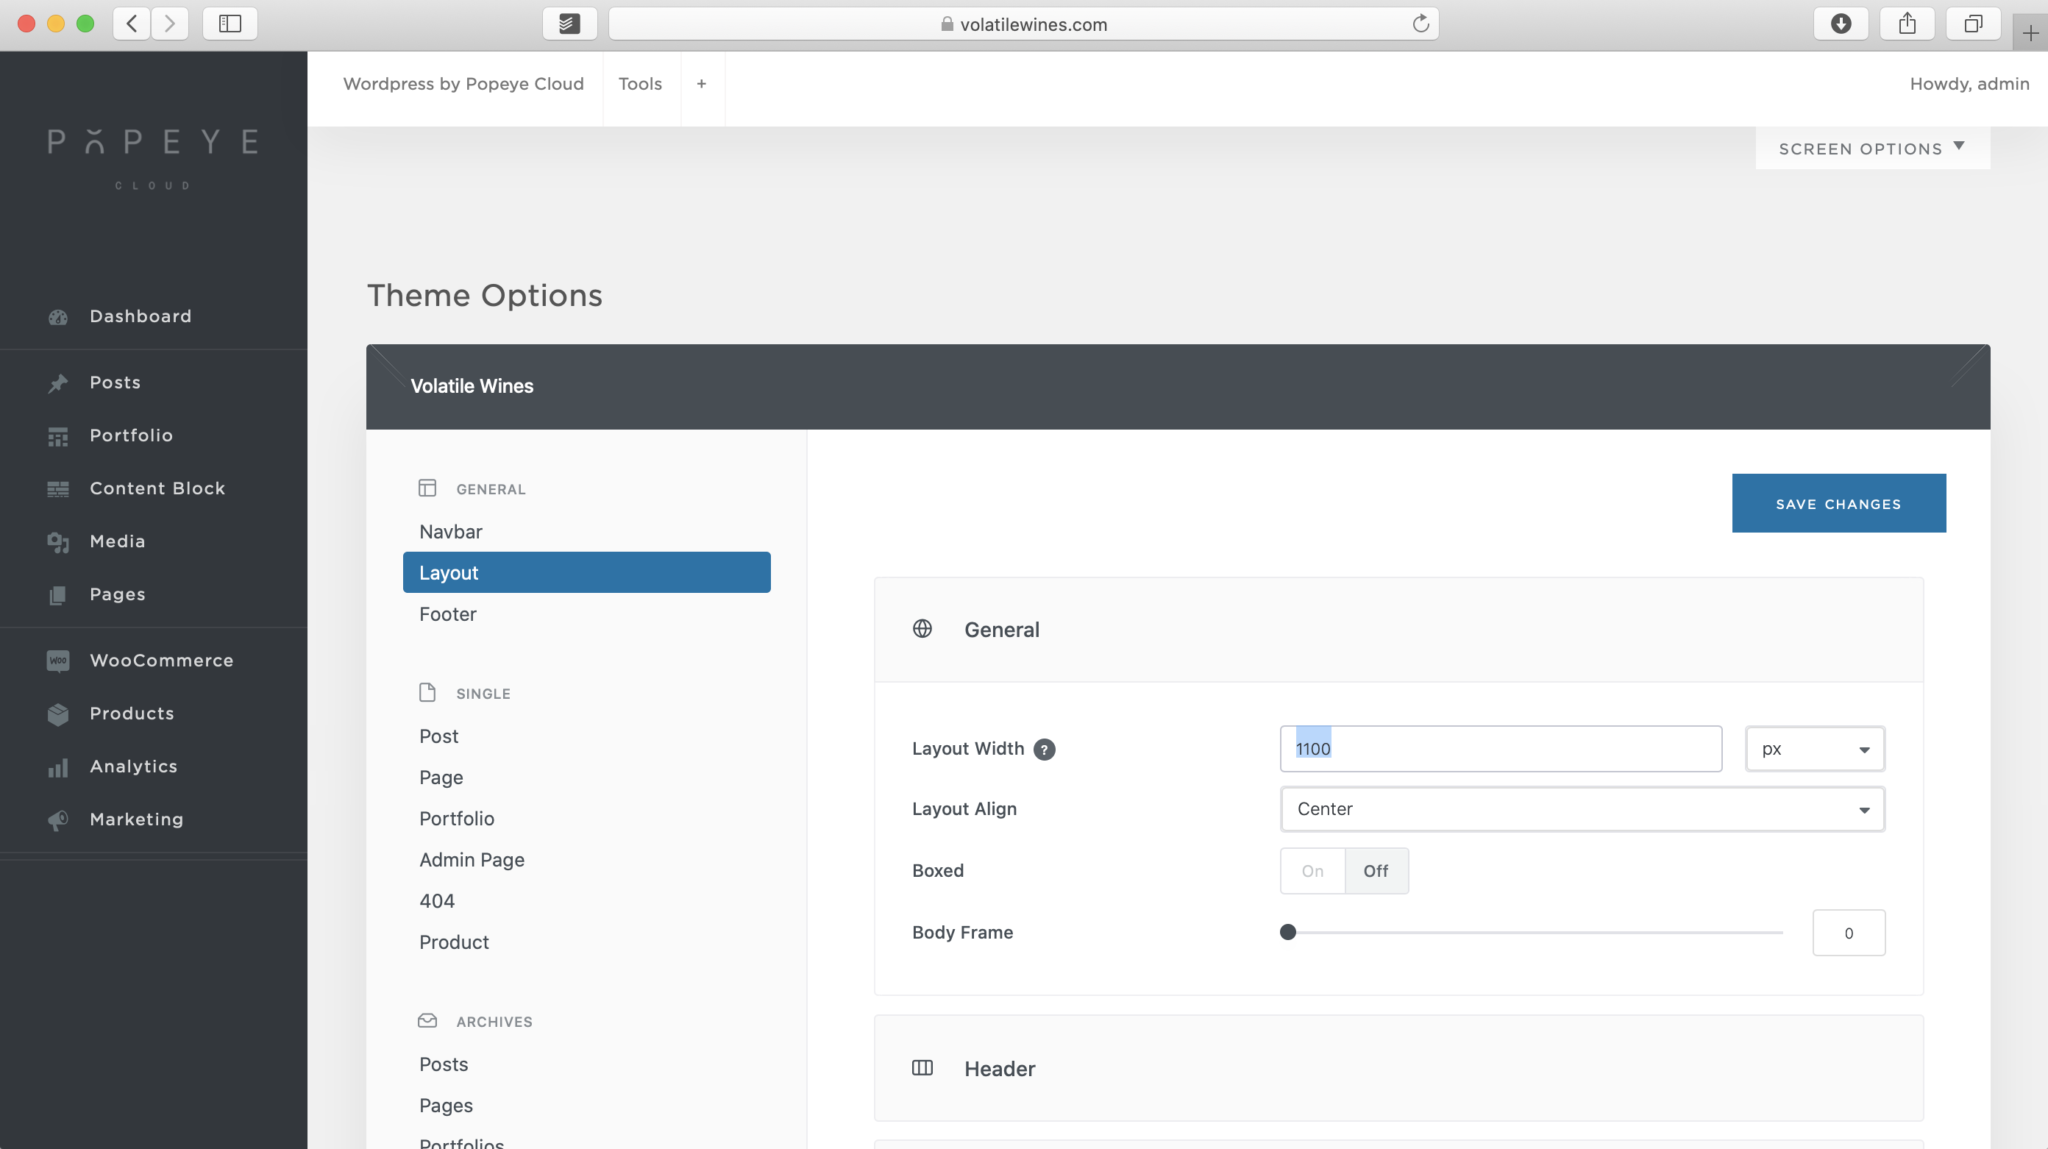
— Specify the width of your site.
Go to theme options > lay out
Tips 'n tricks
Refresh WP Rocket if there are no changes visible
Install mail on Android
Install mail on Android
— How to configure my Basic mailbox on Android?
To set up your control panel email account on Android, please follow the steps below:
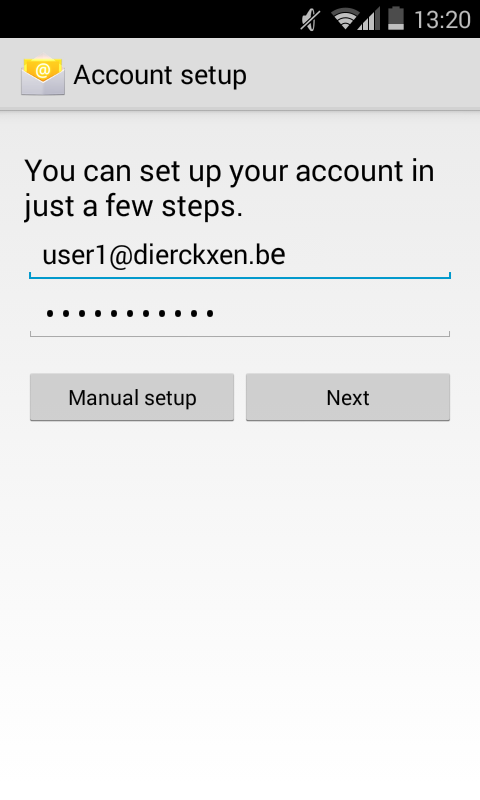
- Open your Android mail client.
- Enter your email address and click on “Next”.
3. Select the type of server you want to use to send your mails
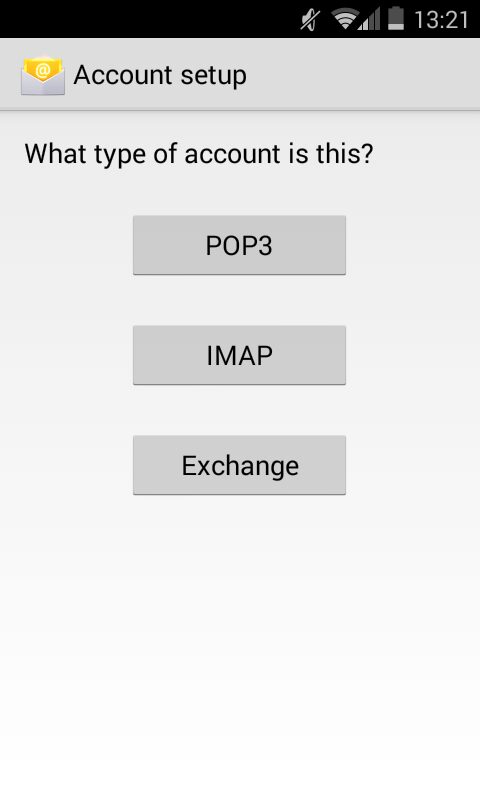
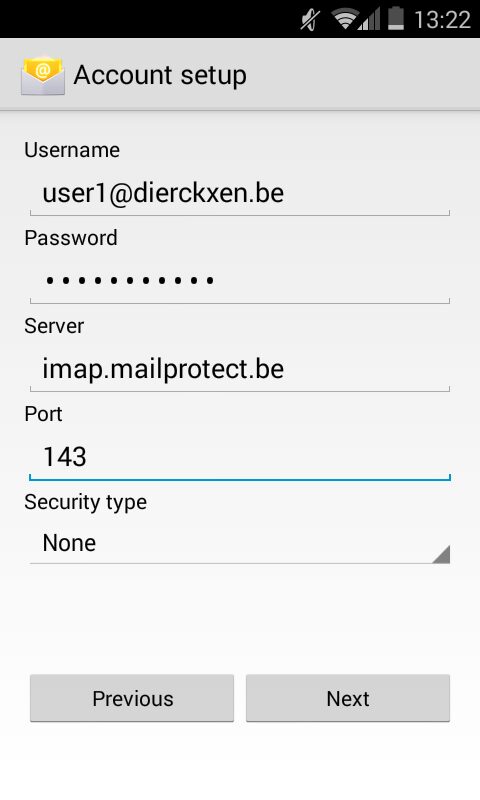
4. For POP3 and IMAP the procedure is the same:
- Change the server and port to your POP3 / IMAP server and port number. Click on “Next”.
- POP3:pop3.mailprotect.be(port:110; SSL port: 995)
- IMAP:imap.mailprotect.be(port: 143; SSL port: 993)
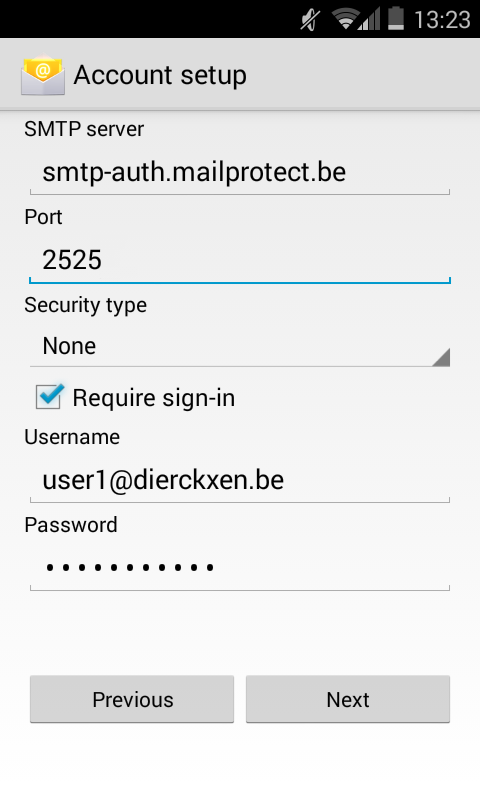
2. Change the server and port to your SMTP server and port number. Click on “Next”.
- SMTP:smtp-auth.mailprotect.be(port: 2525; SSL port: 465)
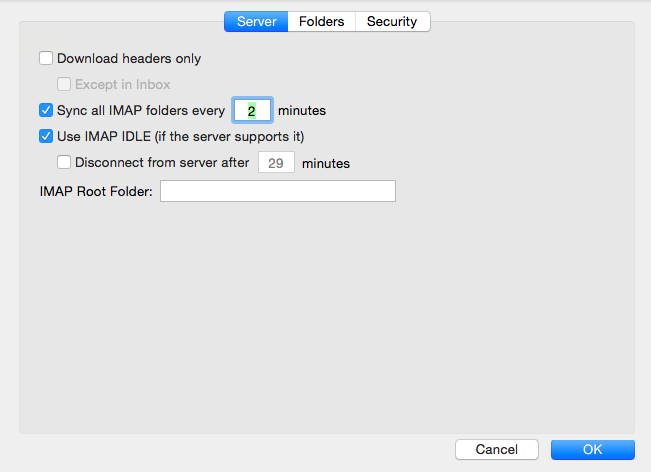
3. Set the inbox checking frequency to your liking. Click on “Next”.
4. Give your account a name and click on “Next”.
Tips 'n tricks
Set your Basic mailbox on Outlook for Mac
Set your Basic mailbox on Outlook for Mac
— Once your Basic mailbox has been created, go to Outlook on your Mac computer to set up your mailbox.
Follow these steps in Outlook for Mac 2016:
- Go to “Accounts” via the “Extra” menu.
- Click on the plus sign at the bottom left to add an account.
- Enter your e-mail address and continue.
- Select “IMAP / POP” in the menu and continue.
- Choose IMAP or POP in the drop-down menu (Read our selection guide) and enter the missing information. Check “Use SSL to connect” at the servers (see image).
Username: Enter your e-mail address
Password: Enter your password
Incoming e-mail server:
For IMAP (recommended): imap.mailprotect.be - Port 993
For POP3: pop3.mailprotect.be - Port 995
Outgoing e-mail server:
smtp-auth.mailprotect.be - Port 587

6. Click on “Add account” to add your account.
7. Click on “More options” at the bottom and make sure that “Use info Incoming Server” is checked under “Authentication”. Click on “Ok” to close the window.
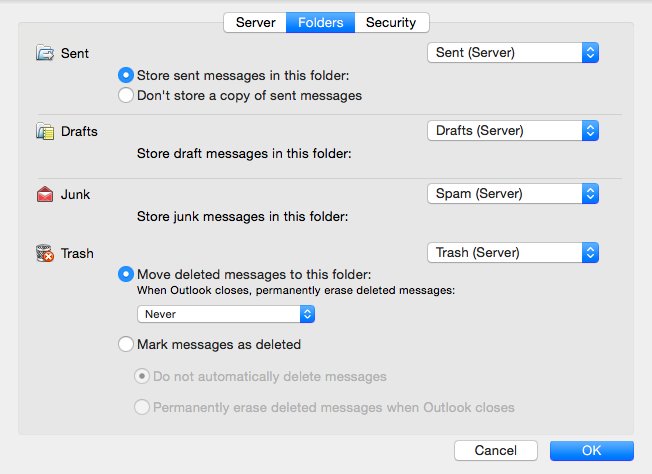
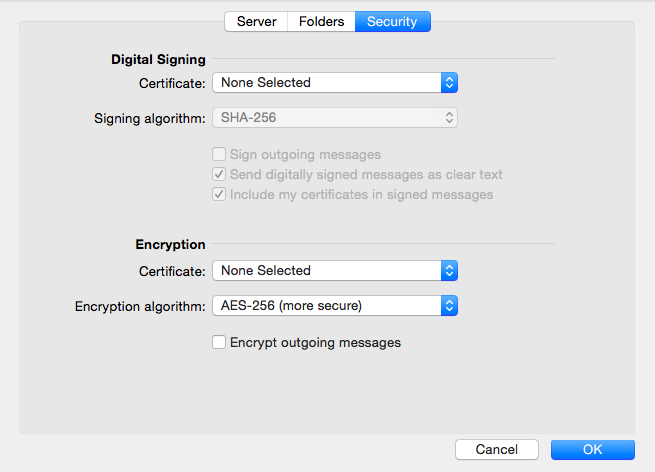
8. Optional: Click on “Advanced” for additional recommended settings (see screenshots).
Follow these steps in Outlook for Mac 2011:
- Go to “Accounts” via the “Tools” menu.
- Click on the plus sign at the bottom left to add an account and choose “E-mail”.
- Enter your e-mail address and password and continue.
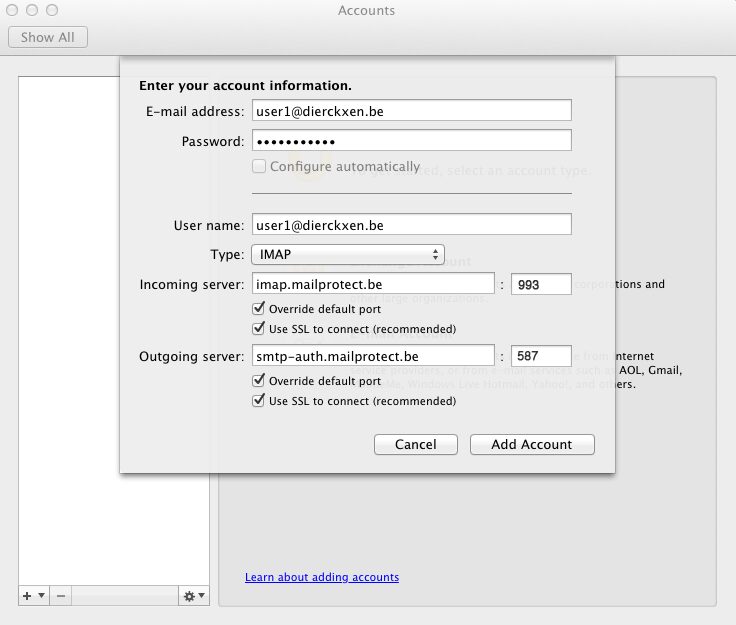
- Choose IMAP or POP in the drop-down menu and enter the missing information. Check “Use SSL to connect” at the servers (see image).
Username: Enter your e-mail address
Password: Enter your password
Incoming e-mail server:
For IMAP (recommended): imap.mailprotect.be - Port 993
For POP3: pop3.mailprotect.be - Port 995
Outgoing e-mail server:
smtp-auth.mailprotect.be - Port 587
5. Click on “Add account” to add your account.
6. Click on “More options” at the bottom and make sure that “Use info Incoming Server” is checked under “Authentication”. Click on “Ok” to close the window.
Tips 'n tricks
Delete e-mails from the server if you chose a POP configuration. Make sure your online mailbox has not become full, by deleting deleted e-mails there too. Follow these extra steps for this. This is done automatically with an IMAP configuration. Delete e-mails from the server in Apple Mail (POP only)
How do I add a thank you page ?
How do I add a thank you page?
— Learn everything about our (paid) Thank you Pro plugin
Woocommerce -> Thank you Pro
Enter a title and make all the adjustments you like (text, media,..).
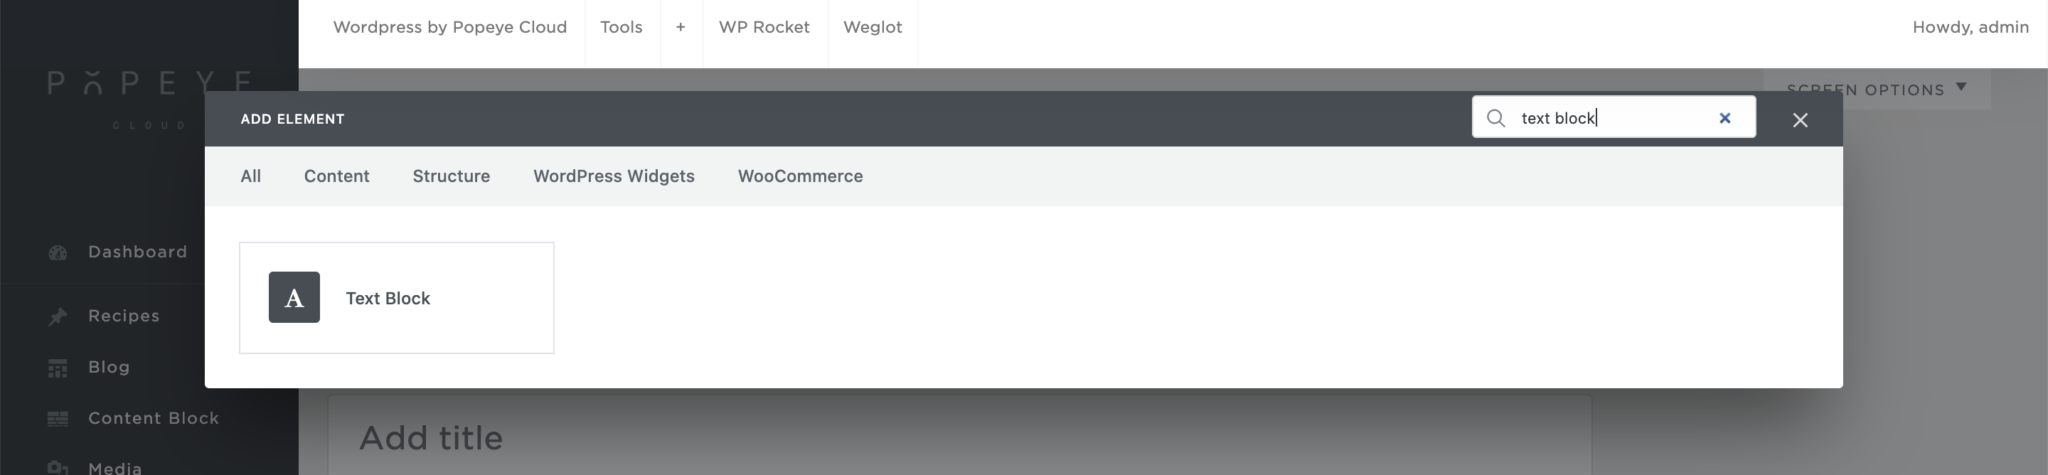
Please note to add a SHORTCODE you can easily use a TEXT BLOCK
First of all, after installing and activating the Thank you Pro plugin, we need to create a new thank you page in place of the default WooCommerce version.
To create a new WooCommerce thank you page:
Go to WooCommerce > Thank you Pro
Click ‘Add Thank You Page’
We can then start adding components as outlined below

1. To add a coupon to your WooCommerce Thank You page:
Edit your new Thank You page
Give it a title
In the content area, add the [order_coupon] shortcode
To configure the coupon:
Go to WooCommerce > Settings > Thank you Pro > Coupons
You can edit the parameters, like the amount and usage restrictions
2. To add custom content to your WooCommerce Thank You page:
Edit your new Thank You page
Give it a title
In the content area, add the [order_custom_content] shortcode
Add your custom content, using any kind of WordPress content you like
Close the custom content area using the [/order_custom_content] shortcode (note the slash just after the opening square bracket)
3. To add a Recommended Products (or Cross Sells) section to your Thank You page:
Edit your new Thank You page
Give it a title
In the content area, add the [order_cross_sells] shortcode
To configure the section:
Go to WooCommerce > Settings > Thank you Pro > Cross sells
You can edit the parameters, like the number and layout, by following the guidance in this support document
4. To add a downloads section to your WooCommerce Thank You page:
Edit your new Thank You page
Give it a title
In the content area, add the [order_download] shortcode
To configure the section:
Go to WooCommerce > Settings > Thank you Pro > Downloads
You can edit the parameters, like the number and layout
5. To add a shipping map section to your Thank You page:
Edit your new Thank You page
Give it a title
In the content area, add the [order_shipping] shortcode
To configure the section:
Go to WooCommerce > Settings > Thank you Pro > Shipping
6. To add social share buttons to your WooCommerce Thank You page:
Edit your new Thank You page
Give it a title
In the content area, add the [order_social_shares] shortcode
To configure the section:
Go to WooCommerce > Settings > Thank you Pro > Social sharing