

Install GA4
How to install GA4 on your website to measure and report all your data
— As of July 1, the standard Google Analytics tool will disappear. Therefore it is important to switch as soon as possible to GA4. Switching to Google Analytics 4 (GA4) is an important step for companies looking to improve their analytics and tracking capabilities. GA4 offers new features and a more advanced approach to data analysis. In this text, we will discuss the steps you need to take to set up GA4 and how to take advantage of the new features it offers.
GA4
To implement GA4, you need to start by creating a new GA4 account. Go to the Google Analytics website and follow the instructions to create a new account. Here you will be assigned a unique measurement ID that you will need later.
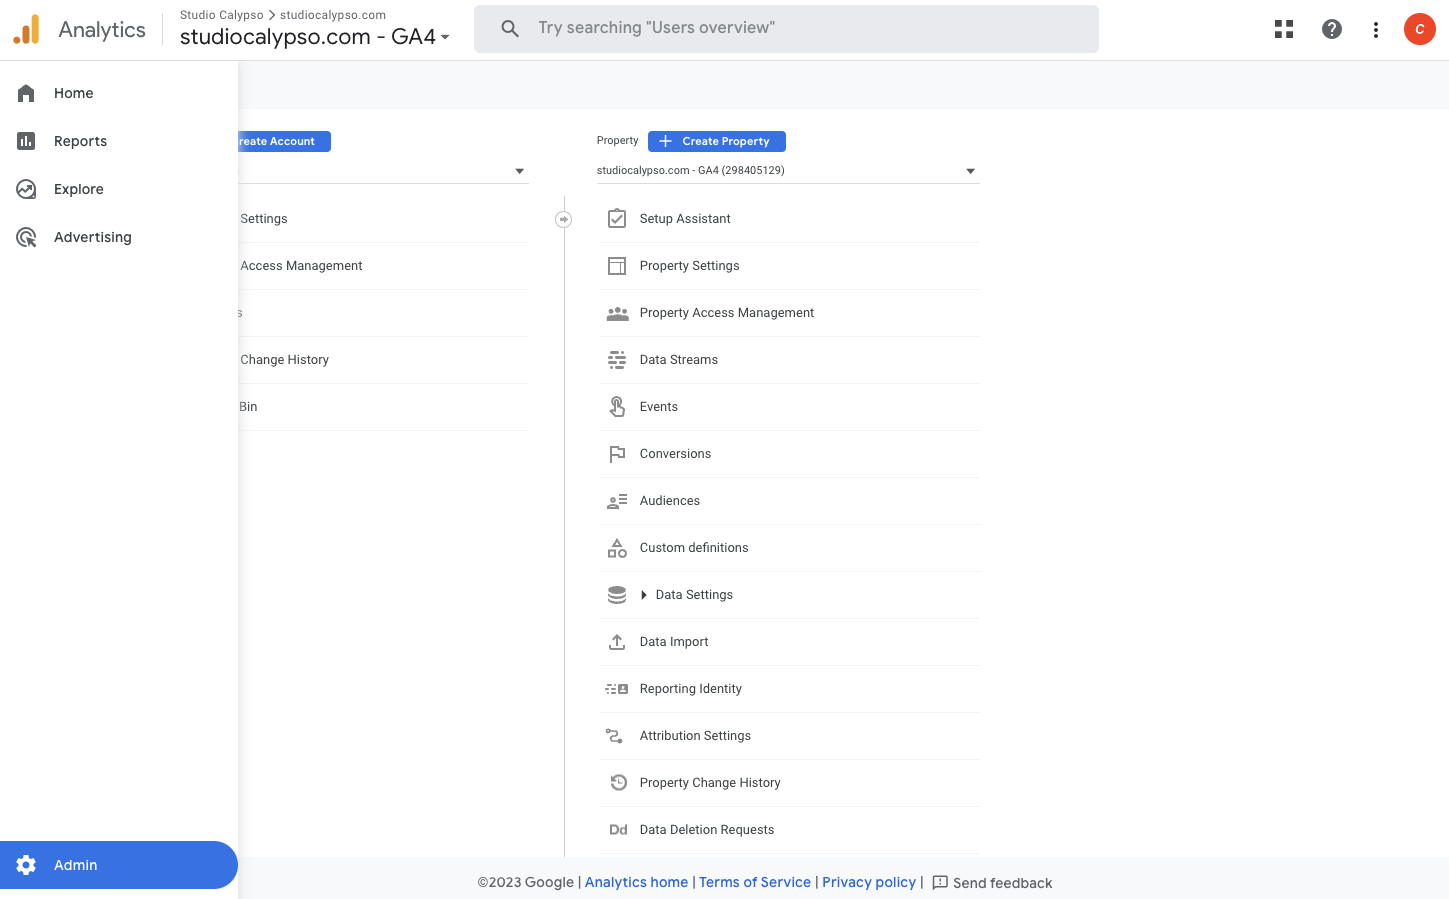
- Go to Google Analytics
- Go to admin at the bottom left > Click create account
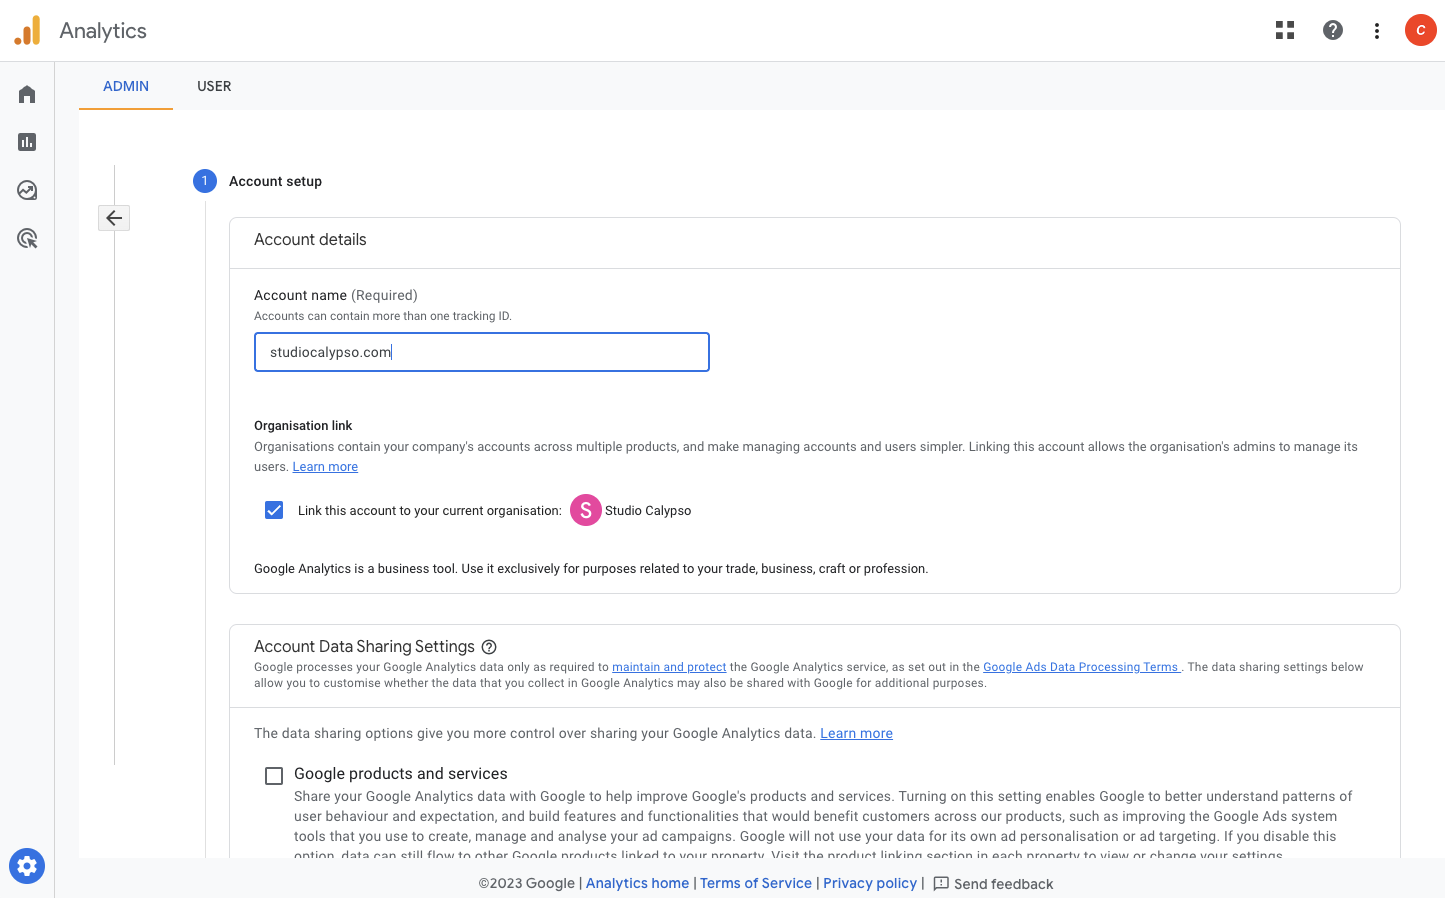
Account setup
- Fill in an account name, this is equal to your website domain name
- Check ‘link this account to your current organisation’
- Press next
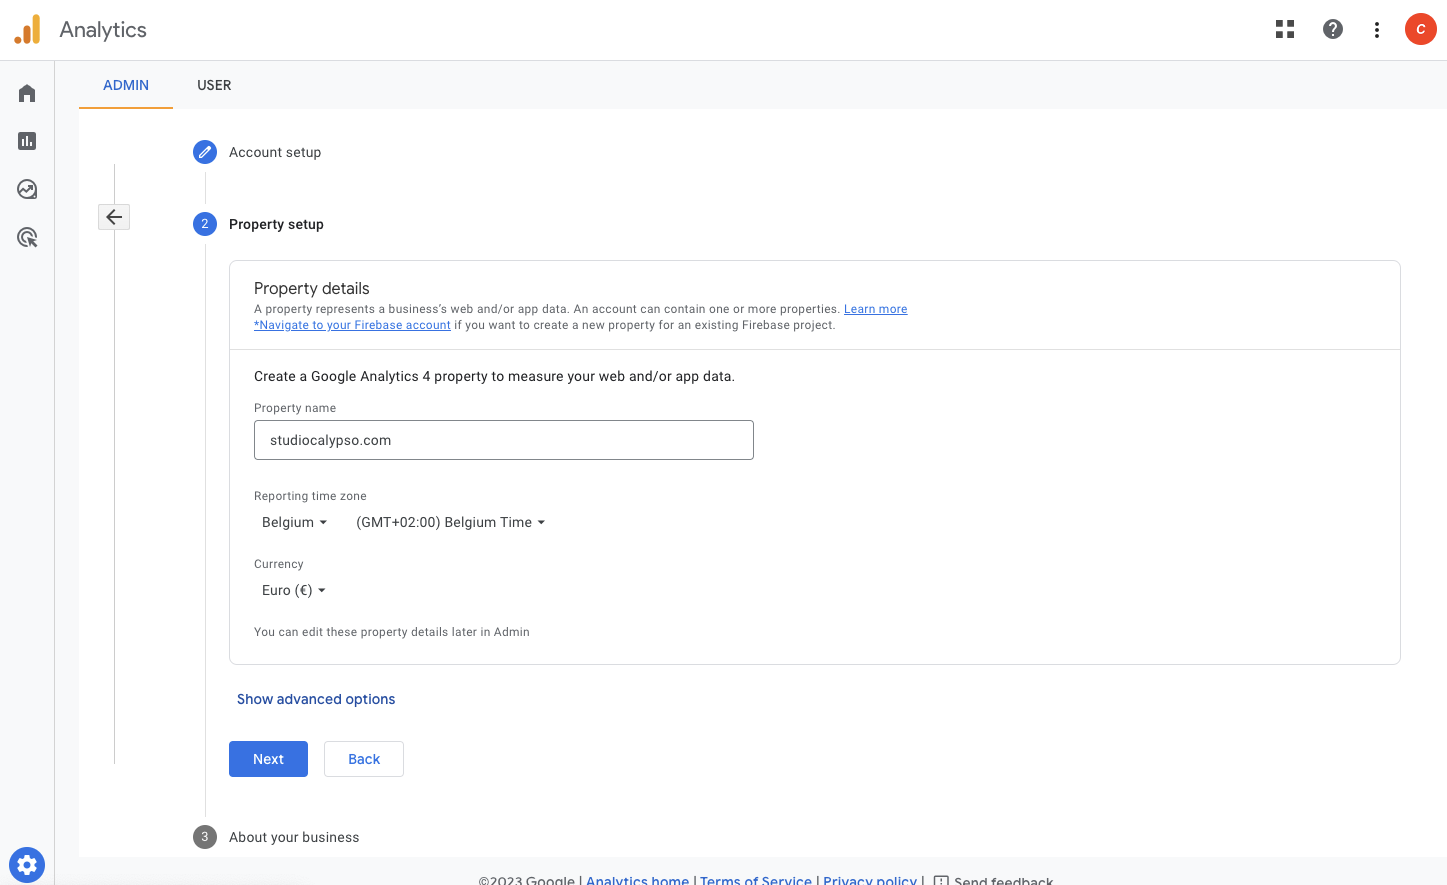
Property setup
- Fill in property name, this is equal to your website domain name
- Change the time zone and currency
- Press next
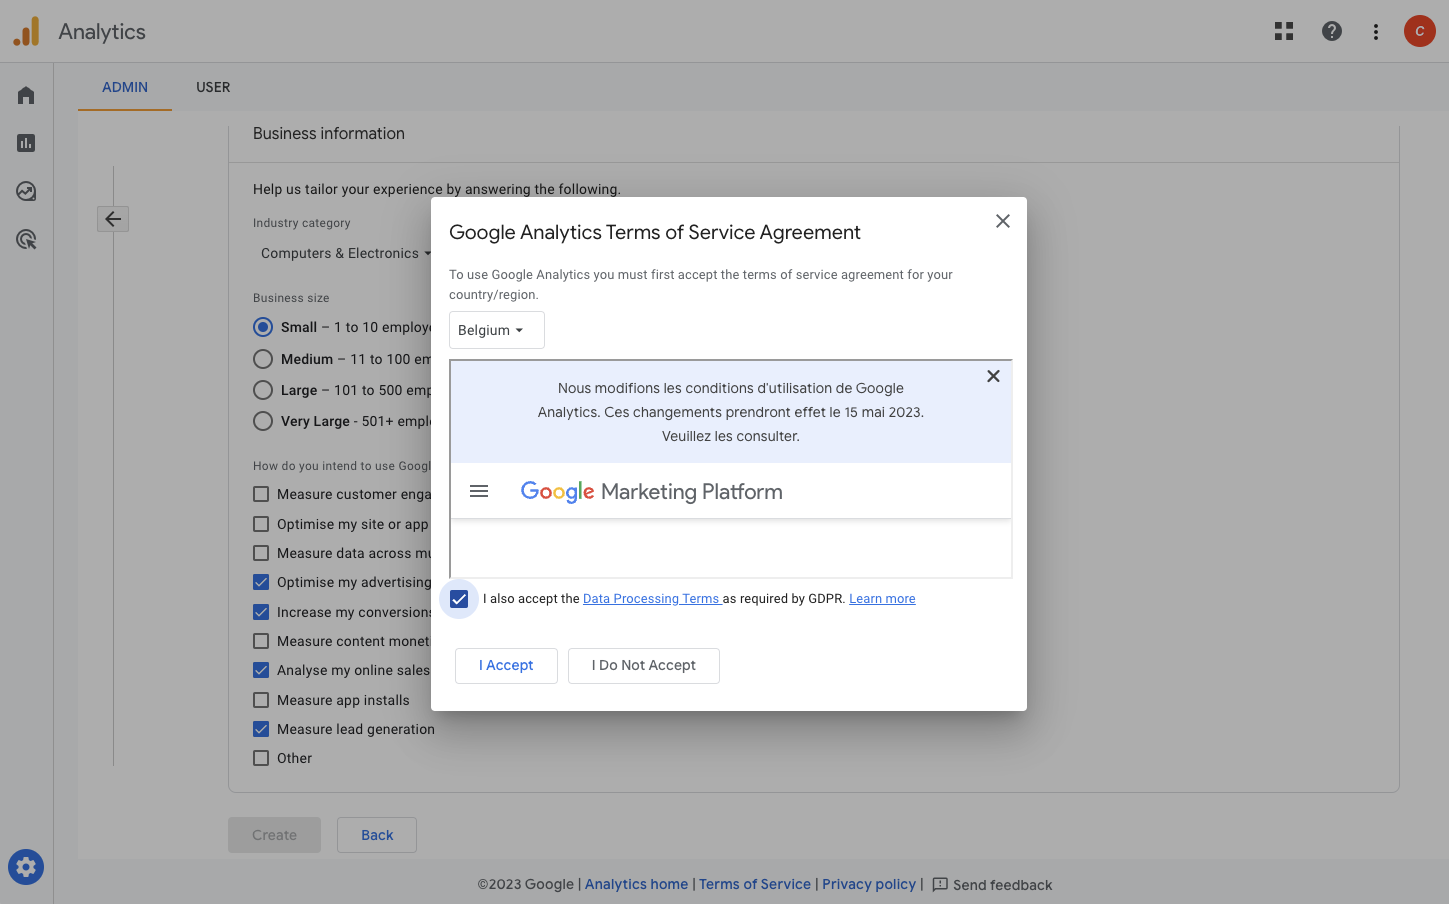
About your business
- Select an industry category
- Select the business size
- Tick all the boxes how you intend to use GA
- Create
Change the country/region to the correct one (ex Belgium)
Check the box ‘I accept the Data Processing Terms…’ > I accept
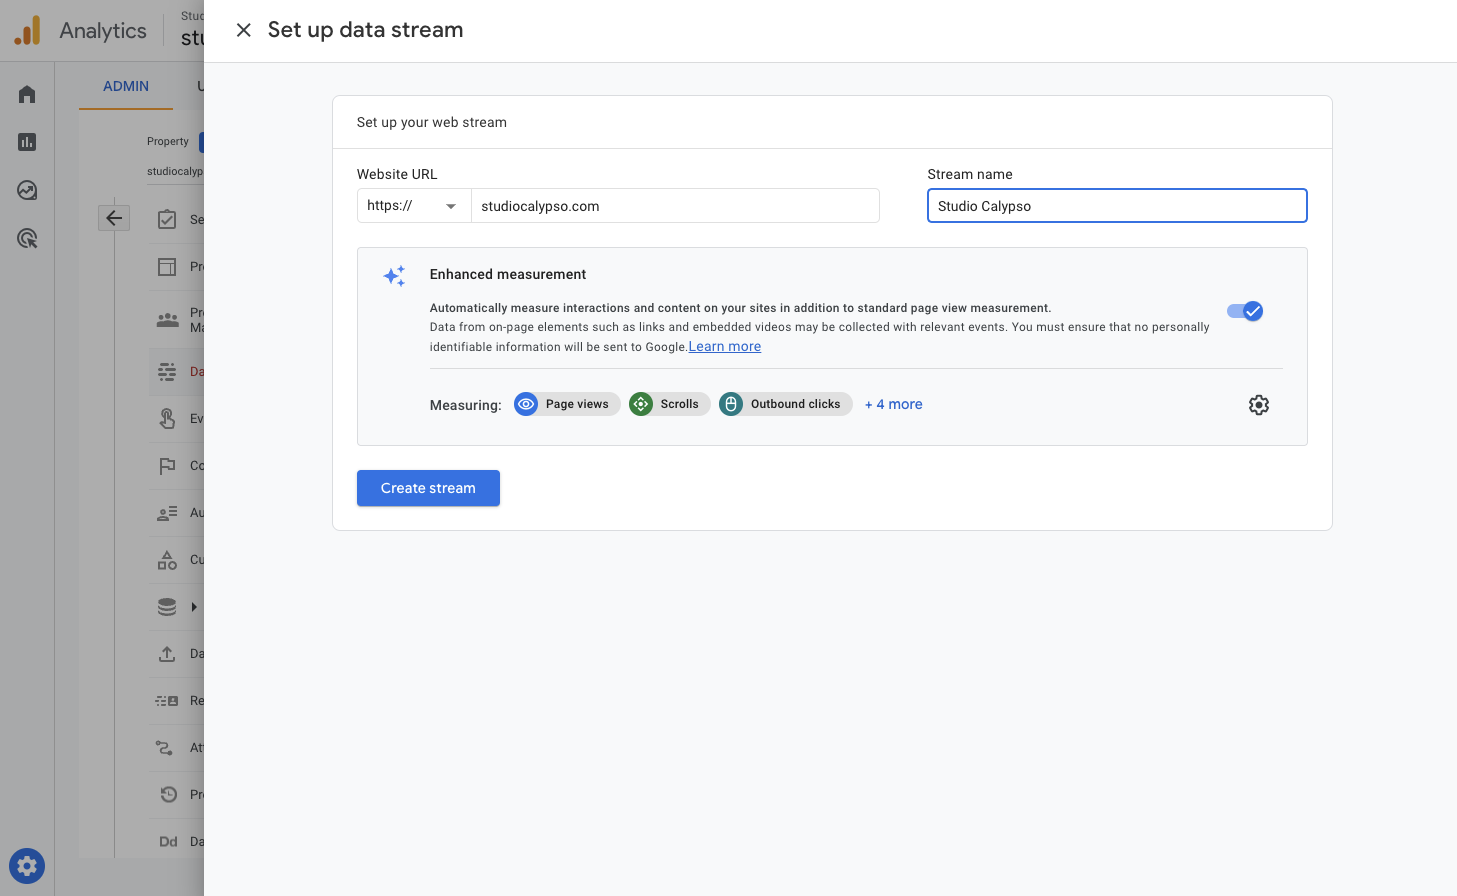
Web stream
Set up your web stream
- Fill in the website url
- Fill in the stream name
- Create stream
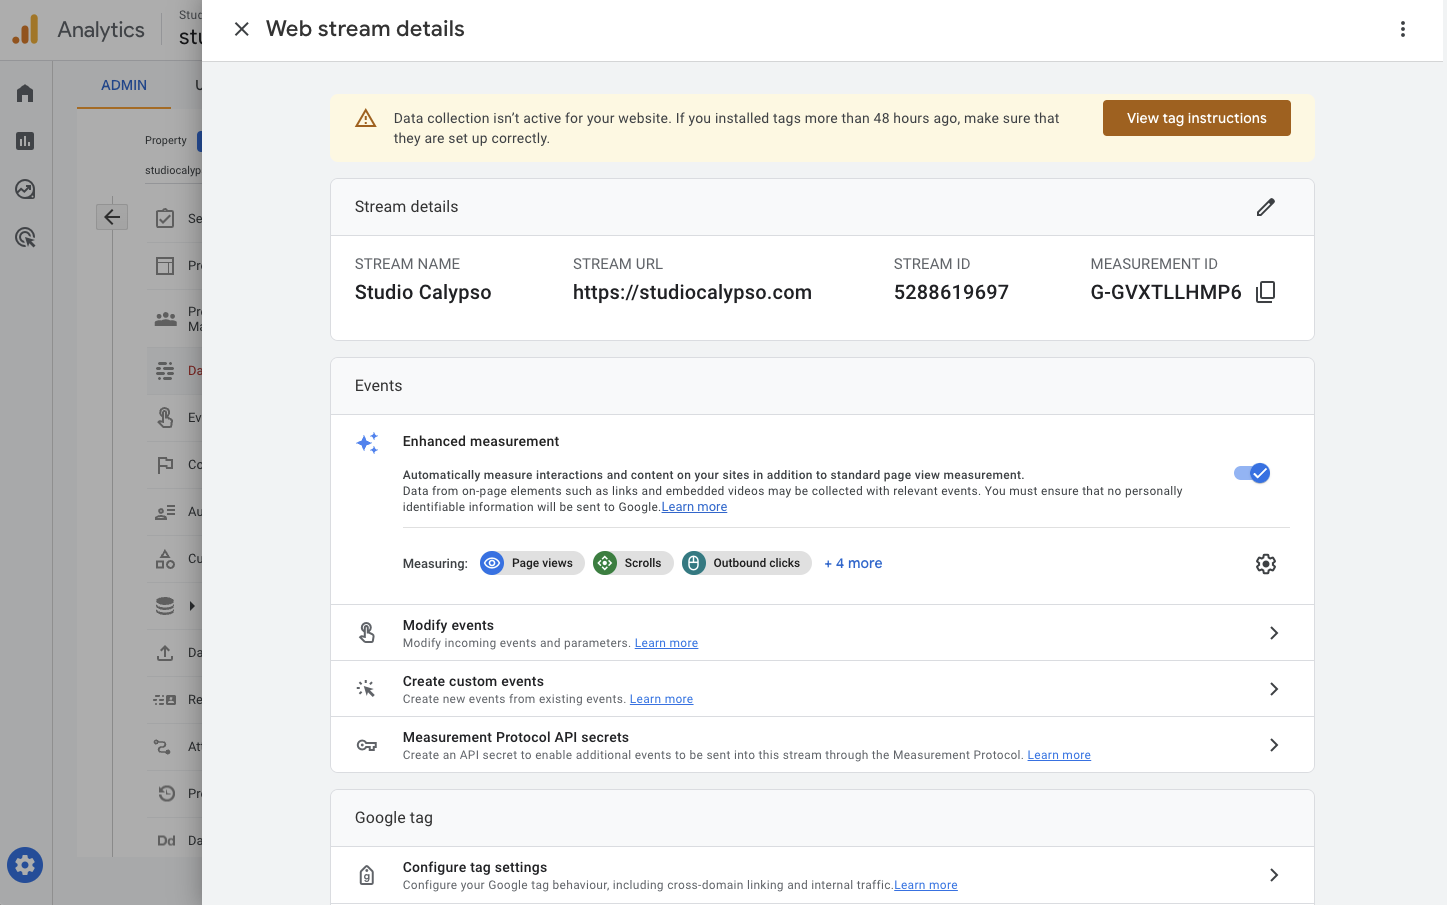
Web stream details
- Copy the measurement ID
We are now going to paste this ID into the website as tracking code.
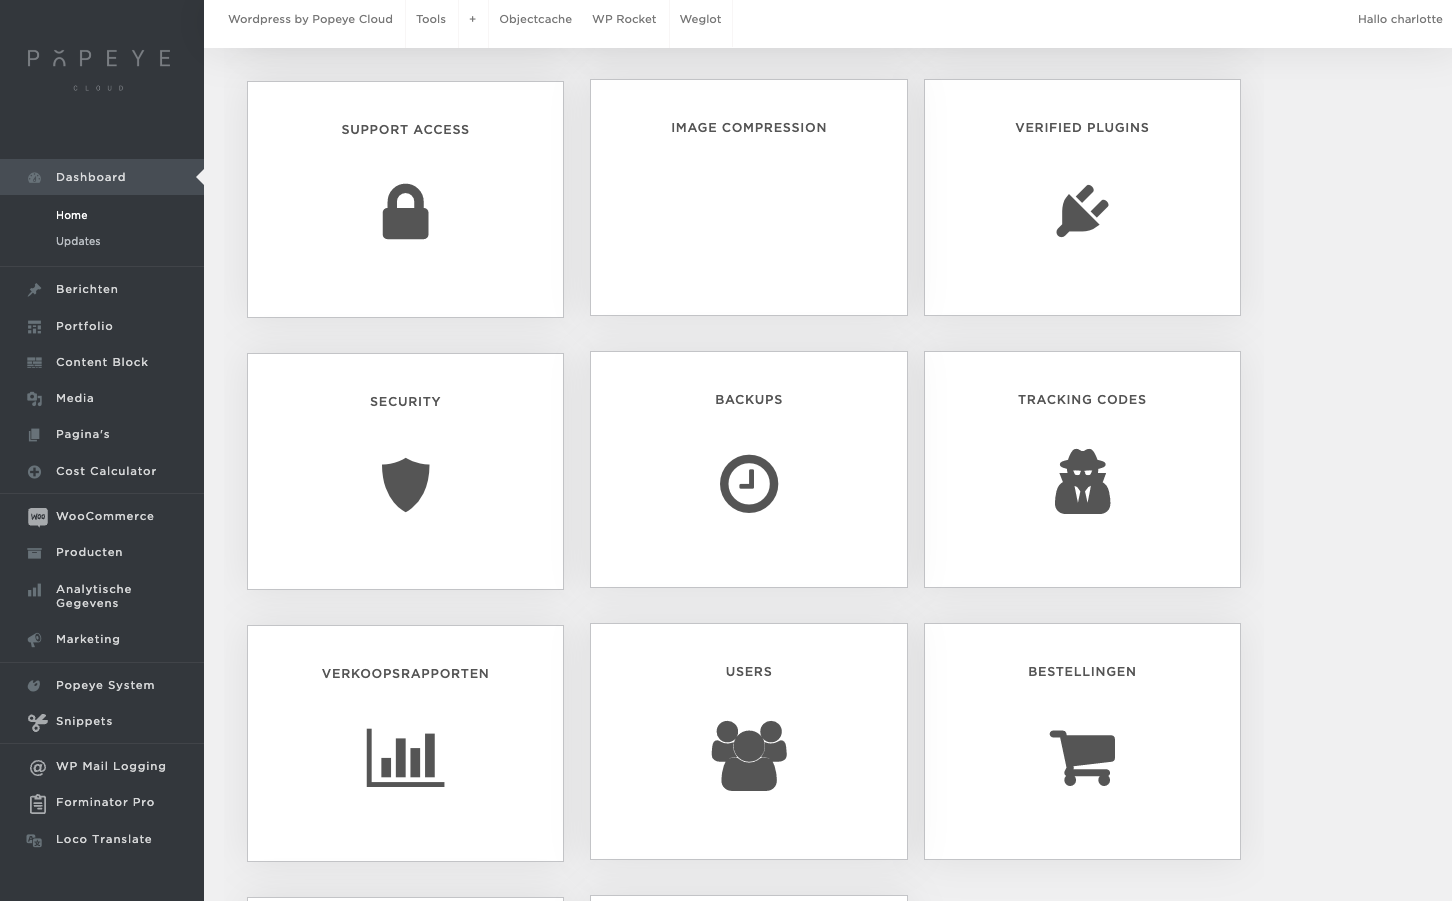
Install the tracking id
Go to your website.
On your dashboard you will find tracking codes
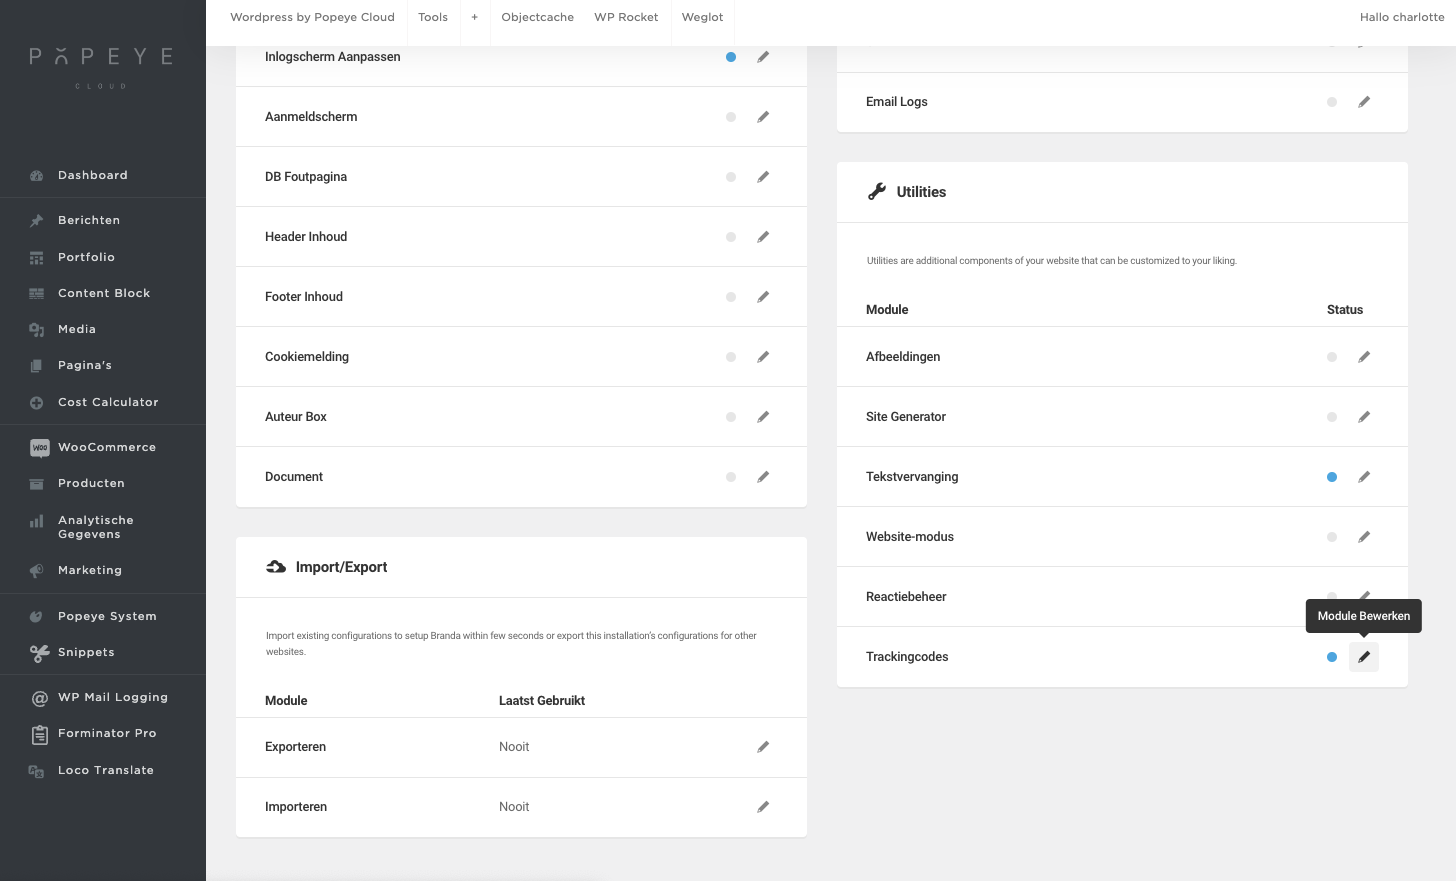
Utilities
- Scroll down to utilities
- Open the tracking codes with the pen
- Click ‘+ add tracking code’
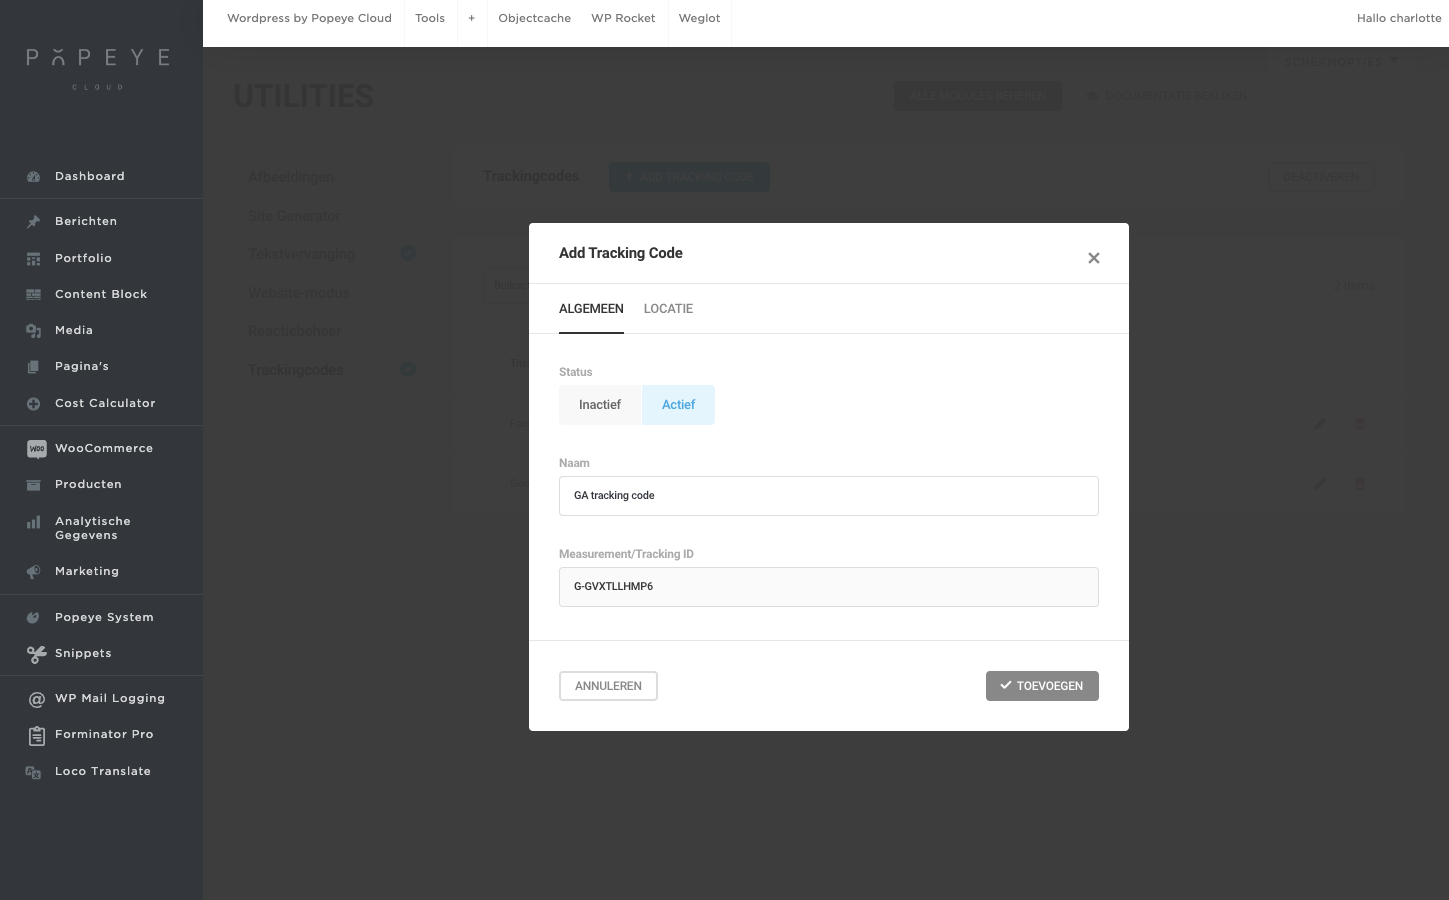
Add tracking code
- Status : Actief
- Name : ex. GA tracking code
- Measurement tracking ID : paste your code here
- Click ‘add’
Now your website is linked to your google analytics code. Once everything is set up and data starts flowing in, you can get started with reporting and insights. Navigate through the reports and dashboards in the new GA4 features.

Tips 'n tricks
Moving to Google Analytics 4 is an important step to improve your analytics and tracking capabilities and gain valuable insights. With GA4, you'll benefit from advanced analytics capabilities and new features that can help you understand your users' behavior. Remember that the old version of Google Analytics will no longer work after July 1, so be sure to make the switch to GA4 before this happens to preserve your metrics and data. Follow the mentioned steps to set up GA4 and take advantage of the many benefits it has to offer.
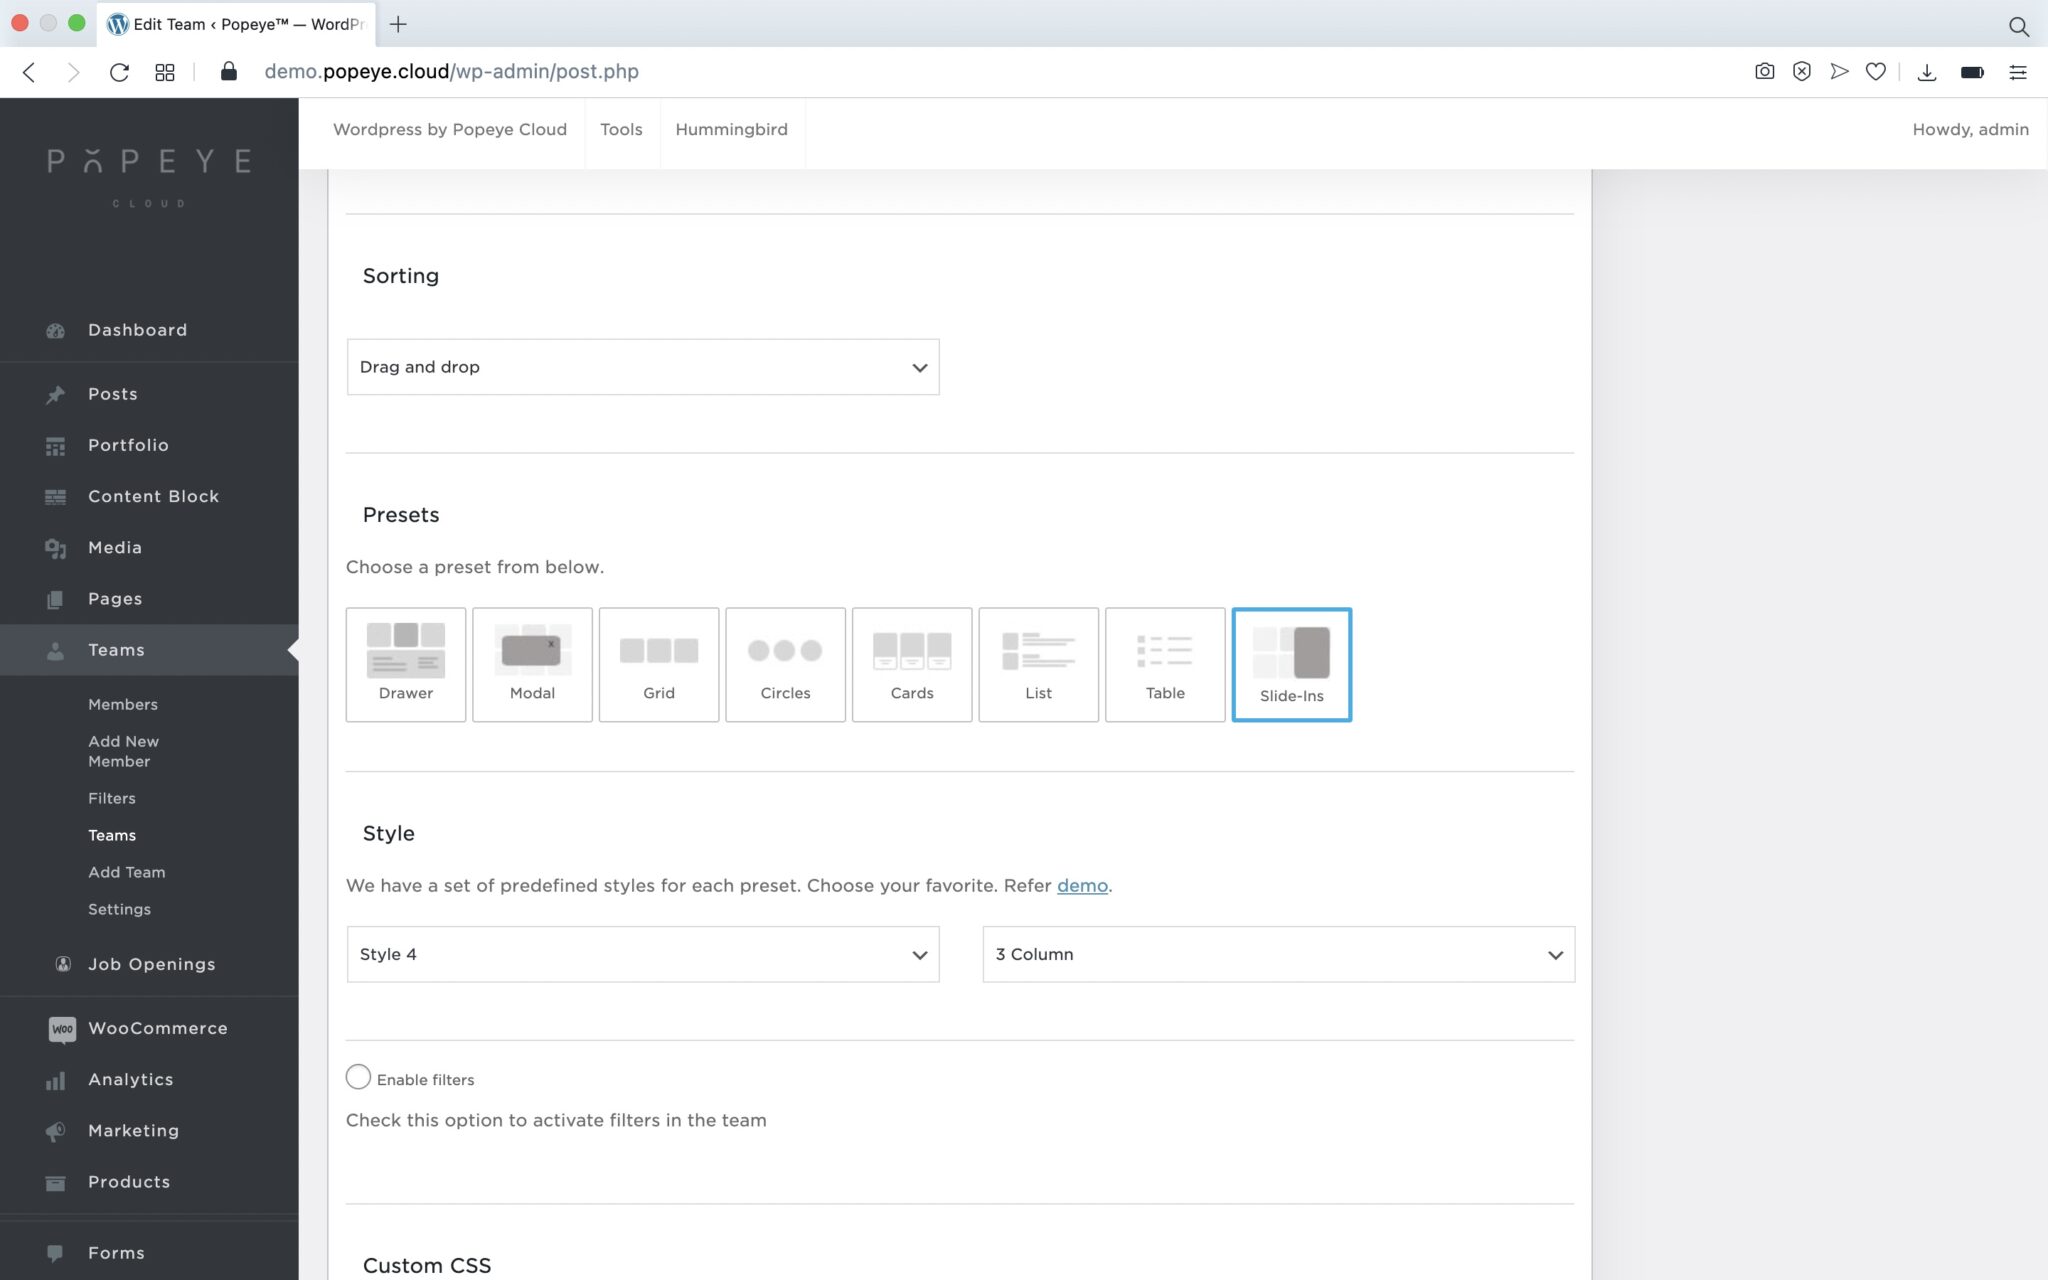
Preloader
Preloader
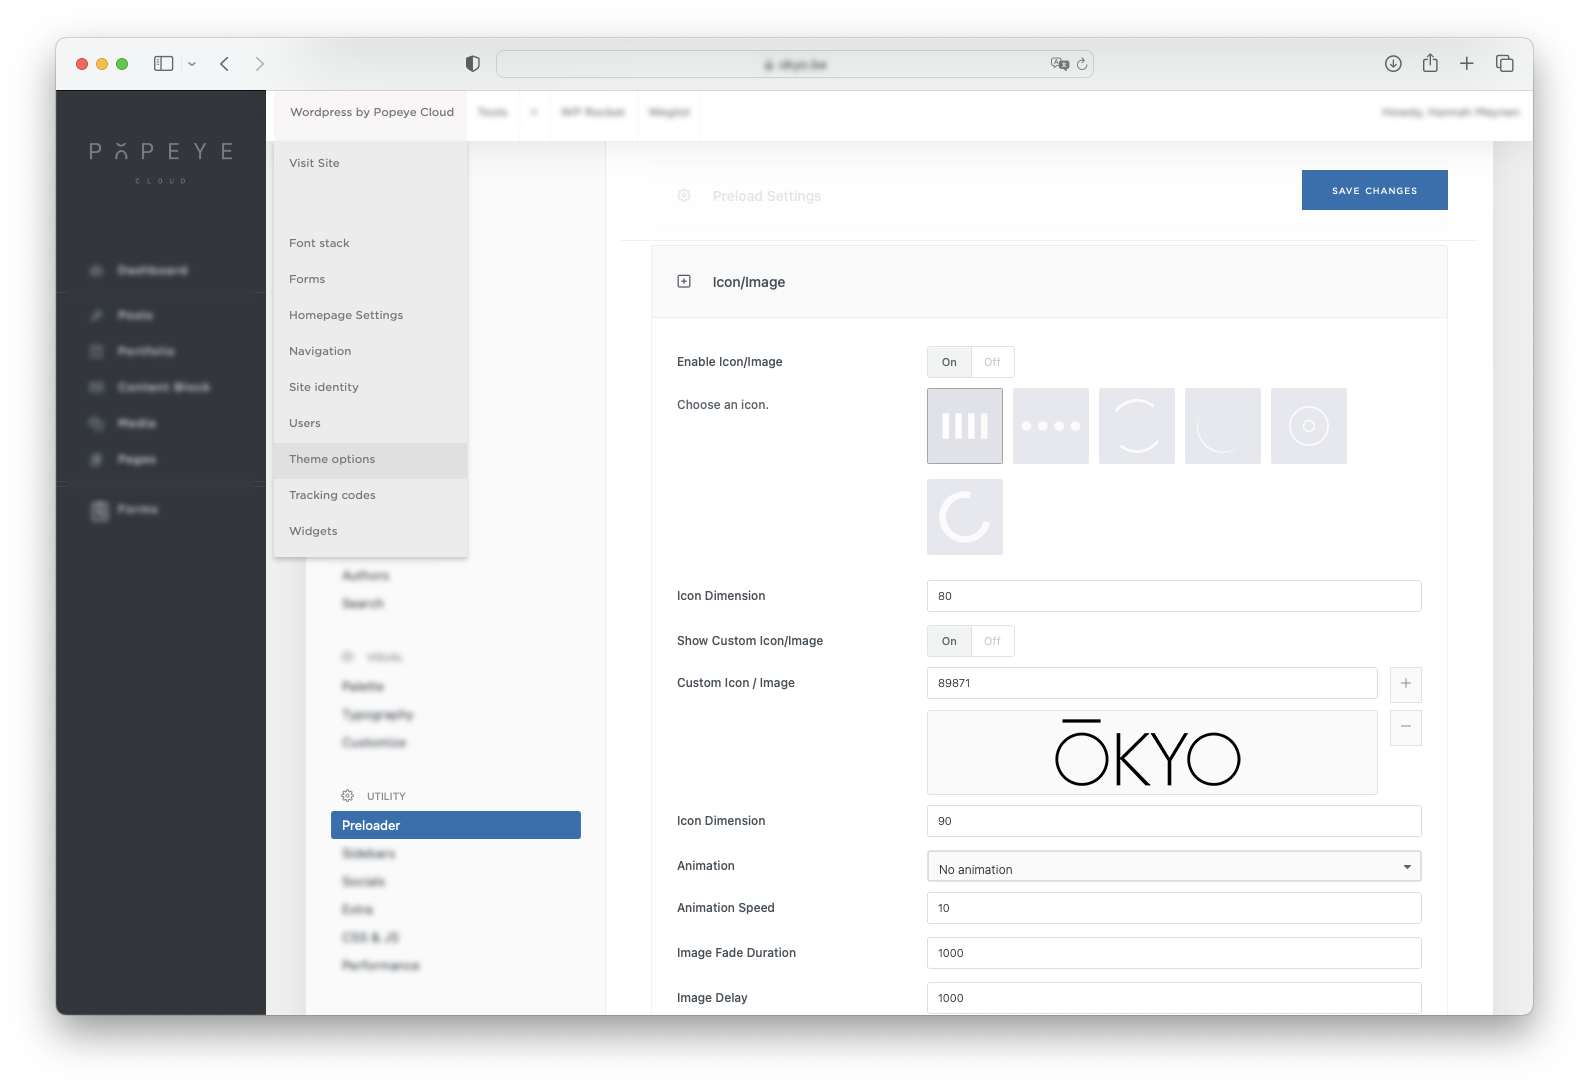
How to change your preloader logo/icon
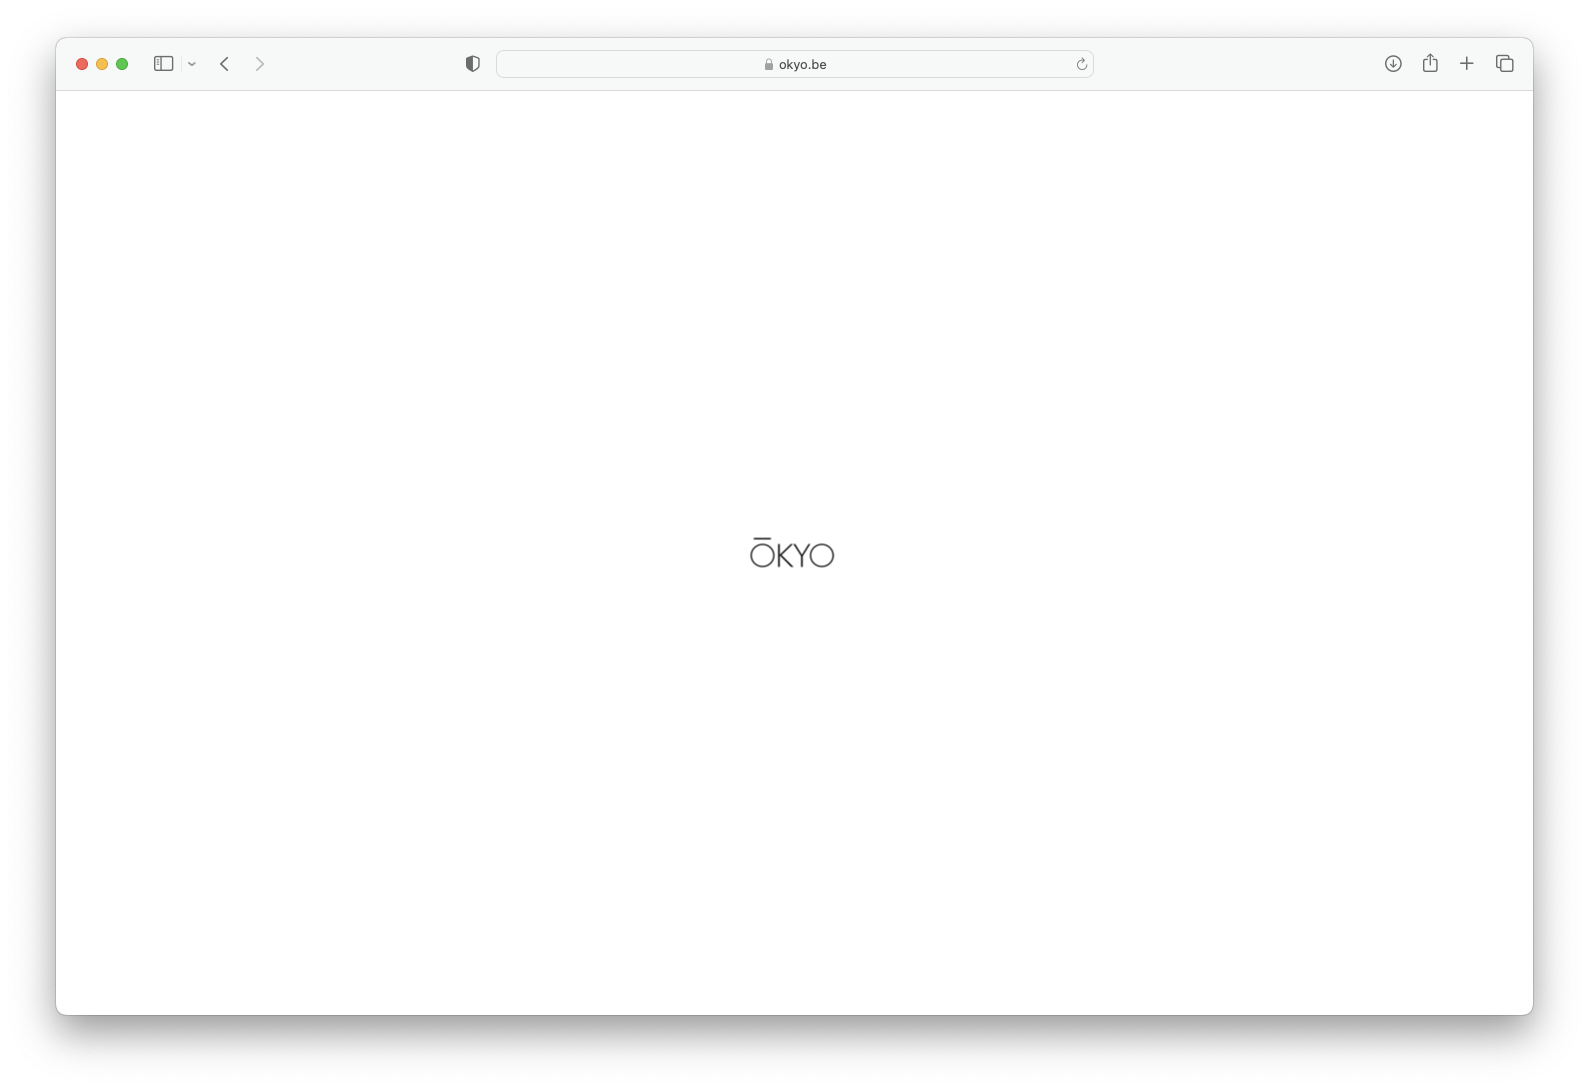
Go the Wordpress by Popeye Cloud: theme options Scroll down until you see the tab: preloader Click icon/image Now you can change your logo at the custom icon / image level Click the + icon to select another image from your media library When loading the website you'll see the result
Navigation menu overlay settings
Navigation menu overlay settings
— Create infinite overlay settings with our new plugin settings.
Menu overlay
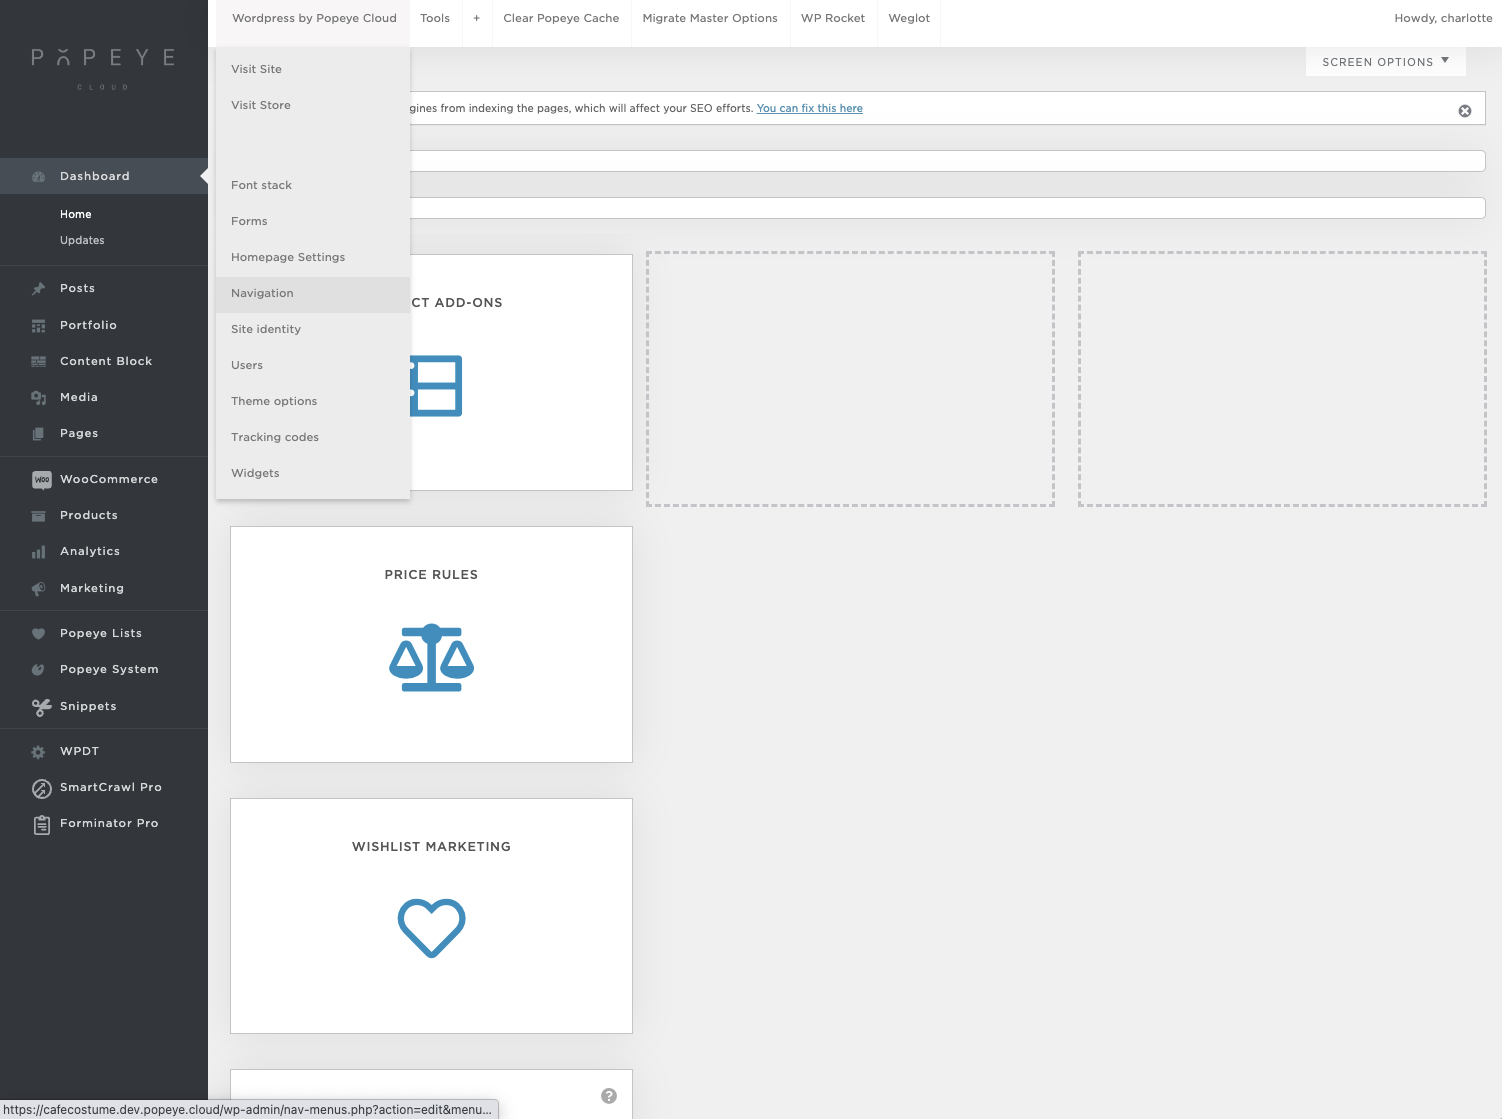
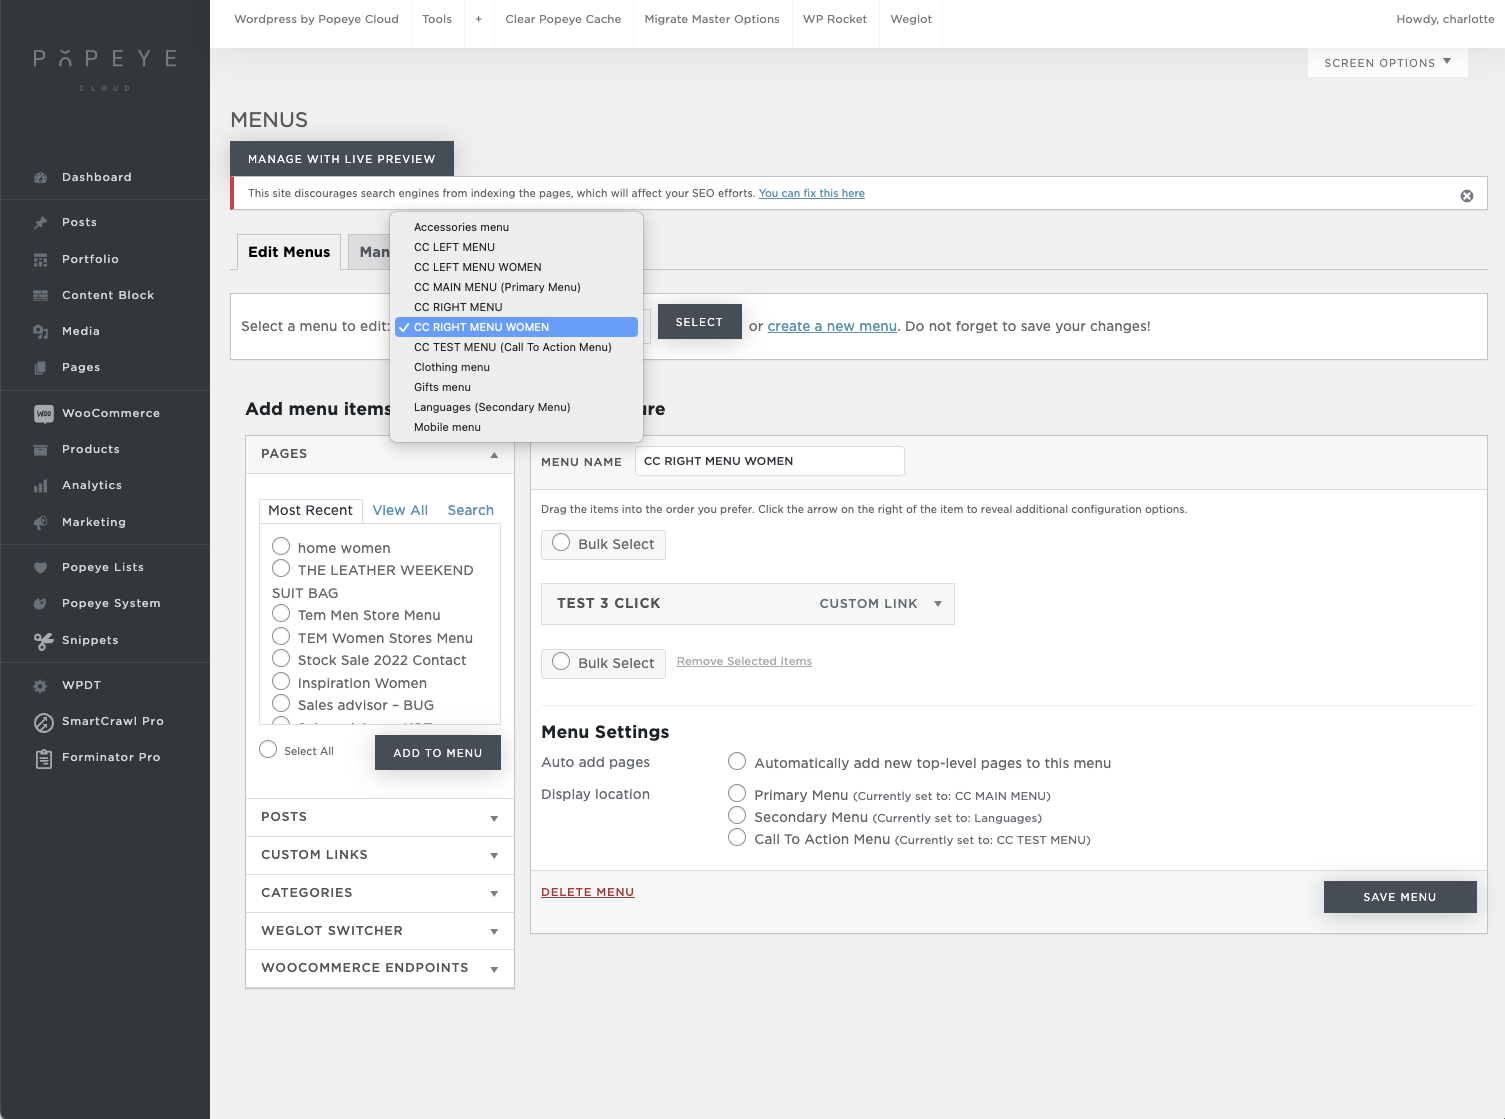
Go to your navigation.
- Wordpress by Popeye Cloud > Navigation
- Select a menu to edit > choose one from the drop down and click ‘select”
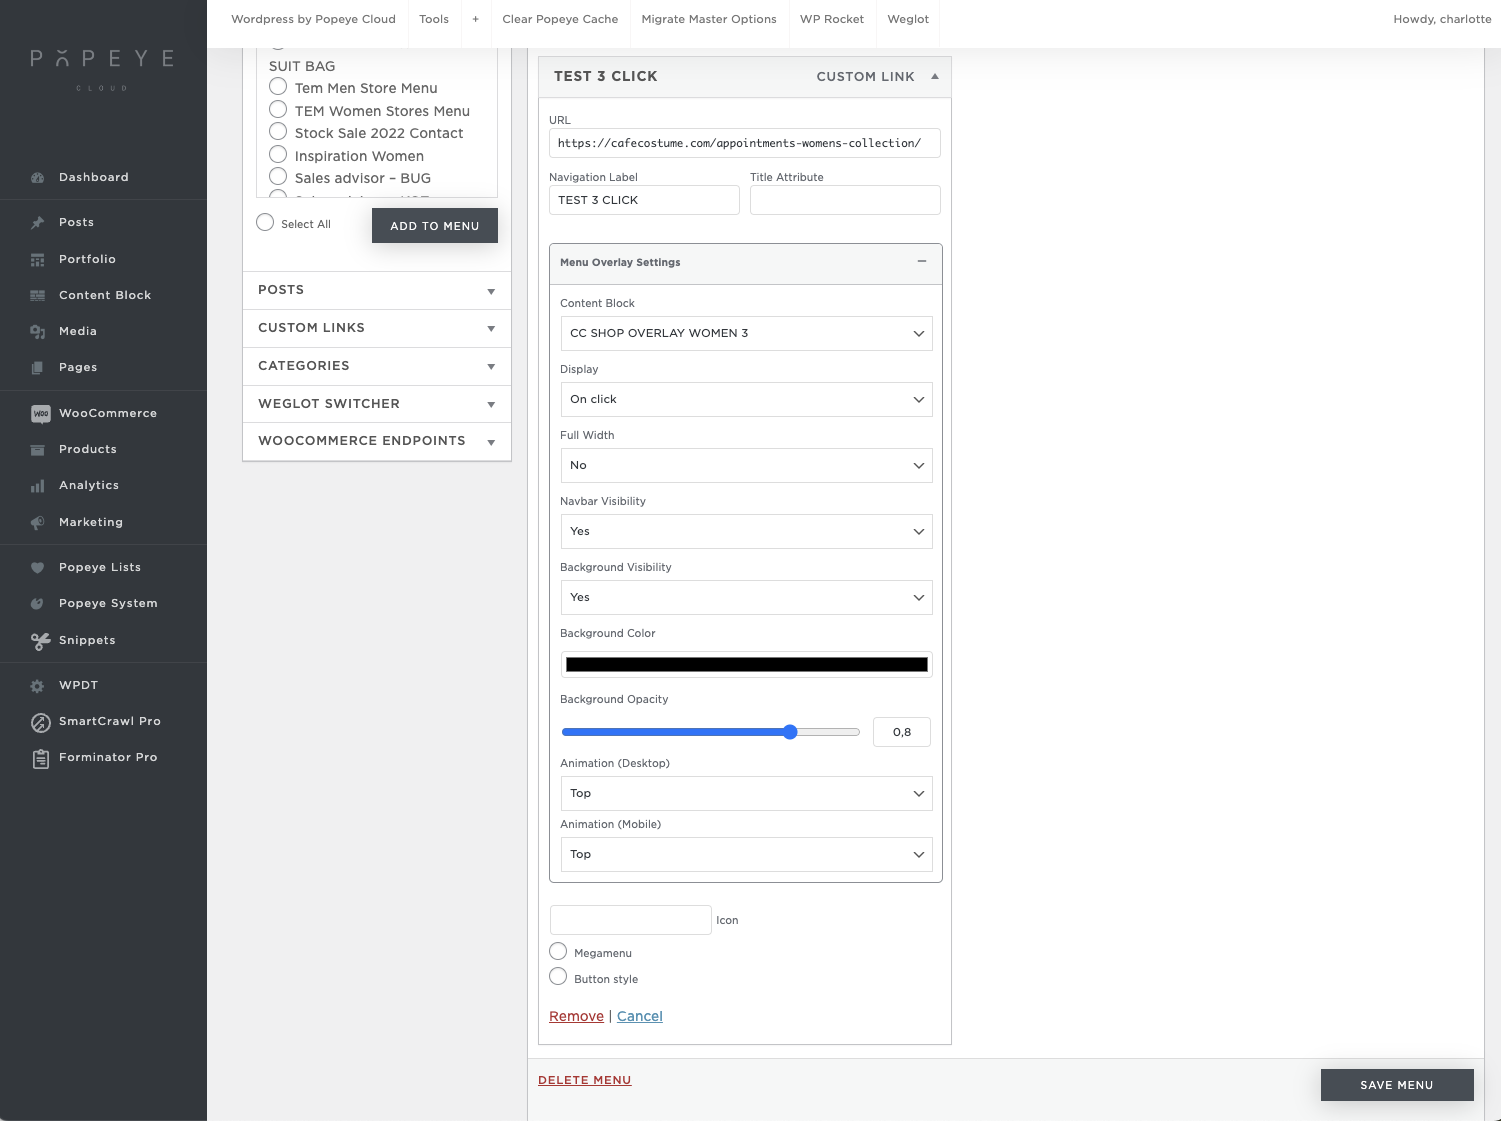
- Menu overlay settings > choose a content block that you like to show when clicking of by hovering your menu item (test 3 click in this example)
- Set different settings and behaviours for your menu overlay: width, visibility, background,…
- Click ‘save menu’
The navbar visibility yes or no is een option where you can determine whether your navigation will be in front or over your navbar. The background visibility is where you can determine if there is a background when the menu is shown.

Tips 'n tricks
Save your settings!
Create unique navigation and menu structure for specific website page
Create a unique navigation and menu structure for each page in your website/webshop.
— You may want to refer to a different navigation on certain pages in your website/webshop. Below you will learn how to set a different menu for each page.
Set up a general navigation
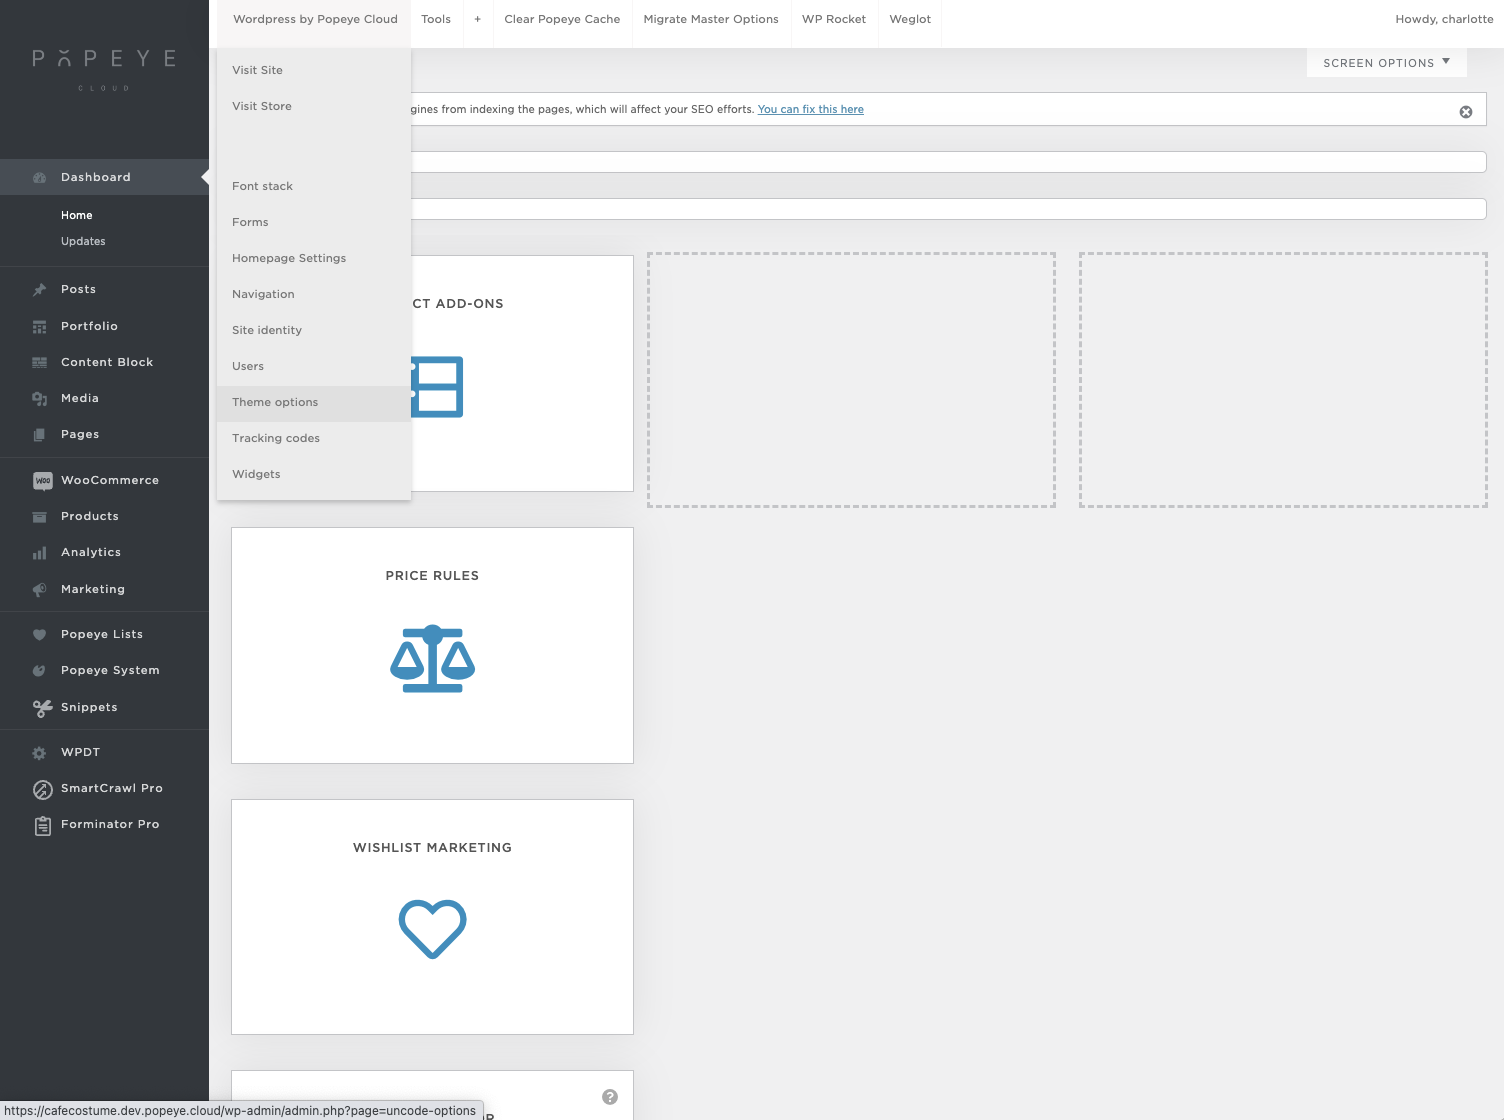
Go to theme options to first set the general settings for your menu correctly.
- Wordpress by Popeye Cloud > Theme options
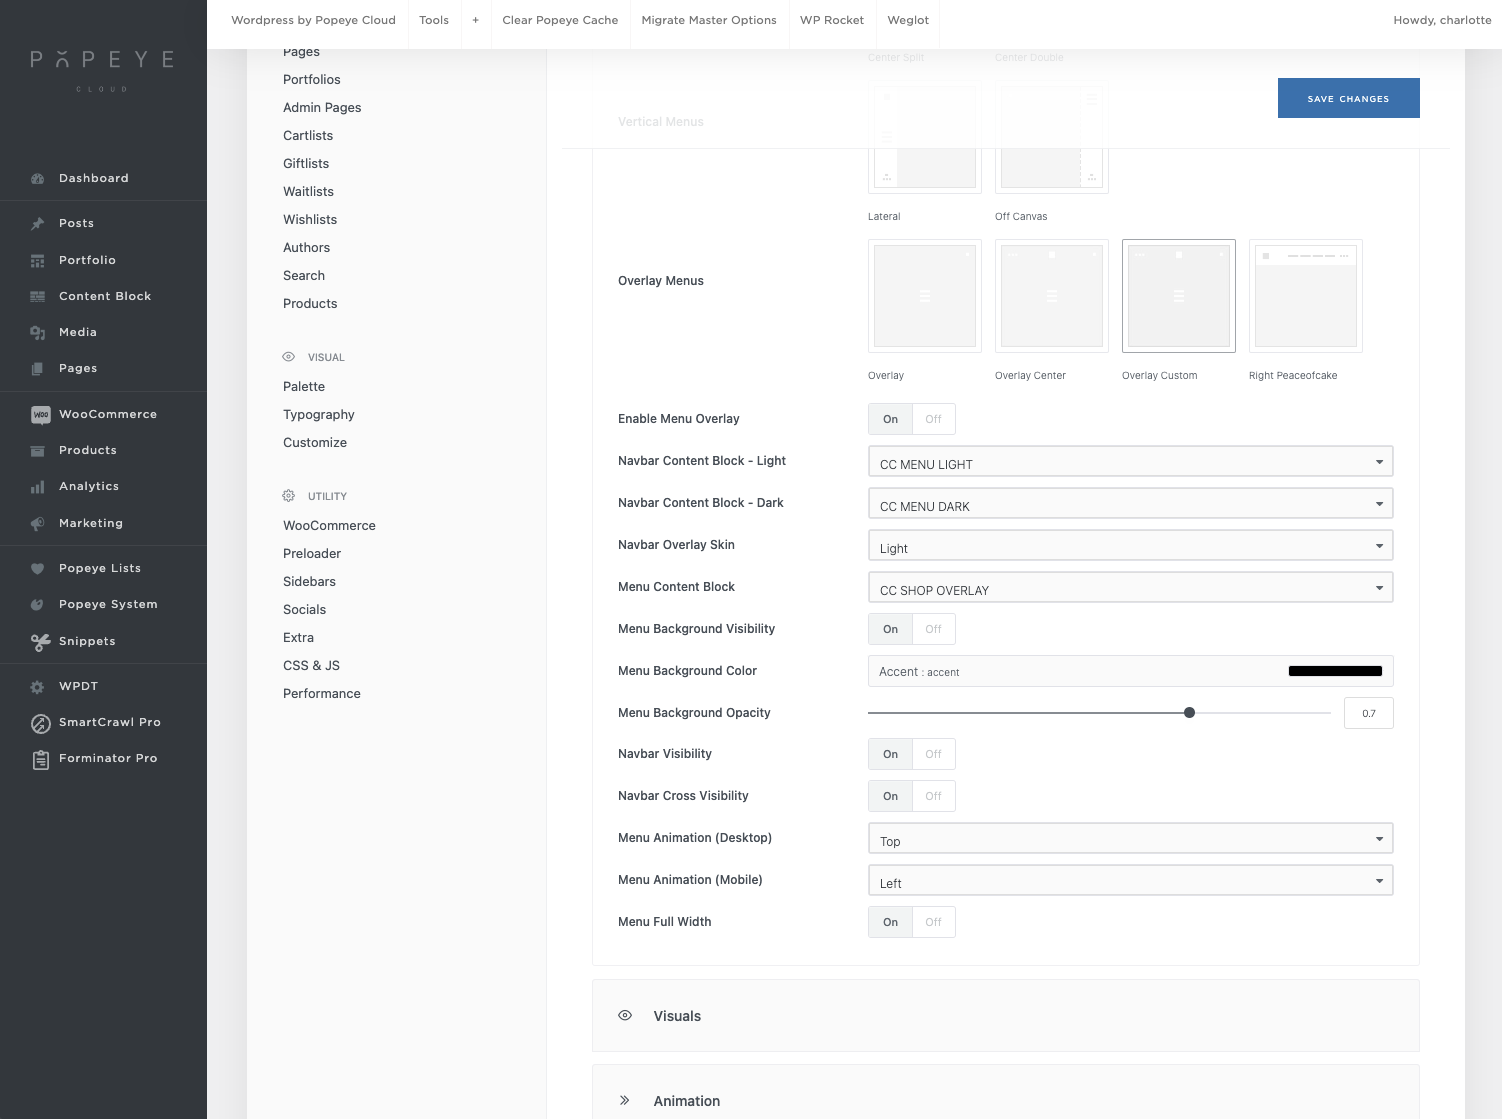
- Click in general Navbar > menu and choose in overlay menus for ‘overlay custom’
- Set a ‘navbar content block light’ and a ‘navbar content block dark’
- Set a ‘menu content block’ that serves as your overlay menu used on mobile. This is the menu that you see when choosing the three stripes on mobile
There are two content blocks that serve as navigation bar. This is applied so that your navbar can be shown in a light color (usually white) on a dark image and the navbar in a dark color (usually black) on a light image. You can define this for a row on your page.
The content blocks that you choose here (navbar content block – light, navbar content block – dark and menu content block) are automatically set as the menu for the entire website/webshop.
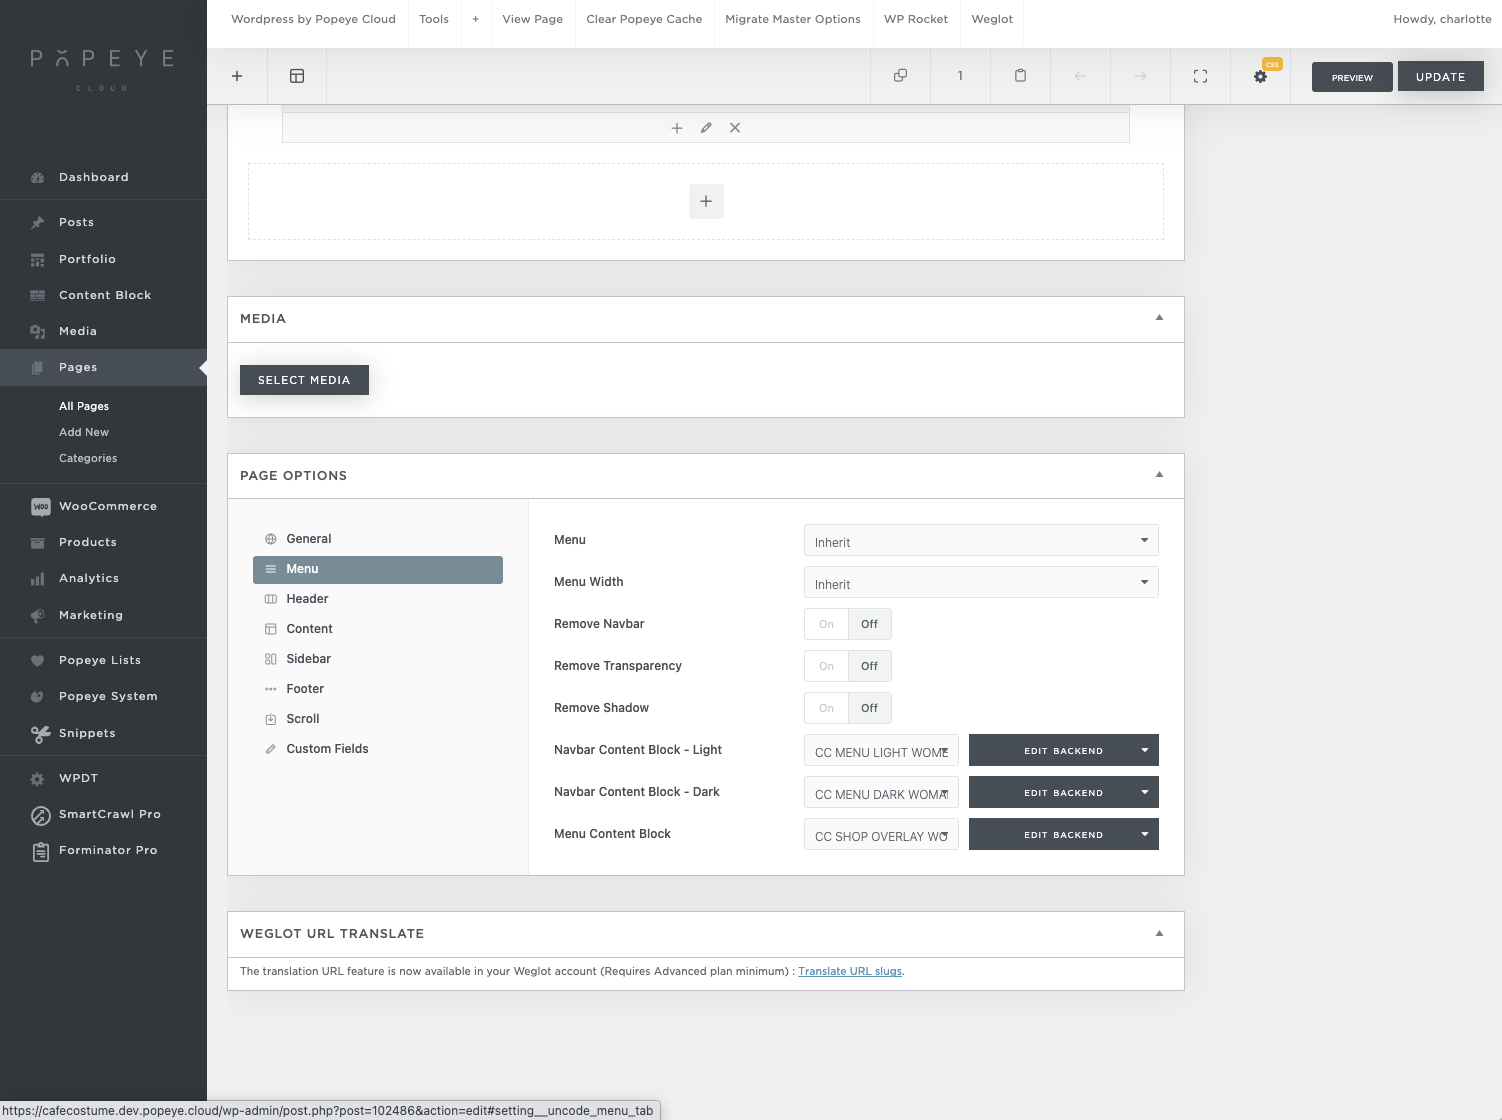
Set a individual navigation for each page
Give a page an individual menu in the backend
- Go to the page where you want to select another menu and click edit page.
- Scroll all the way down to page options > menu
- Here you can set a new navbar light, dark and overlay mobile which will only be visible on that page
- Save changes
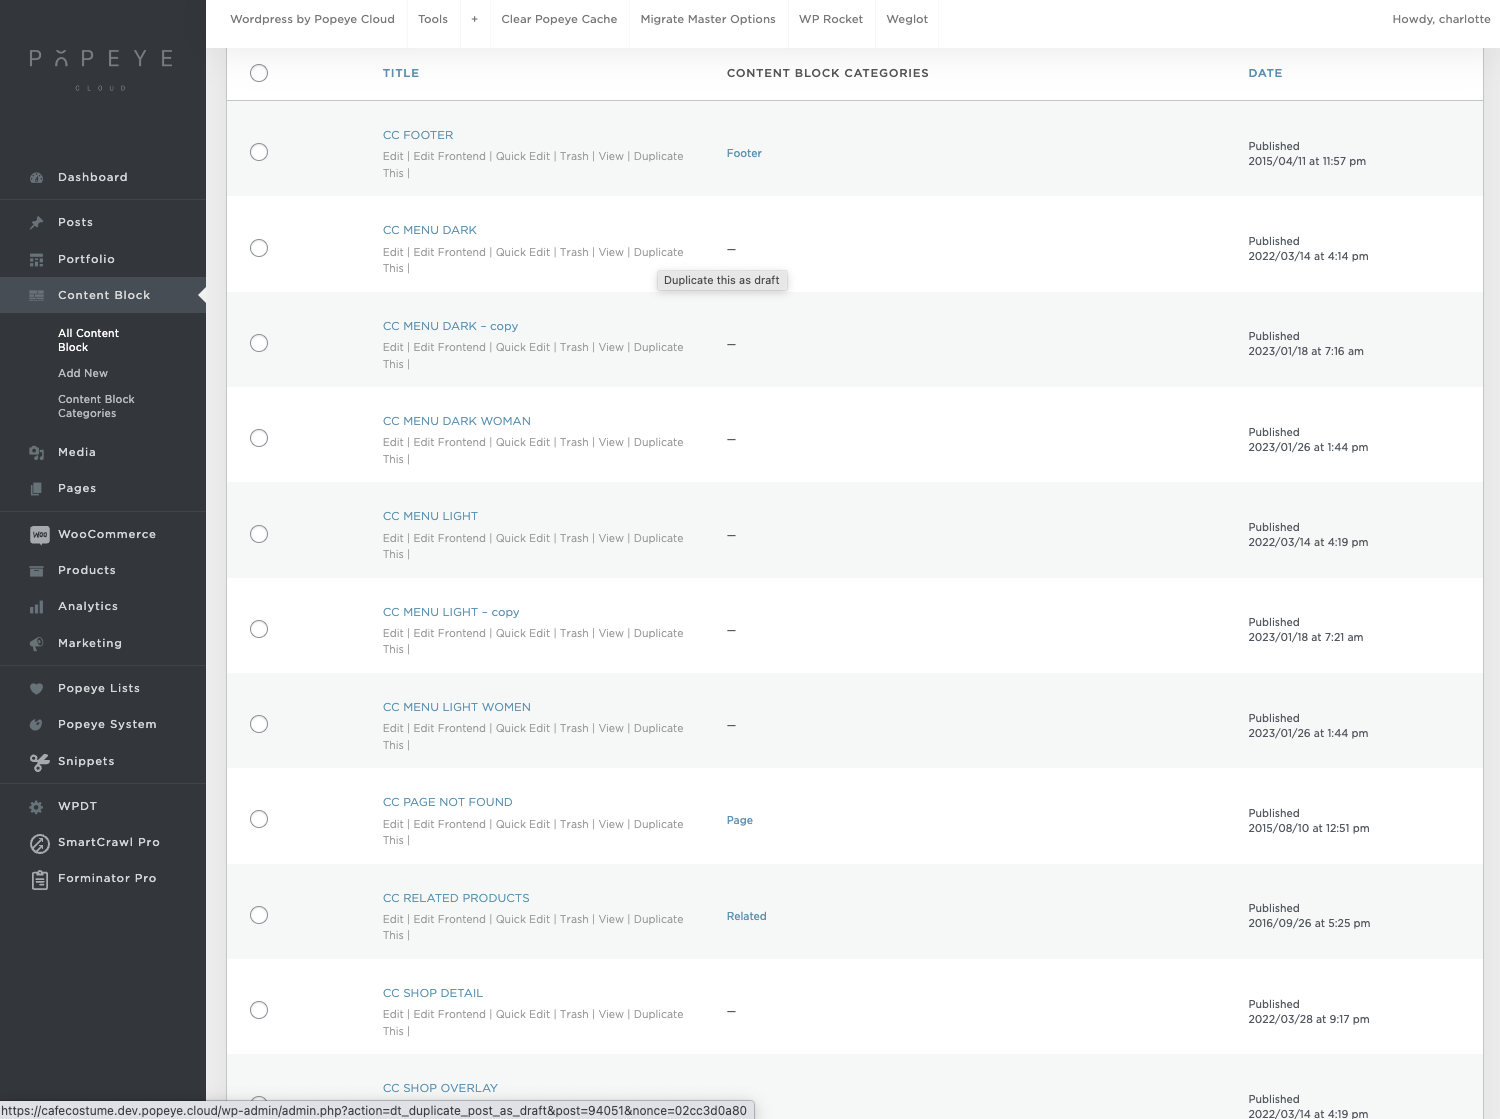
If you want to keep the same formatting of fonts etc but only change the links we always recommend duplicating the content block you set in the theme options, rename it and change the content. This way the layout is maintained throughout the site.
Go to ‘content block’ in the side bar and choose ‘duplicate this’.
Navbar content block light & navbar content block dark
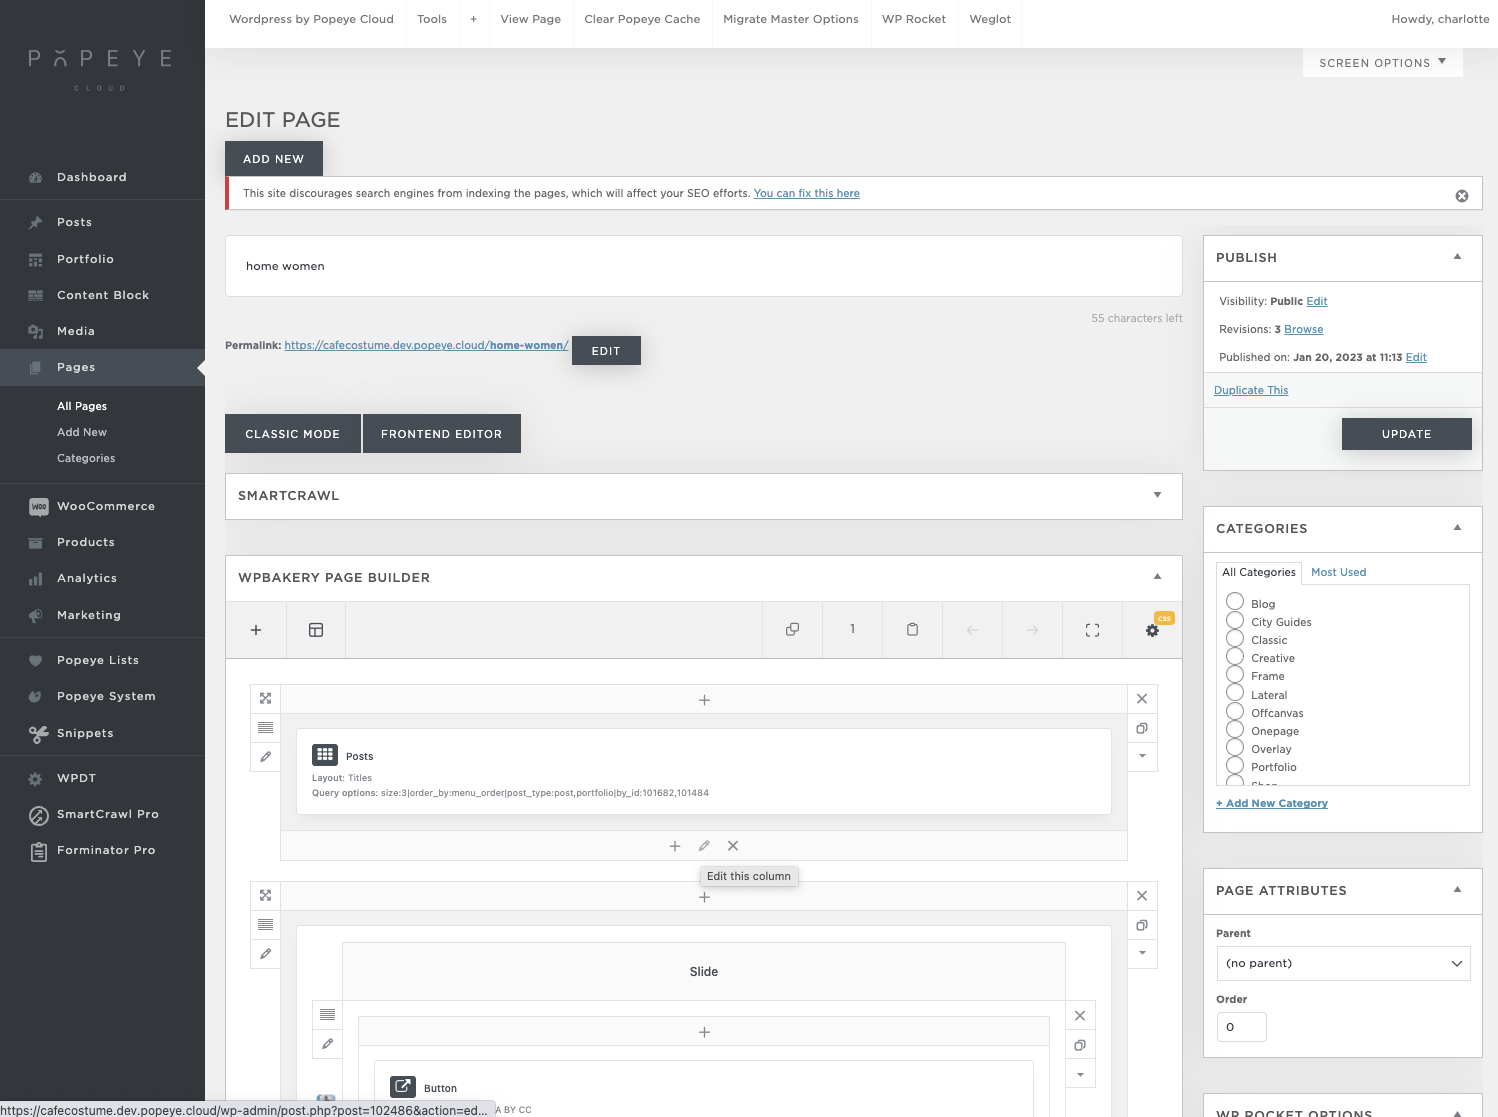
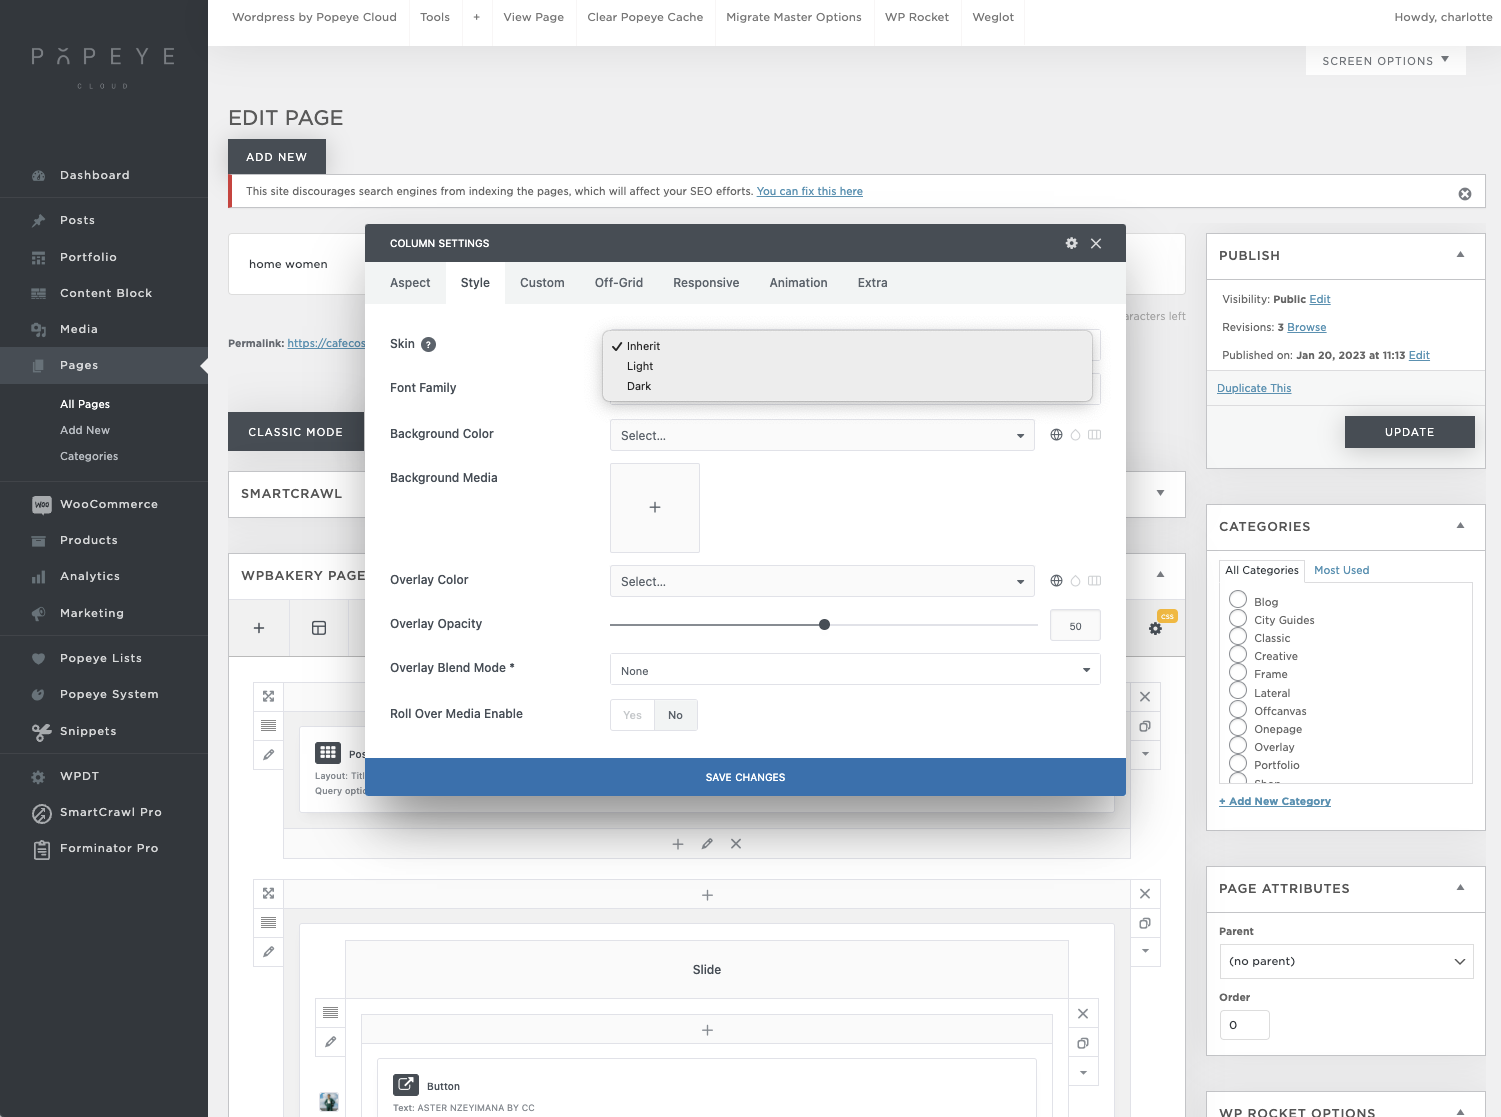
Setting a light and dark version of your navigation bar is important for the different backgrounds it is displayed on. You always set this on your first column of the page because this is where the navigation is displayed on.
- Click ‘edit this column’ > style > skin light or dark
- Save changes
Tips 'n tricks
What you set in the theme options are your default settings!
How do I add an Ads Connector?
How do I add an Ads Connector?
— activate Ads Connector to automatically link products to your Google Shopping and Facebook / Instagram Shopping
To get started with the ads connector go to the dashboard and select this tab ‘ads connector’.
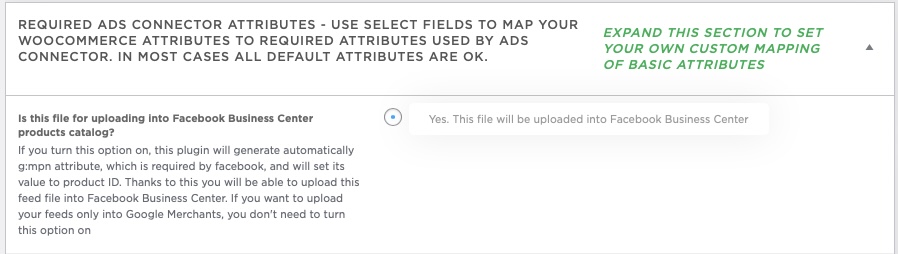
Once you’ve opened the Ads Connector, you can use the button below to create a Product feed and set it up as a source for your catalog in Facebook Ads or Google Shopping. You can create one feed for all products. Depending on your advertising strategy, it is often interesting to create different feeds so you can create a different catalog for different brands with a different budget.
Important to set the right category (is only used for Google Shopping)

Important to indicate below option: ‘File will be uploaded into Facebook Business Center’ (to make your feed compatible with FB/IG)
Tips 'n tricks
More info on uploading items to a catalog with a data view via URL (feed) can be found on the knowledge base links below. Important to set up with FB/IG/GOOGLE that their system should be syncing your feed every X number of hours so that your new products, stock and prices are automatically updated:
Facebook / Instagram: https://www.facebook.com/business/help/1275400645914358?id=725943027795860Google Shopping: https://support.google.com/merchants/answer/7538732?hl=nl
How do I add team members?
How do I add team members?
— Learn everything about our team plugin
1. Team member overview
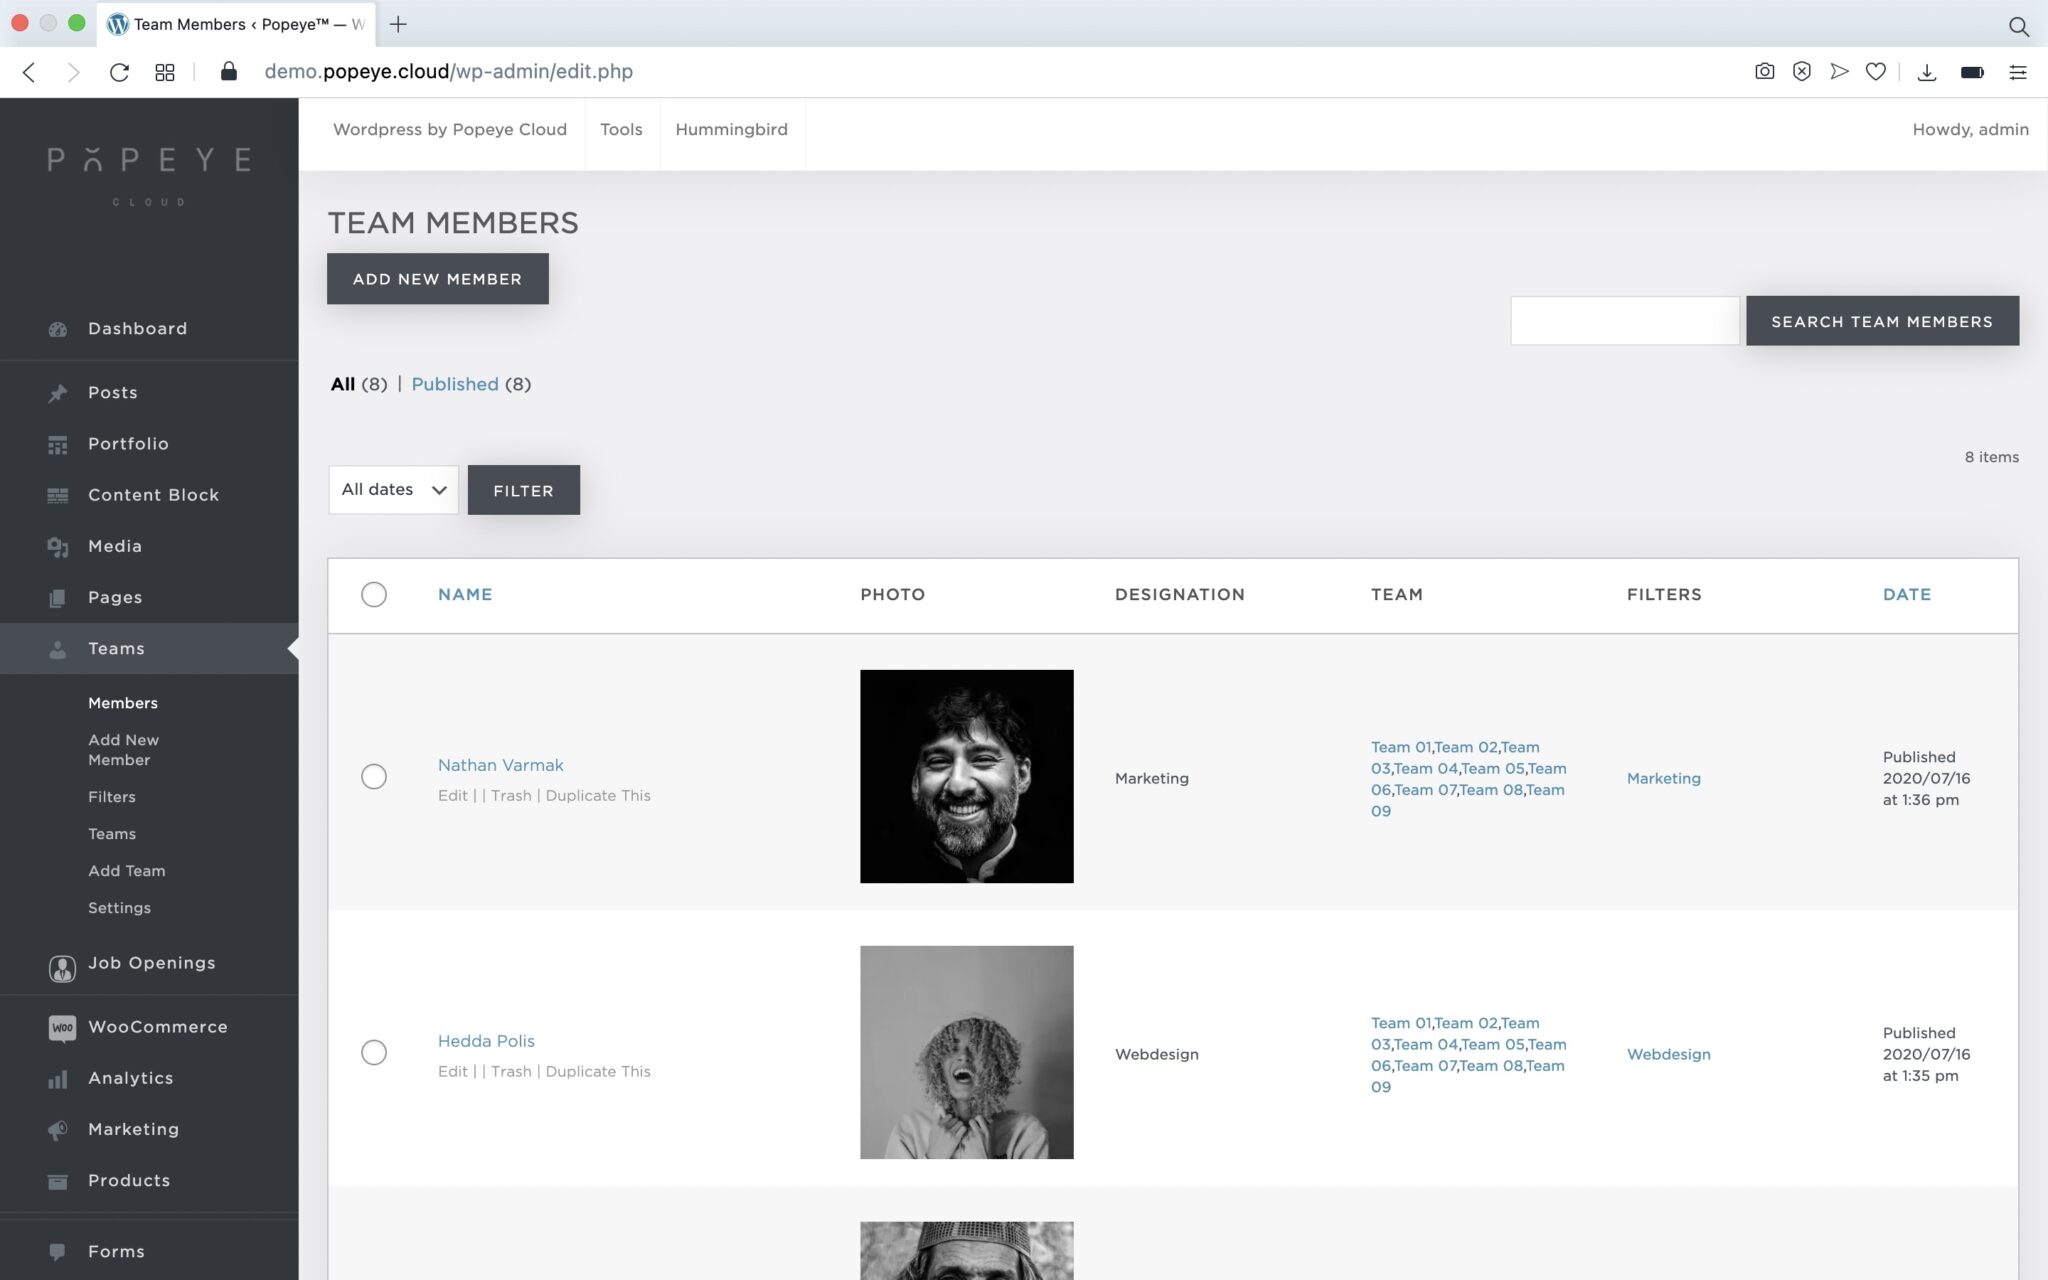
2. Adding a team member or editing

3. Adding team filters
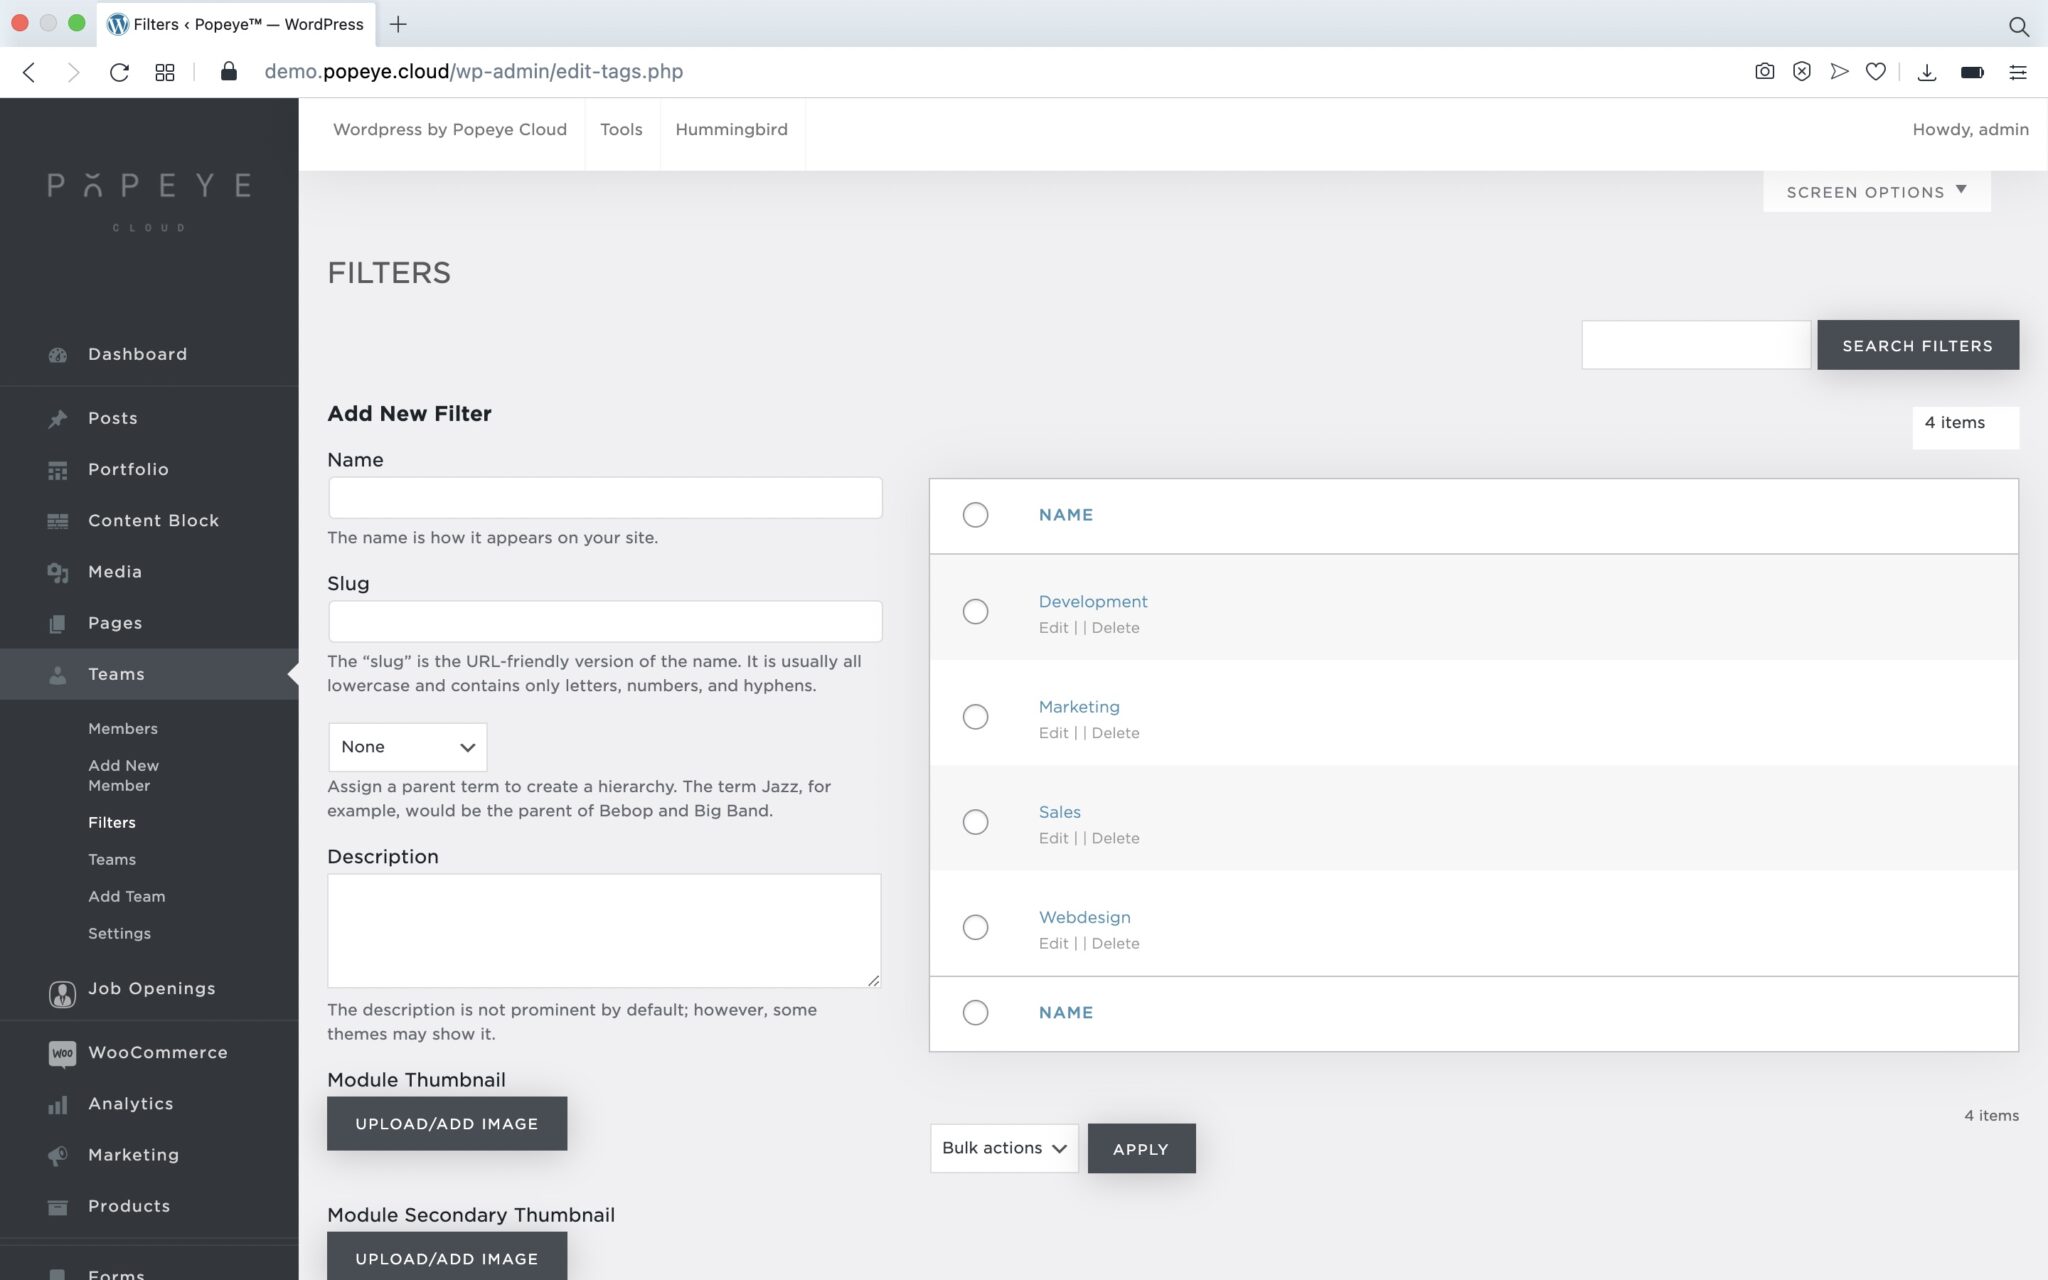
4. Adding the team

5. Adding the team
Tips 'n tricks
Don't forget to save your changes!
How to configure my Basic mailbox on iPhone / iPad?
How to configure my Basic mailbox on iPhone / iPad?
— To set up your email account on your iPhone / iPad, please follow the steps below
On your phone
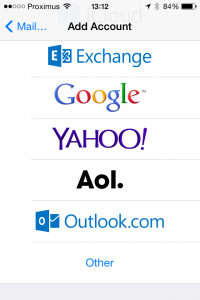
- Unlock your iPhone / iPad and follow “Settings” > “Passwords & Accounts” > “Add Account” > “Other” > “Add Mail Account”.

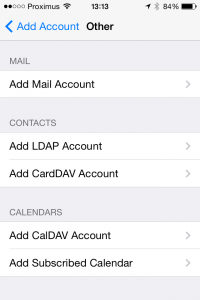
2. Enter your names, full email address that you want to setup (ex. mail@mydomain.com), the password of that account and a description that speaks to you (ex. Work Email or Personal 2, etc.) and click on “Next”.
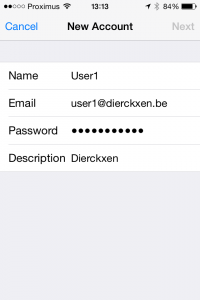
3. Choose between “IMAP” and “POP3”.
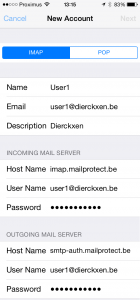
-> 1. For Host Name use your IMAP / POP3 server. —-> POP3:pop3.mailprotect.be(port:110; SSL port: 995)
—->2 IMAP:imap.mailprotect.be(port: 143; SSL port: 993)
2. For User Name use your whole email address (ex. mail@mydomain.com).
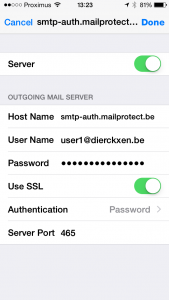
3. For Outgoing mail server, use your SMTP server.
—> 1.SMTP:smtp-auth.mailprotect.be(port: 2525; SSL port: 465)
4. Enter your email and password once again.
5. Click on “Next”.
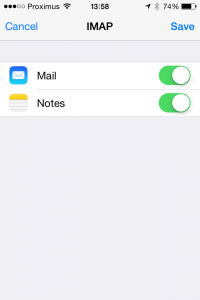
6. Click on “Save”
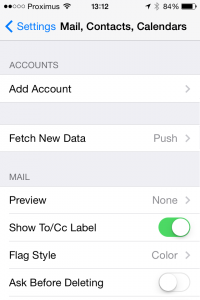
4. Now it is time to tinker the default settings.
-> 1. On your iPhone / iPad follow “Settings” > “Mail, Contacts, Calendars”.


2. Click on the account you just setup.

3. Click on the email address.
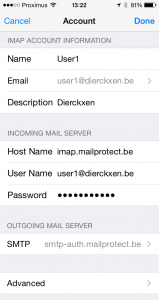
4. Scroll down and click on “SMTP”.
5. Click on the primary server.

6. Change your port to 465 and “Save”.
7. Go back to “< Account”.

8. Go back and click on “Done” at the top.
Tips 'n tricks
Change the display name that e-mail recipients see Outlook
Change the display name that e-mail recipients see
— There are many different types of email accounts you can add to Outlook, including Microsoft 365, Gmail, Yahoo, iCloud, and Exchange accounts.
Add a new account quickly
Most email accounts, including Microsoft 365, Exchange server accounts, Outlook.com, Hotmail.com, Live.com and Google accounts can be set up in a few quick steps.
- Select Outlook > Preferences > Account.
- Click the plus (+) sign > New Account.
- Type your email address > Continue.

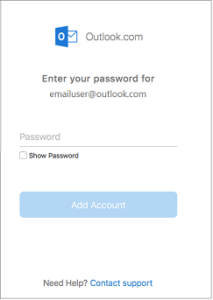
4. Type your password > Add Account. (Your screen might look different from this one depending on the account you’re adding.)
5. If adding a Yahoo, or other IMAP or POP account, you might be taken to those sites and asked to allow Outlook to access your mail, contacts, and calendars. Click Allow to continue.
6. If you are adding Gmail, you will get a prompt within Outlook to sign-in to your Google account. This is for users who are on Build 16.15.18070902 and higher.

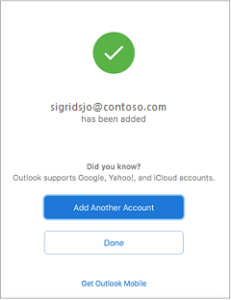
7. Select Done to start using Outlook 2016 for Mac.
Tips 'n tricks
Delete e-mails from the server if you chose a POP configuration. Make sure your online mailbox has not become full, by deleting deleted e-mails there too. Follow these extra steps for this. This is done automatically with an IMAP configuration. Delete e-mails from the server in Apple Mail (POP only)
Add an e-mail account to Outlook 2019
Add an e-mail account to Outlook 2016
— Once your Basic mailbox has been created, go to Outlook on your Windows computer to set up your mailbox.
Follow these steps on your Windows computer:
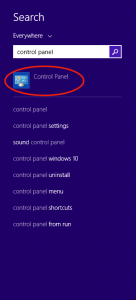
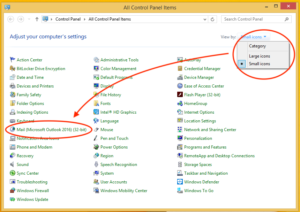
- Go to the Windows Control Panel
Use the Windows search function to get there (see image)
2. Click on “Mail (Microsoft Outlook)”
This item is only visible if you choose the view with large or small icons at the top right, not the category view (see image).
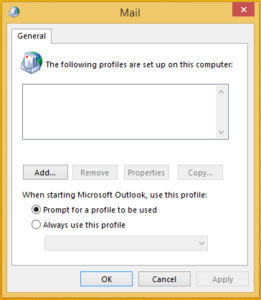
3. If you have not created a profile before, you will get the screen below (see image) where you have to click on “Add”.
Choose a name for your profile and confirm. Click “Apply” to continue.
4. Enter the details of your mailbox:
Your Name: Fill in your name (to appear in your email)
Email Address: Fill in your email address
Password: Fill in your password and repeat
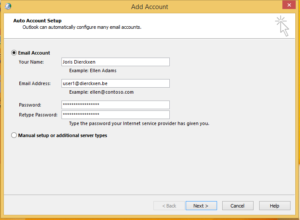
5. Click on “Next” to continue. Outlook will try to configure your mailbox automatically.
6. Click on “Next” to complete the configuration of your mailbox
Tips 'n tricks
Delete e-mails from the server if you chose a POP configuration
Make sure your online mailbox has not become full, by deleting deleted e-mails there too. To do this, follow these extra steps: Delete e-mails from the server in Outlook (only POP)
Spam filtering with Akismet
Spam filtering with Akismet
— Secure forms on your website using Akismet
Activating Akismet
The first step is to activate the Akismet plugin. Since the plugin package of Akismet is bundled with Popeye, there is no need to manually install it. Move to the Plugins menu and simply activate the plugin titled Akismet Anti-Spam.
- Go to https://domainname.be/wp-admin/plugins.php Example: https://popeye.be/wp-admin/plugins.php
- Plugins -> Akismet Anti-Spam -> activate
- Settings -> fill in the API key
- Save
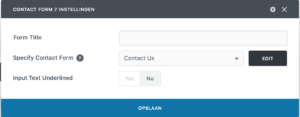
Deploying Akismet in a contact form
To use Akismet to protect your contact form, you need to give specific options to input fields (form-tags).
- Go to the contact form in the backend -> edit
akismet:author
You give this option to the field where submitters input their names.
Example: [text* your-name akismet:author]
akismet:author_email
You give this option to the field where submitters input their email addresses.
Example: [email* your-email akismet:author_email]
Testing the spam filtering
To test if the spam filtering is working correctly, try inputting “viagra-test-123” into the name (akismet:author) field or “akismet-guaranteed-spam@example.com” into the email (akismet:author_email) field, and submitting the form. With these magic words reserved for testing, Akismet must return a “spam” response. If it is working as expected, you’ll see an orange-bordered error message.