
How do I setup stock management with low stock notifications?
How do I setup stock management with low stock notifications?
— Learn everything about stock notifications
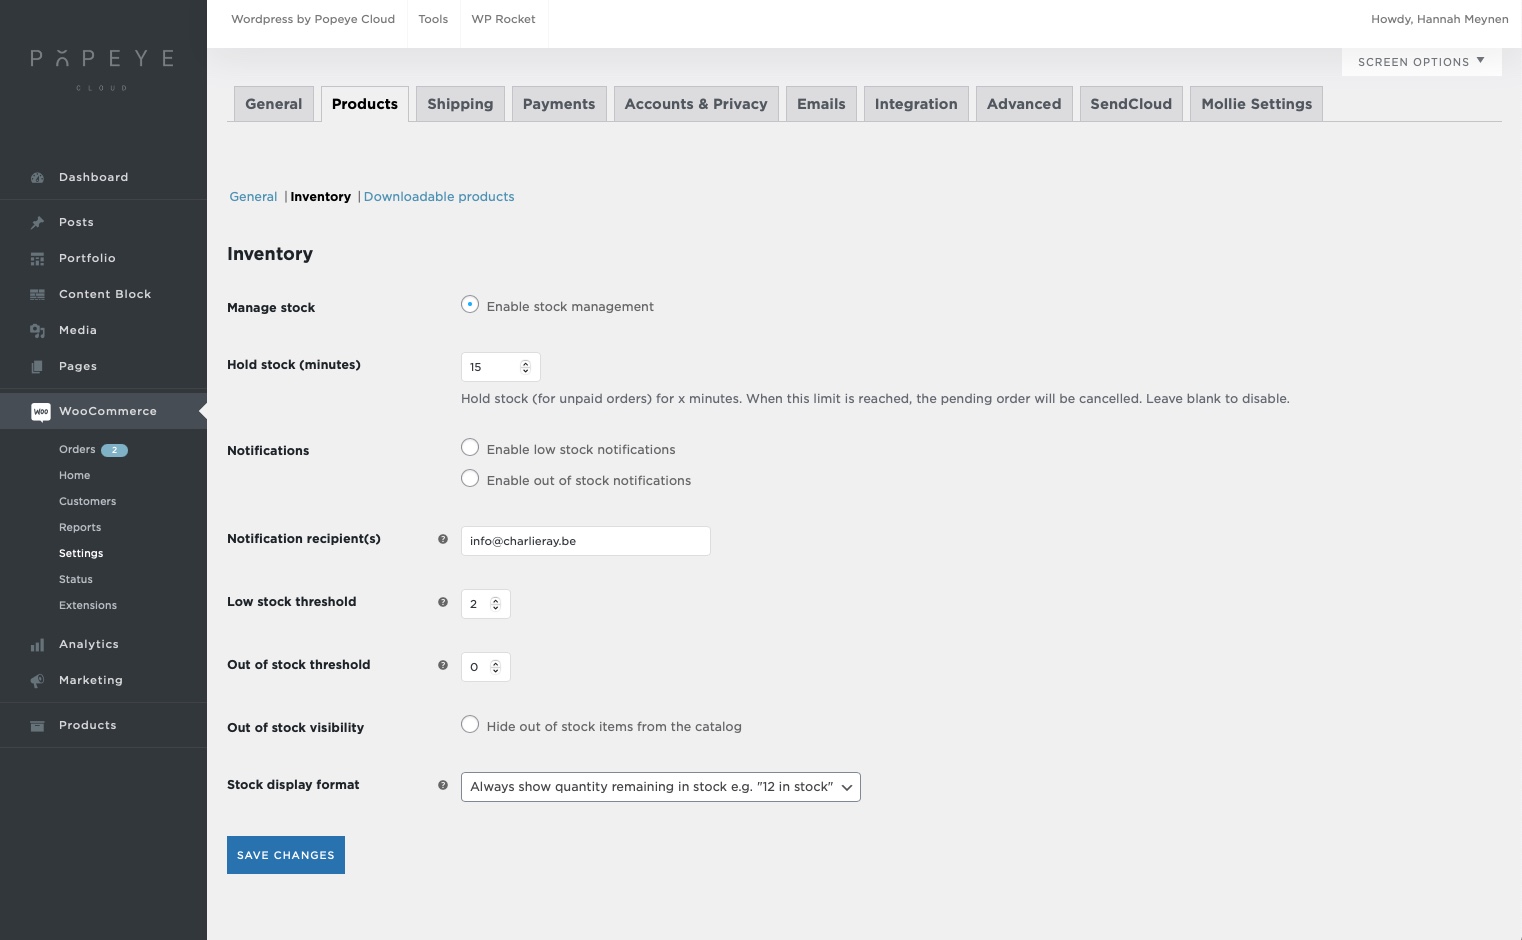
Go to Woocommerce > settings > tab ‘products’ > inventory
Tips 'n tricks
Don't forget to save your changes!
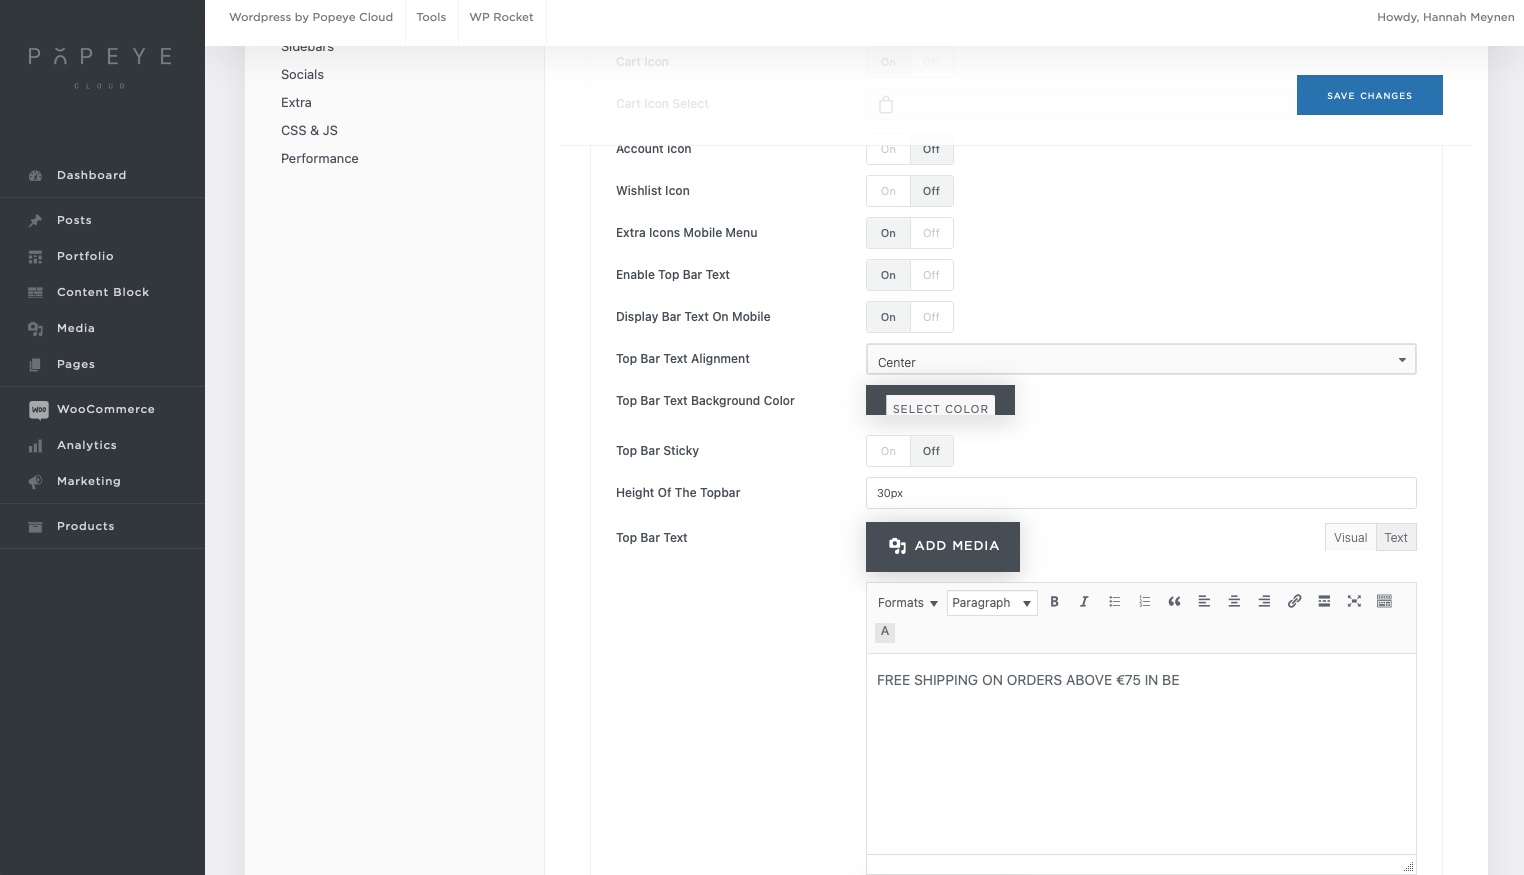
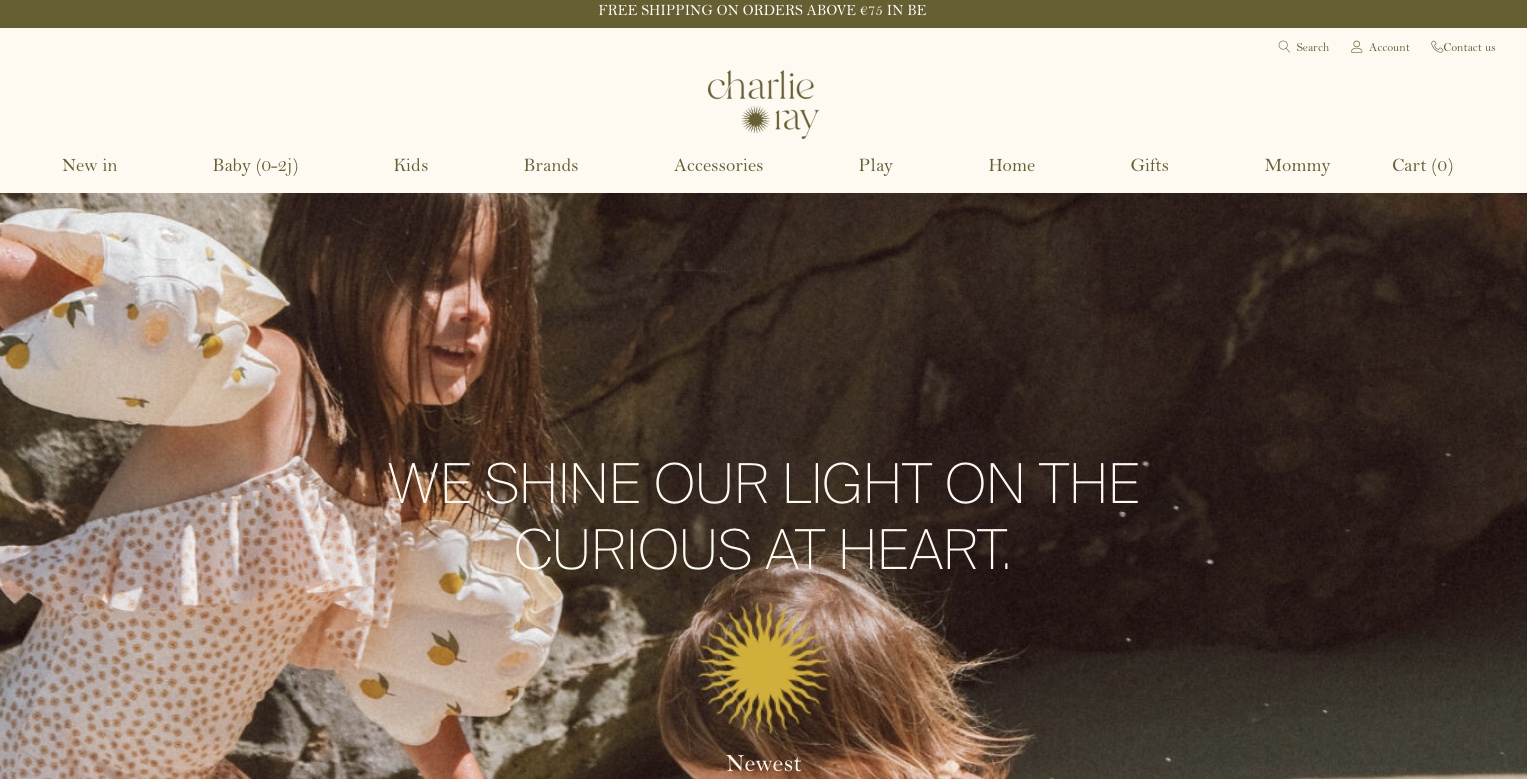
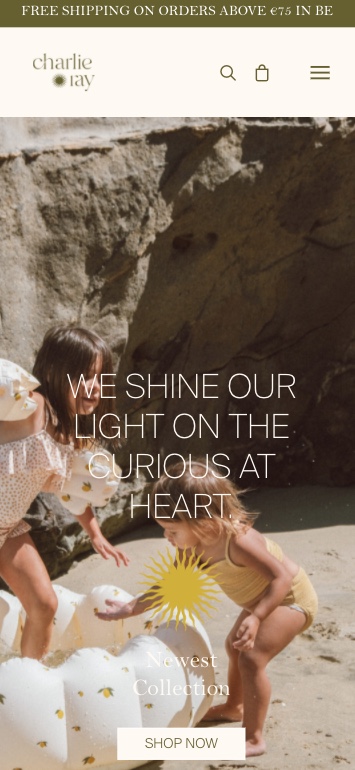
How to create or change the top bar message?
Changing or adding a fixed top bar for promotion notifications or other messages
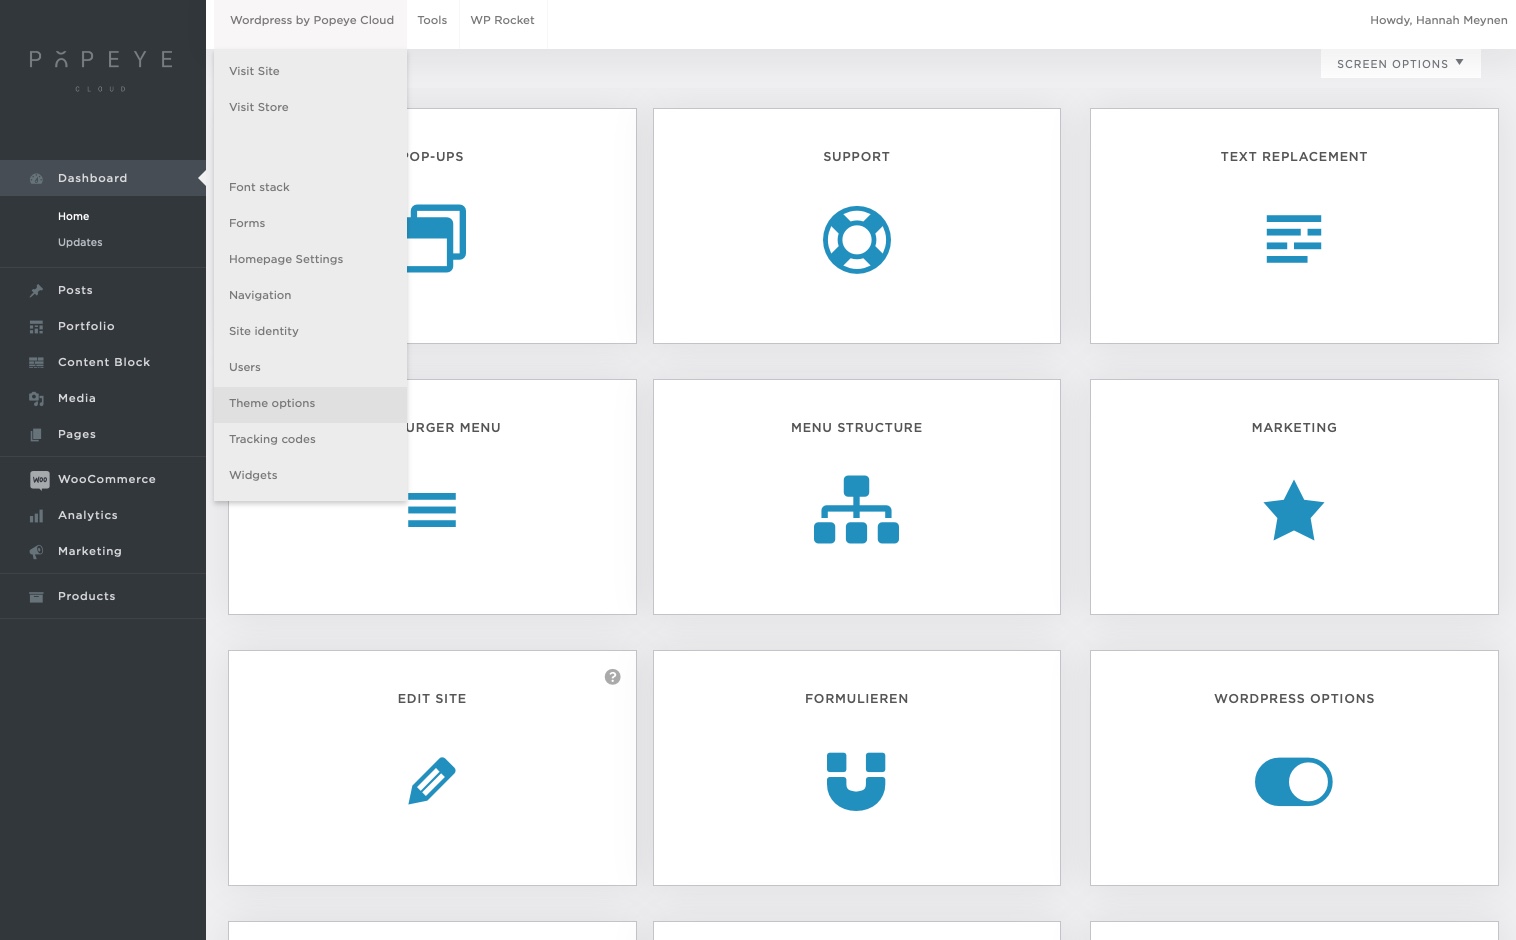
- Go to Wordpress by Popeye Cloud > theme options
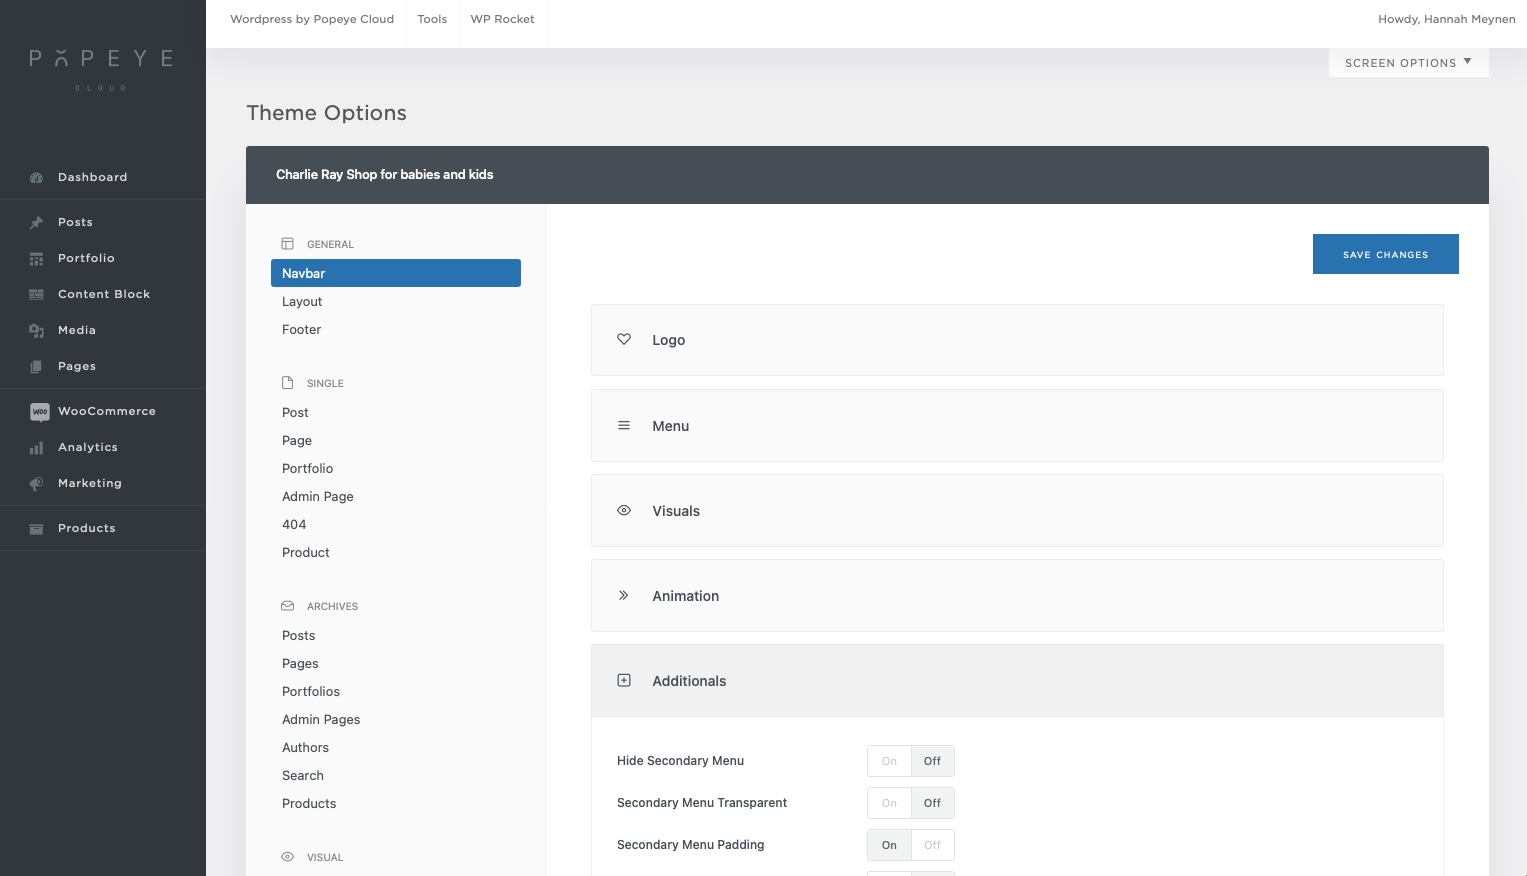
- Click open ‘additionals’
- Enable the top bar text (on)
- Enable on mobile if you prefer this
- Choose alignment of the text
- Choose the background color of the bar
- Choose the height: mostly 30px is fine
- Scroll until you see the ‘Top bar text’
- You can fill in the field for your text
- Click save changes
- Clear your cache if you don’t see any changes
Tips 'n tricks
Explore with it and you'll get away with it quickly!
How do I add size attributes?
Adding sizes to your webshop
— Learn everything about adding sizes to specific products
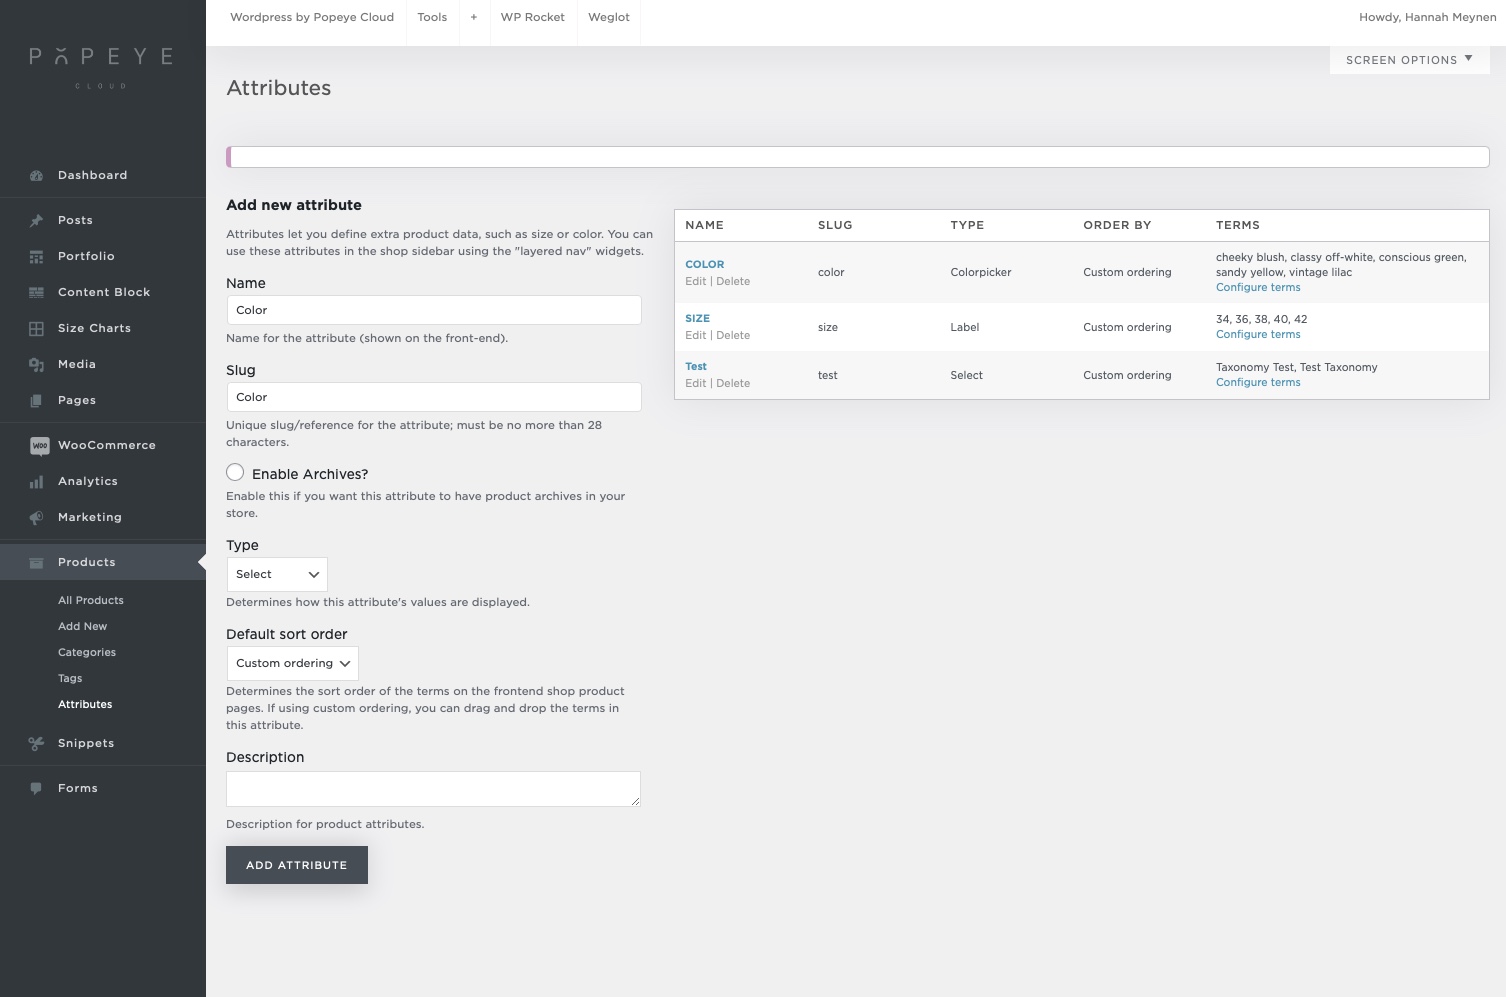
Adding size attributes
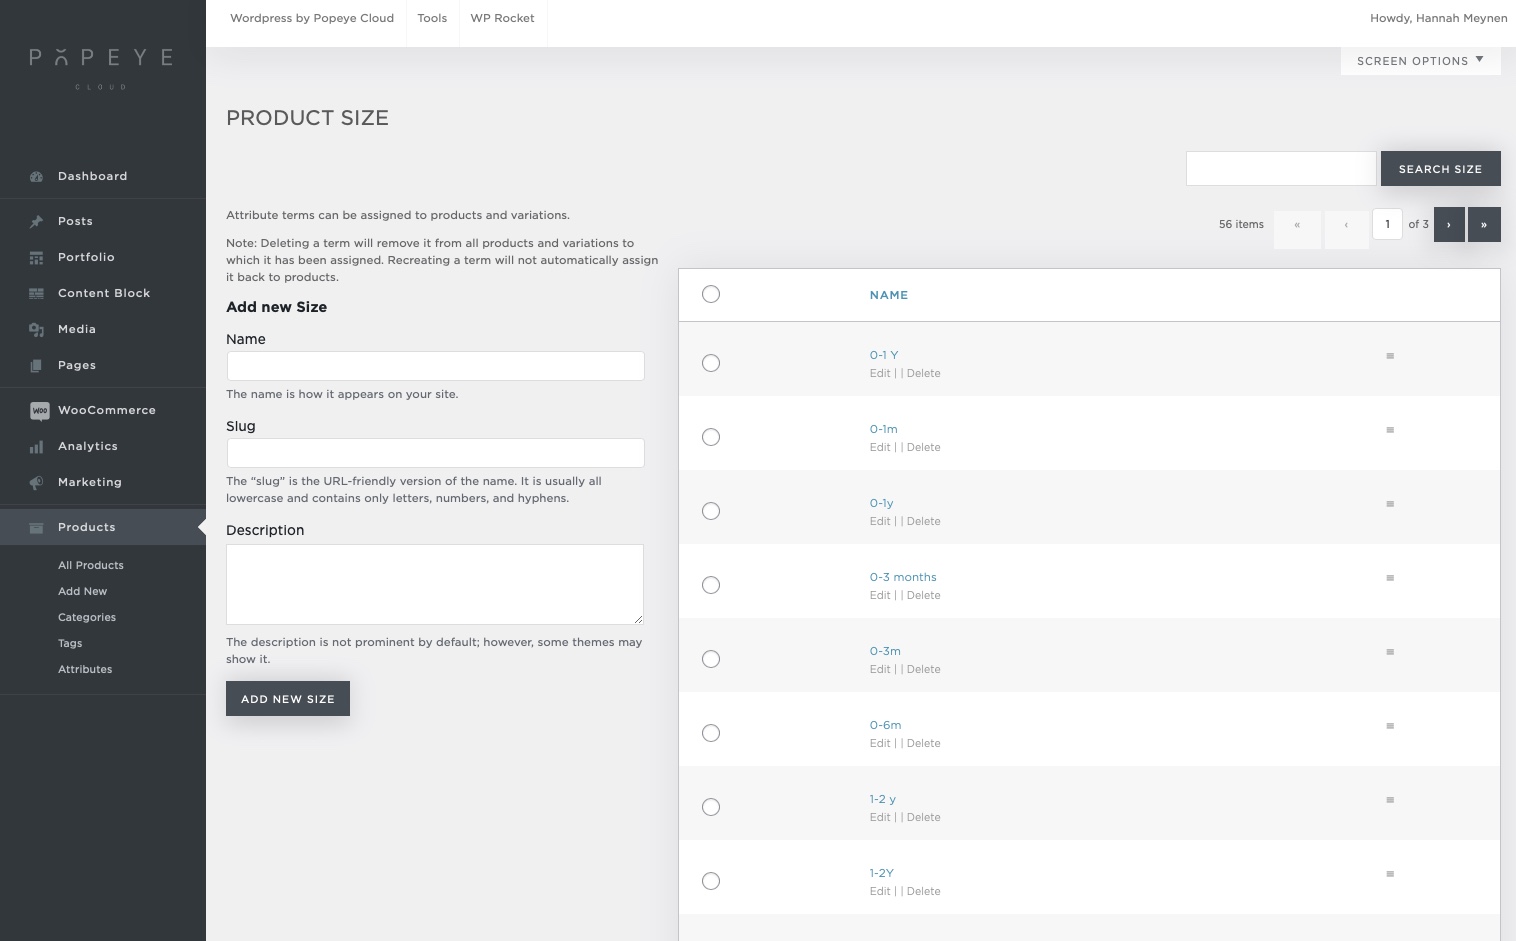
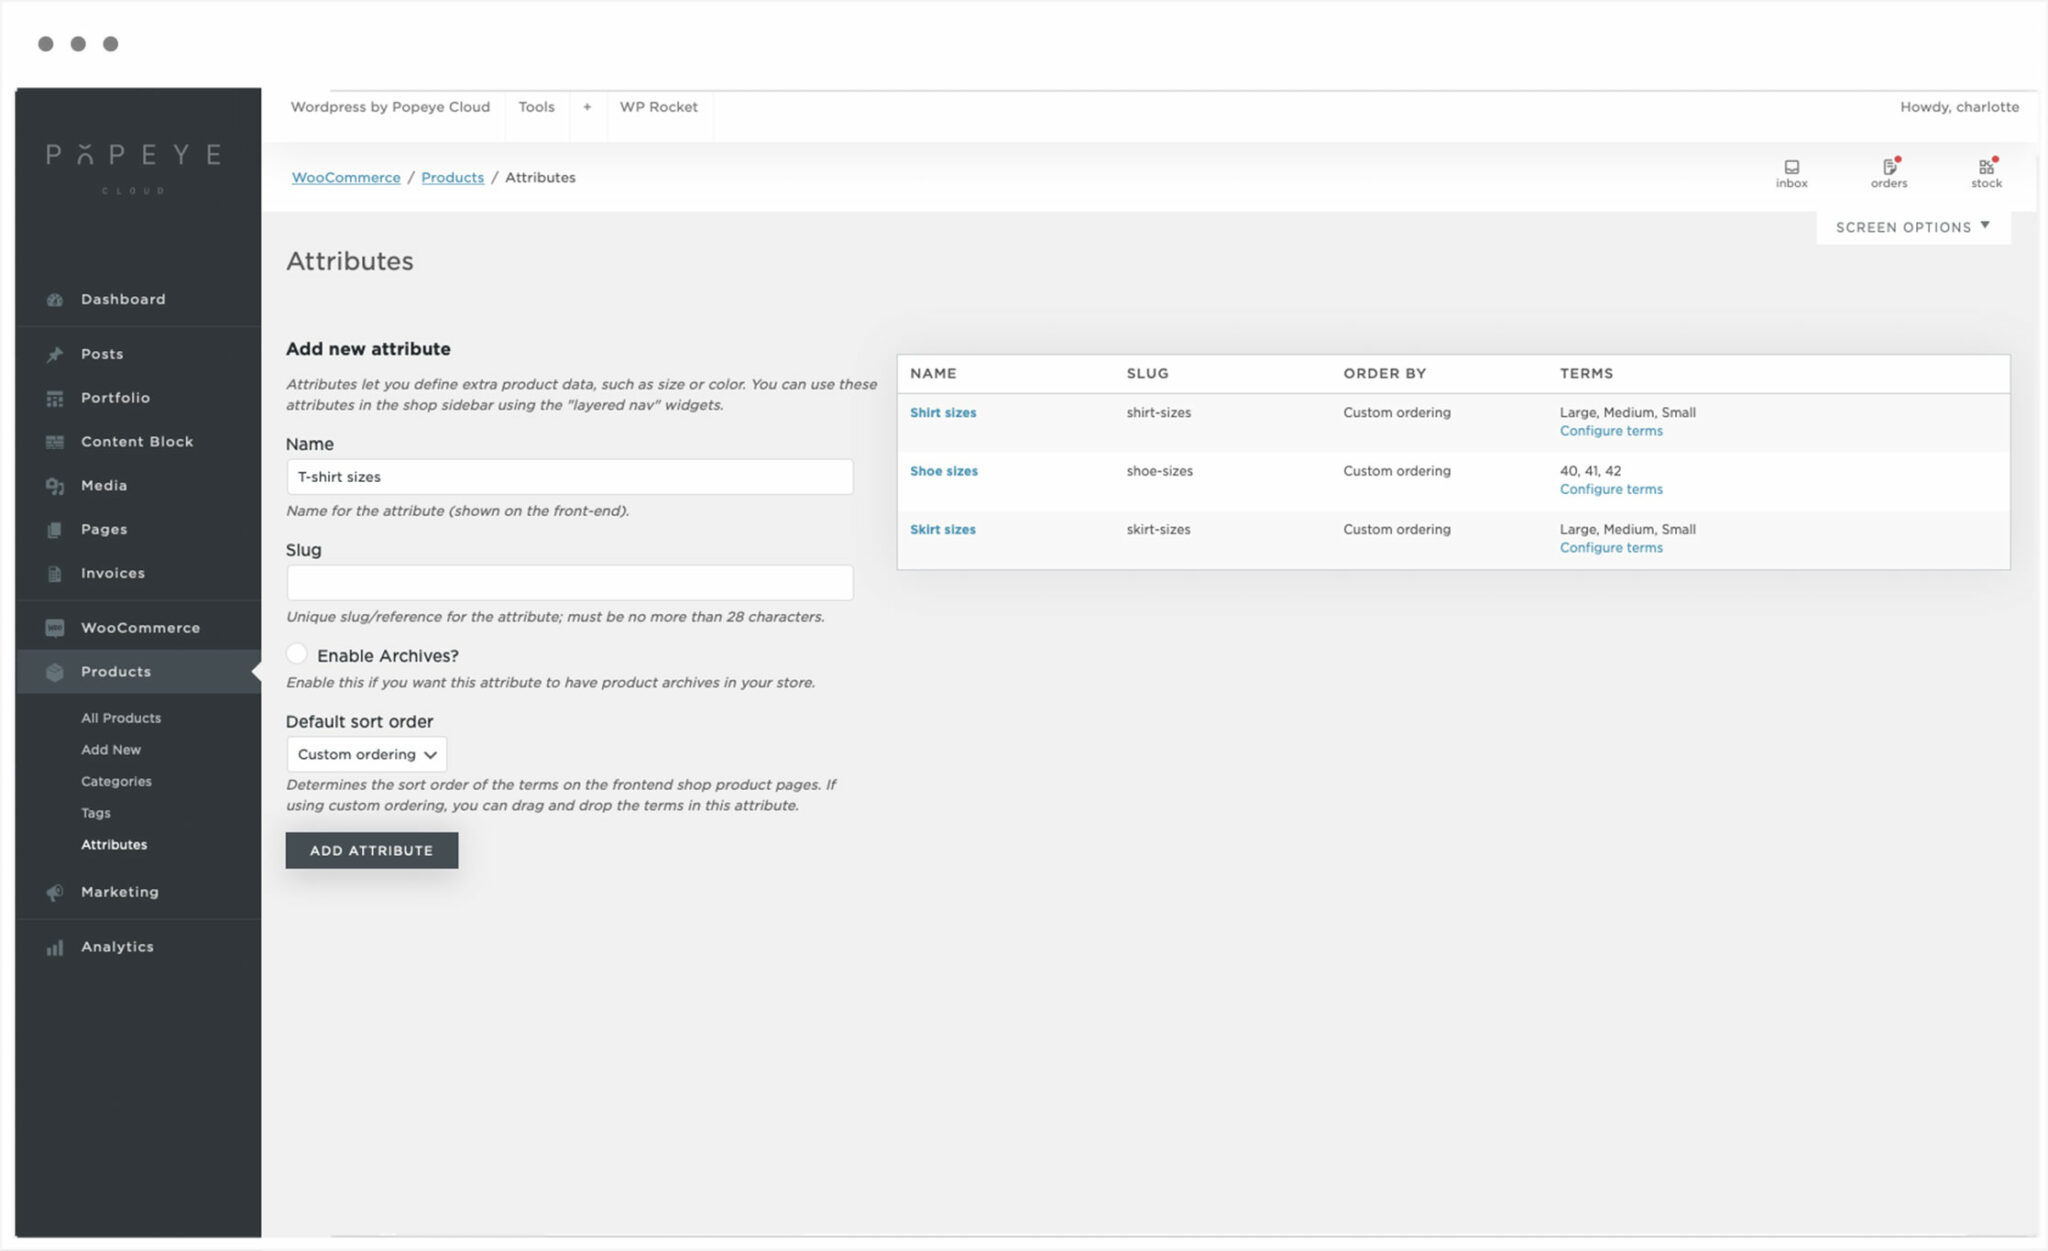
Go to products > attributes
If you want to add colors we first start by making a new attribute.
- On the left side of the page you can fill in the name of your new attributes group for example ‘size’
- By slug you fill in the same word as name
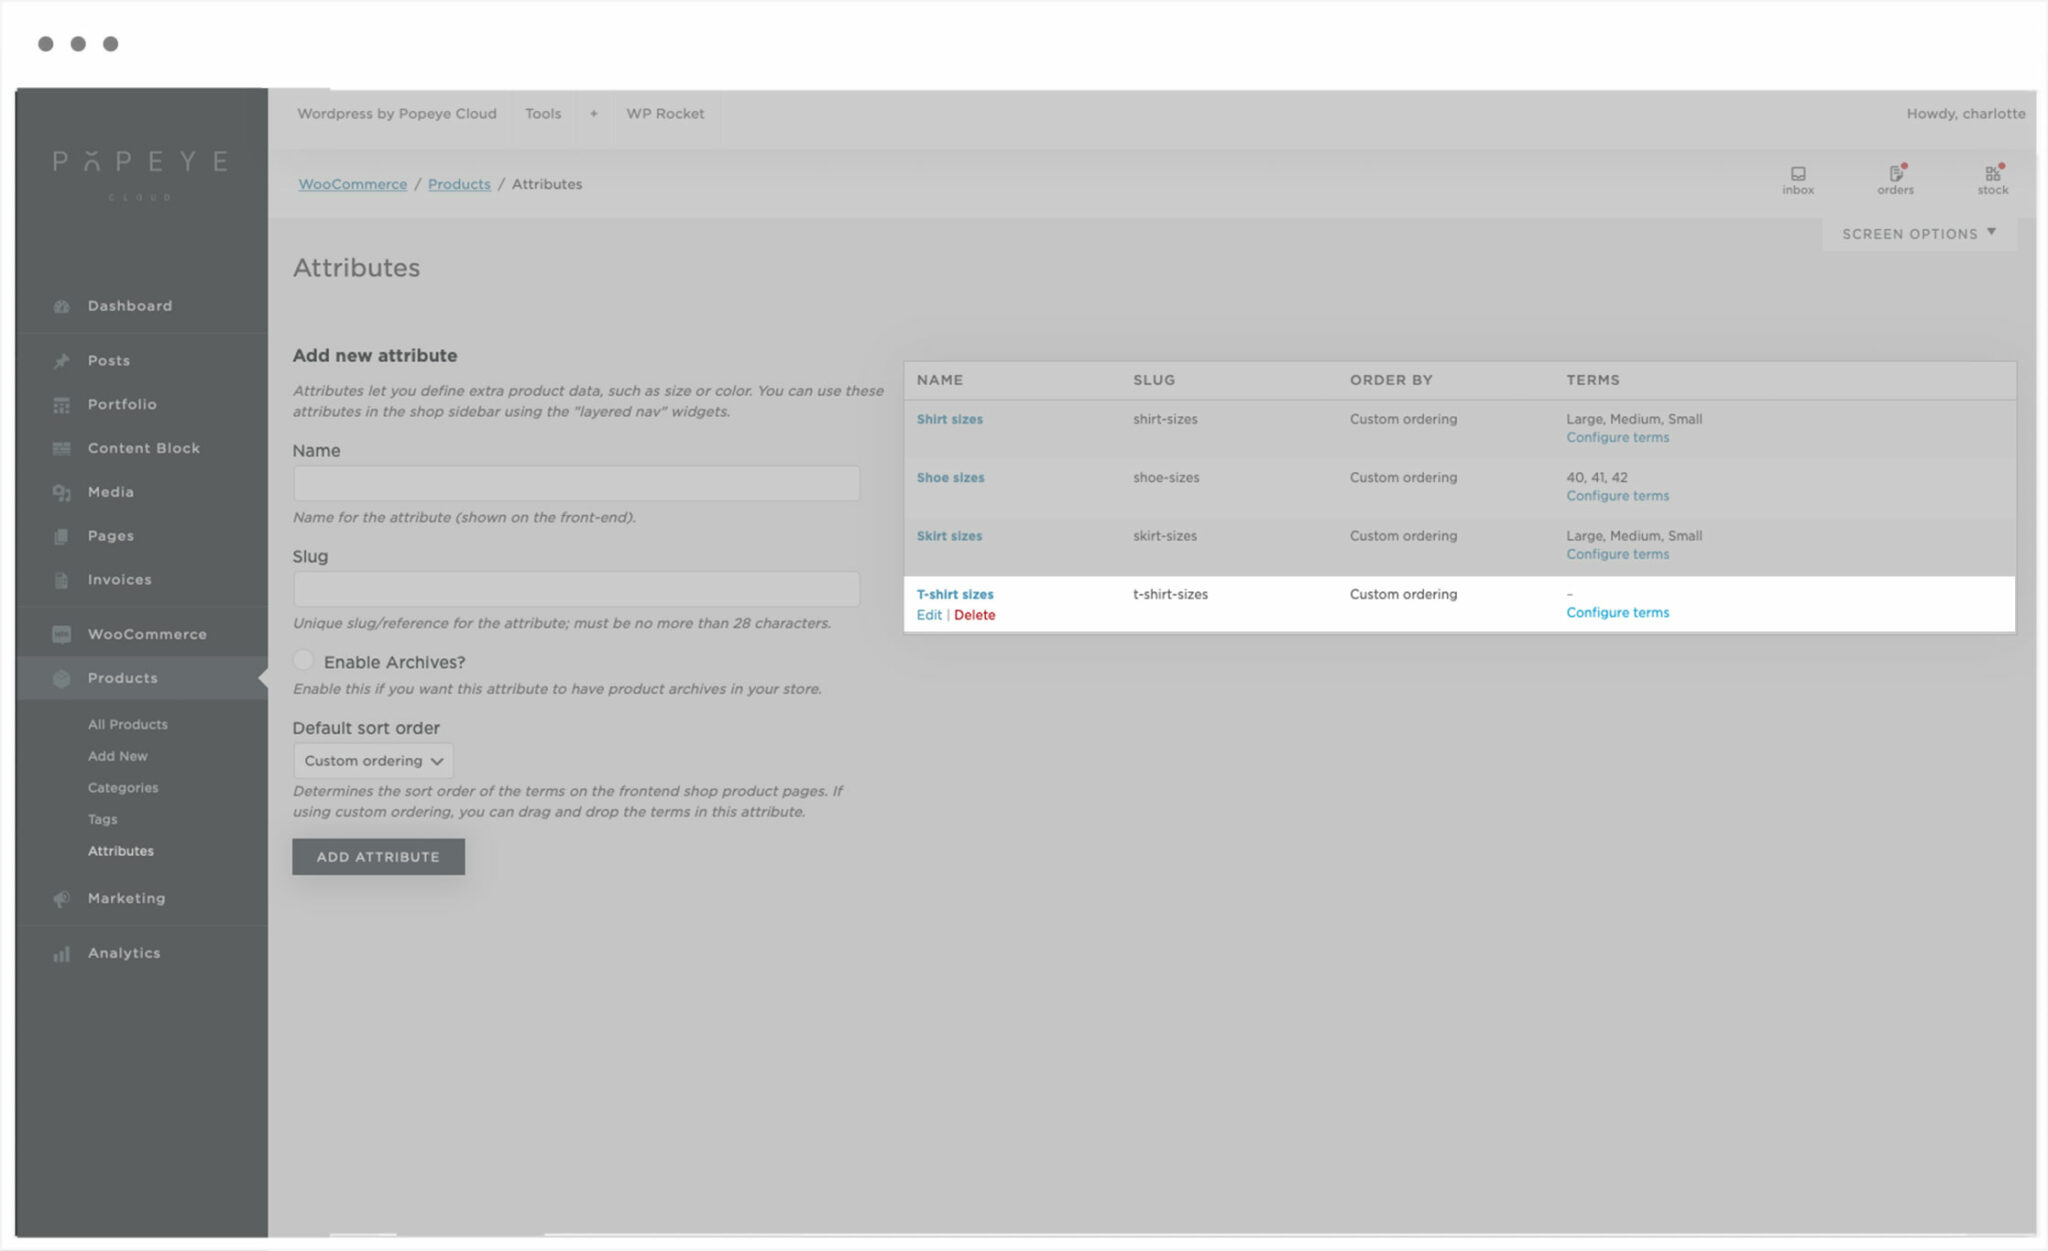
- Then click the button ‘add attribute’
You’ll see it’s added to the right column. Next thing: click ‘configure items’
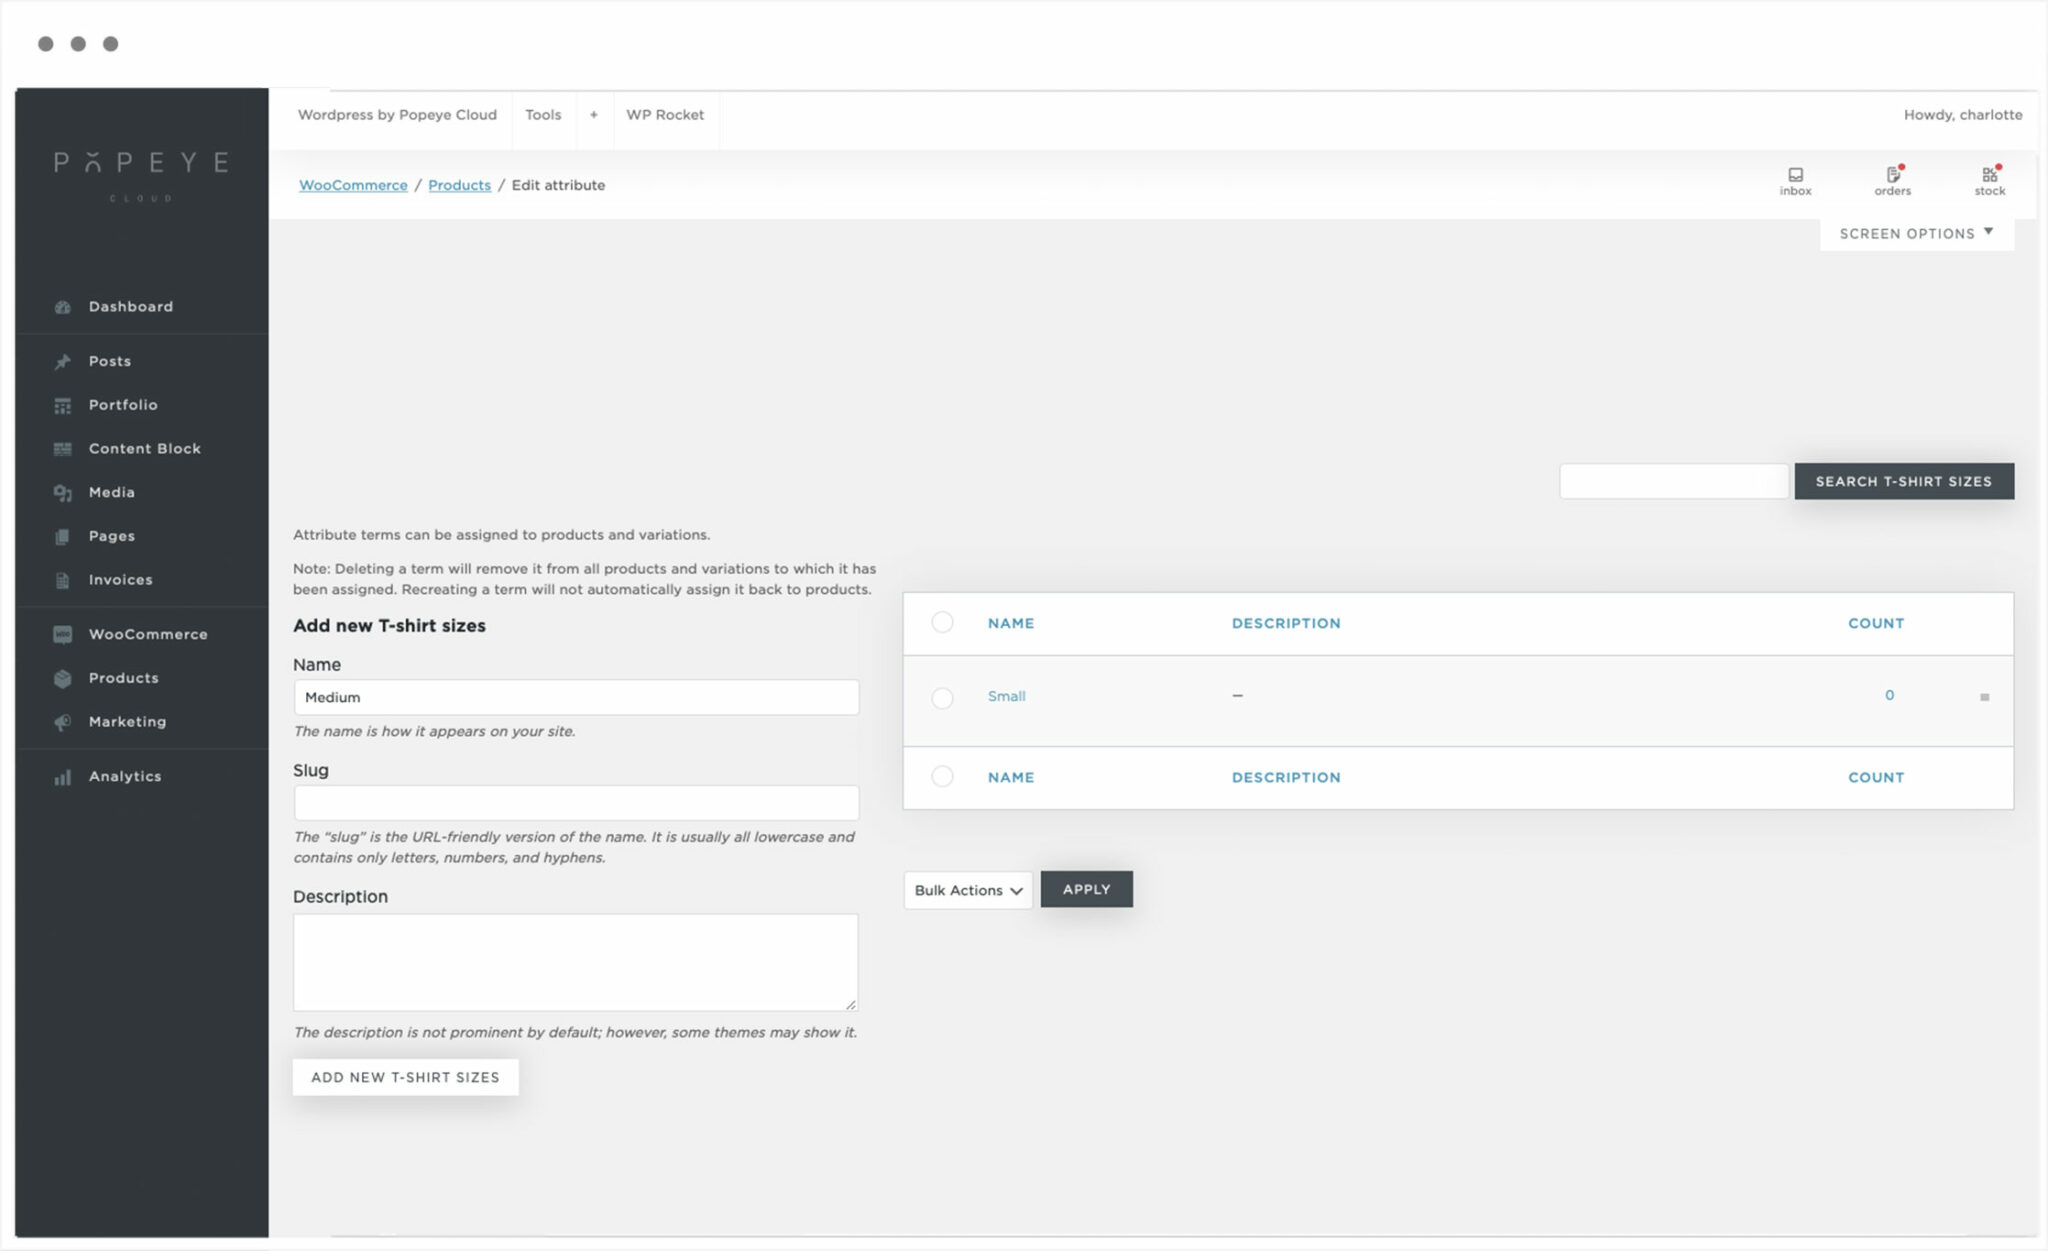
- Add all the sizes you need in your webshop follow next steps
- Fill in the name and slug with the size (left column)
- For example “36, 38, 40…”
- Click on the button ‘add new size’
- The sizes will be added in the right column
- If you accidentally put in the wrong name you can click on ‘edit’ for that item and change the name, then click update
Tips 'n tricks
Don't forget to save your changes!
How do I add color attributes and color swatches?
Adding color attributes and color swatches for your shop
— Learn everything about adding colors to your products
Adding color attributes
Go to products > attributes
If you want to add colors we first start by making a new attribute.
- On the left side of the page you can fill in the name of your new attributes group for example ‘color’
- By slug you fill in the same word as name
- Default sort order: choose color picker if you want to use the swatches if not just go for select
- Then click the button ‘add attribute’
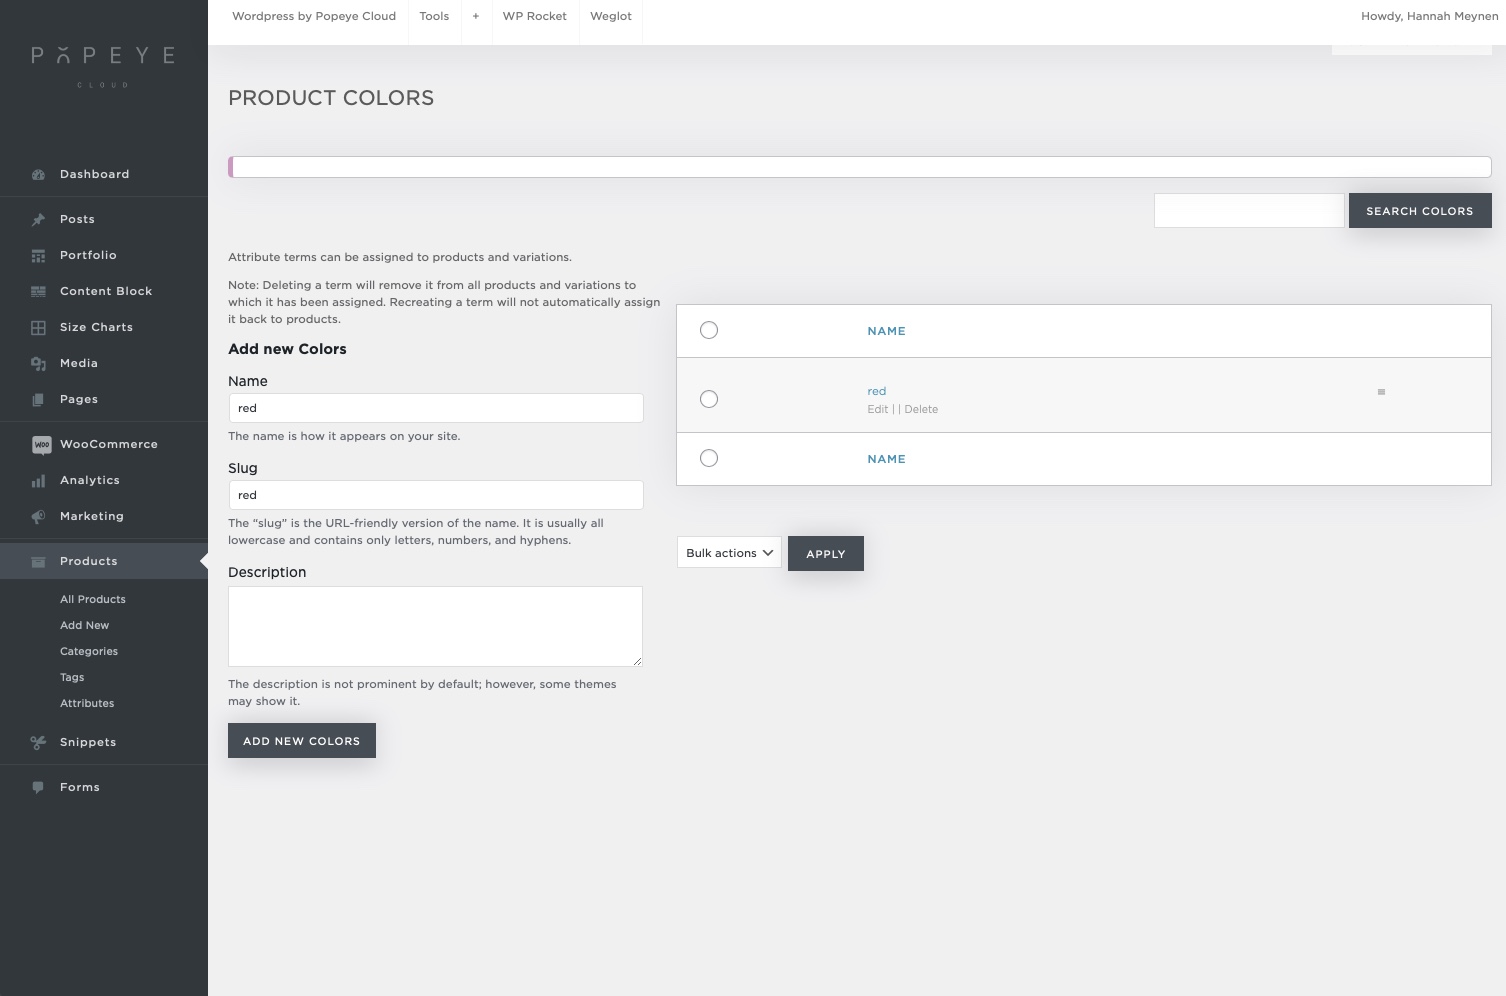
You’ll see it’s added to the right column. Next thing: click ‘configure items’
- Add all the colors you need in your webshop
- Fill in the name and slug with the color name
- For example red
- Click on the button ‘add new colors’
- The color will be added in the right column
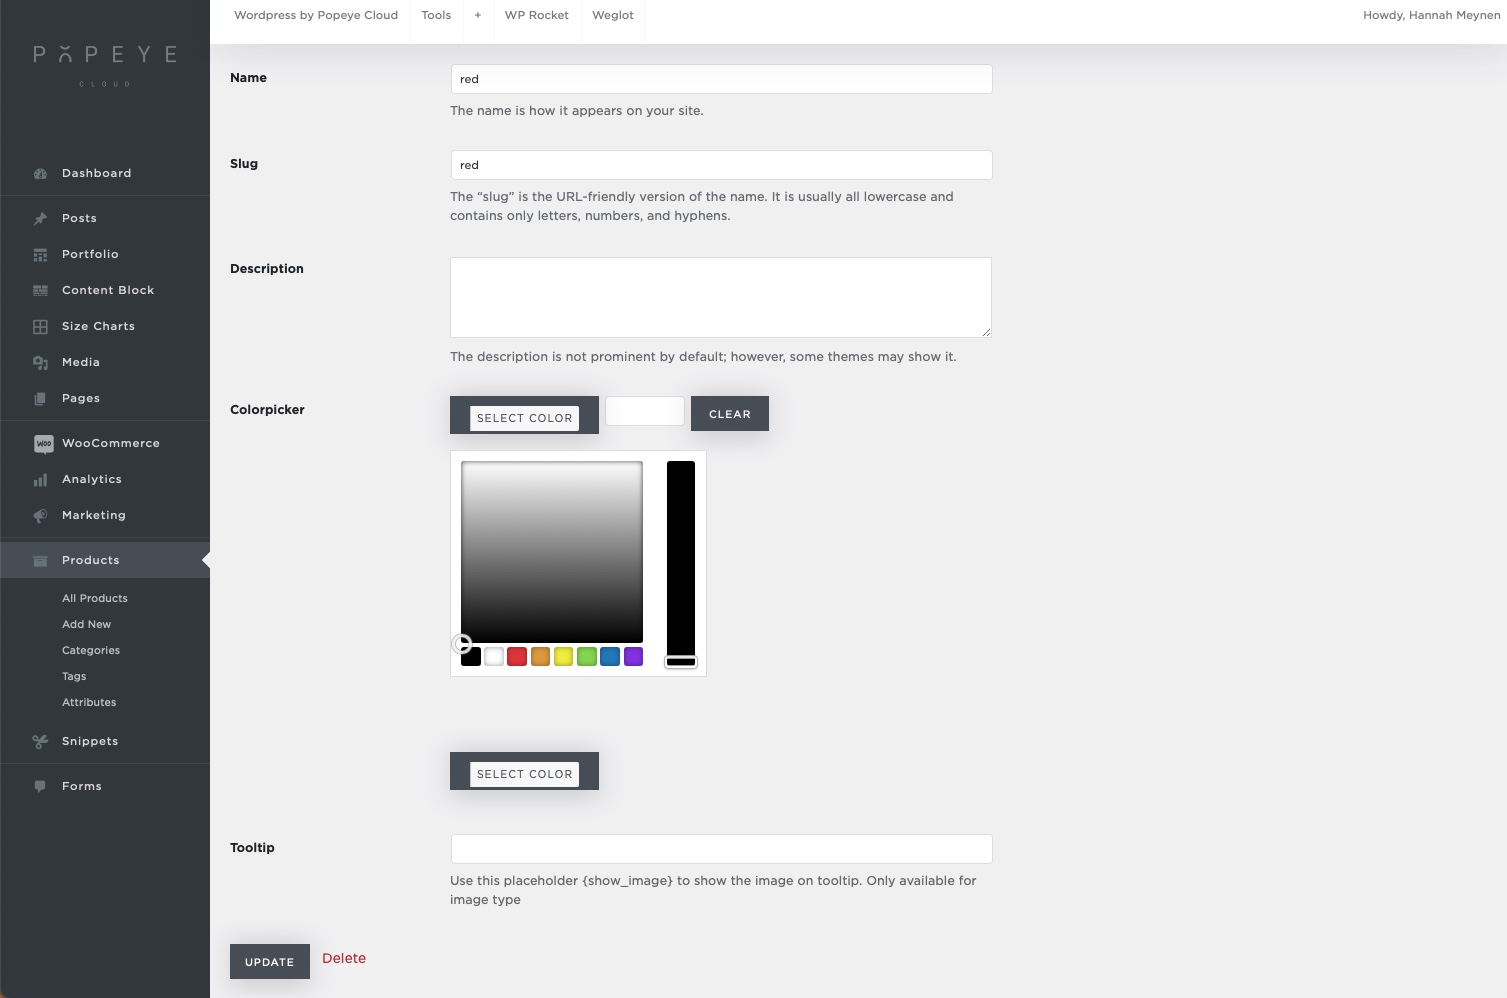
- To give the color red the correct color swatch click on ‘edit’
Adding color swatches
7. Click on ‘select color’ to define the correct color for your swatch
8. Click update
Tips 'n tricks
Don't forget to save your changes!
How do I setup shipping methods?
Setting up shipping methods for your webshop
— Decide to which countries your webshop ships and which not.
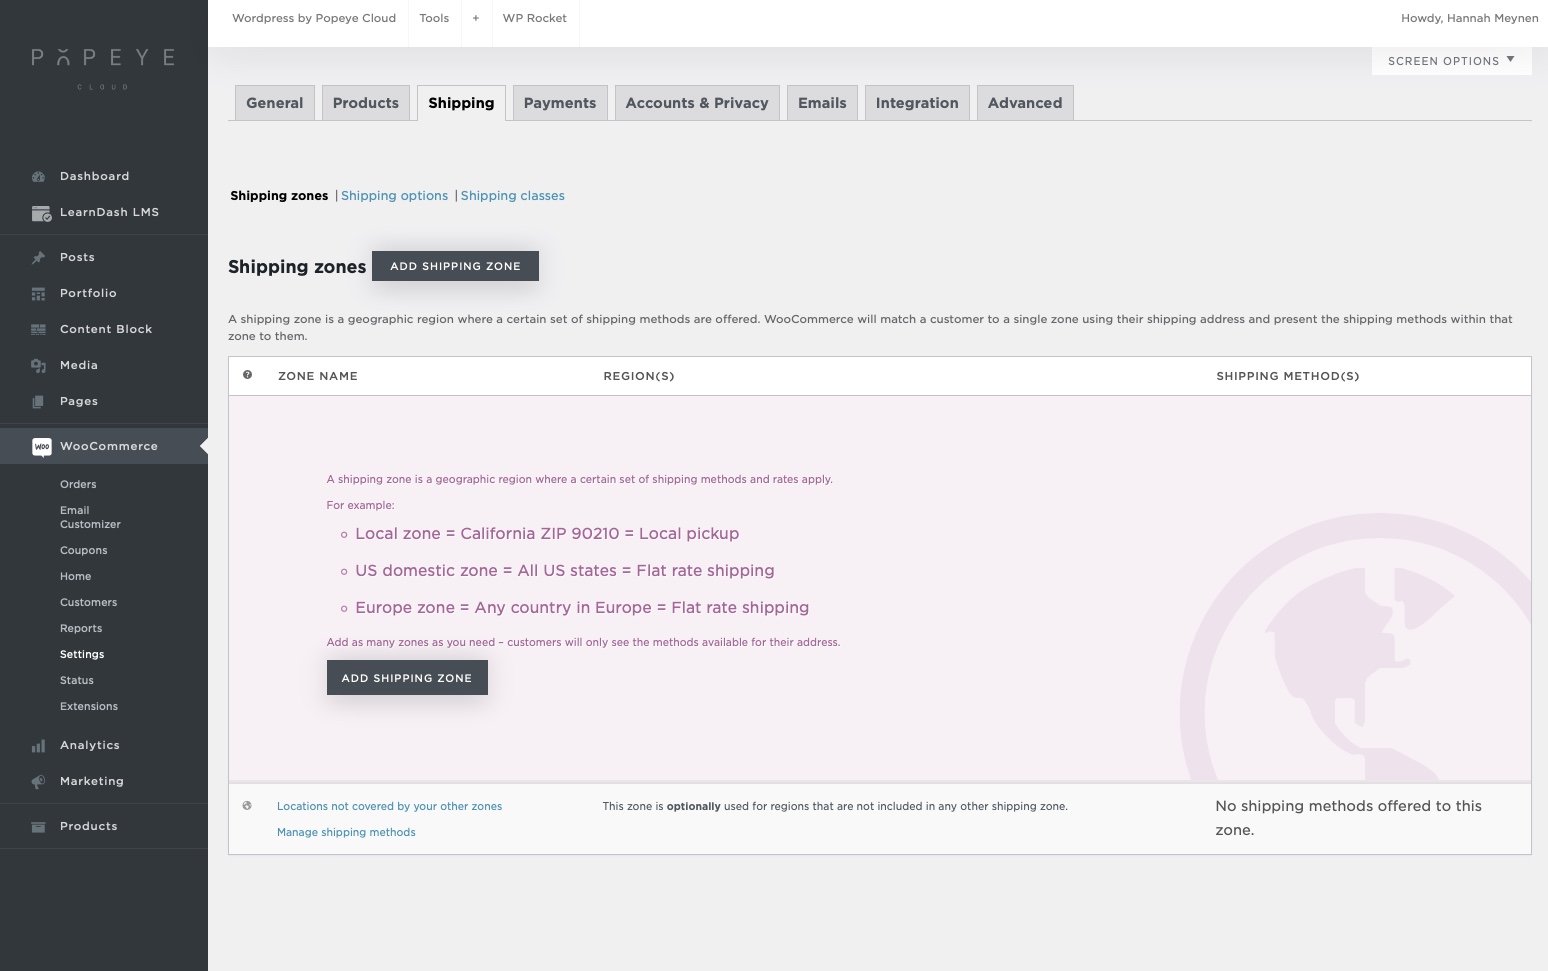
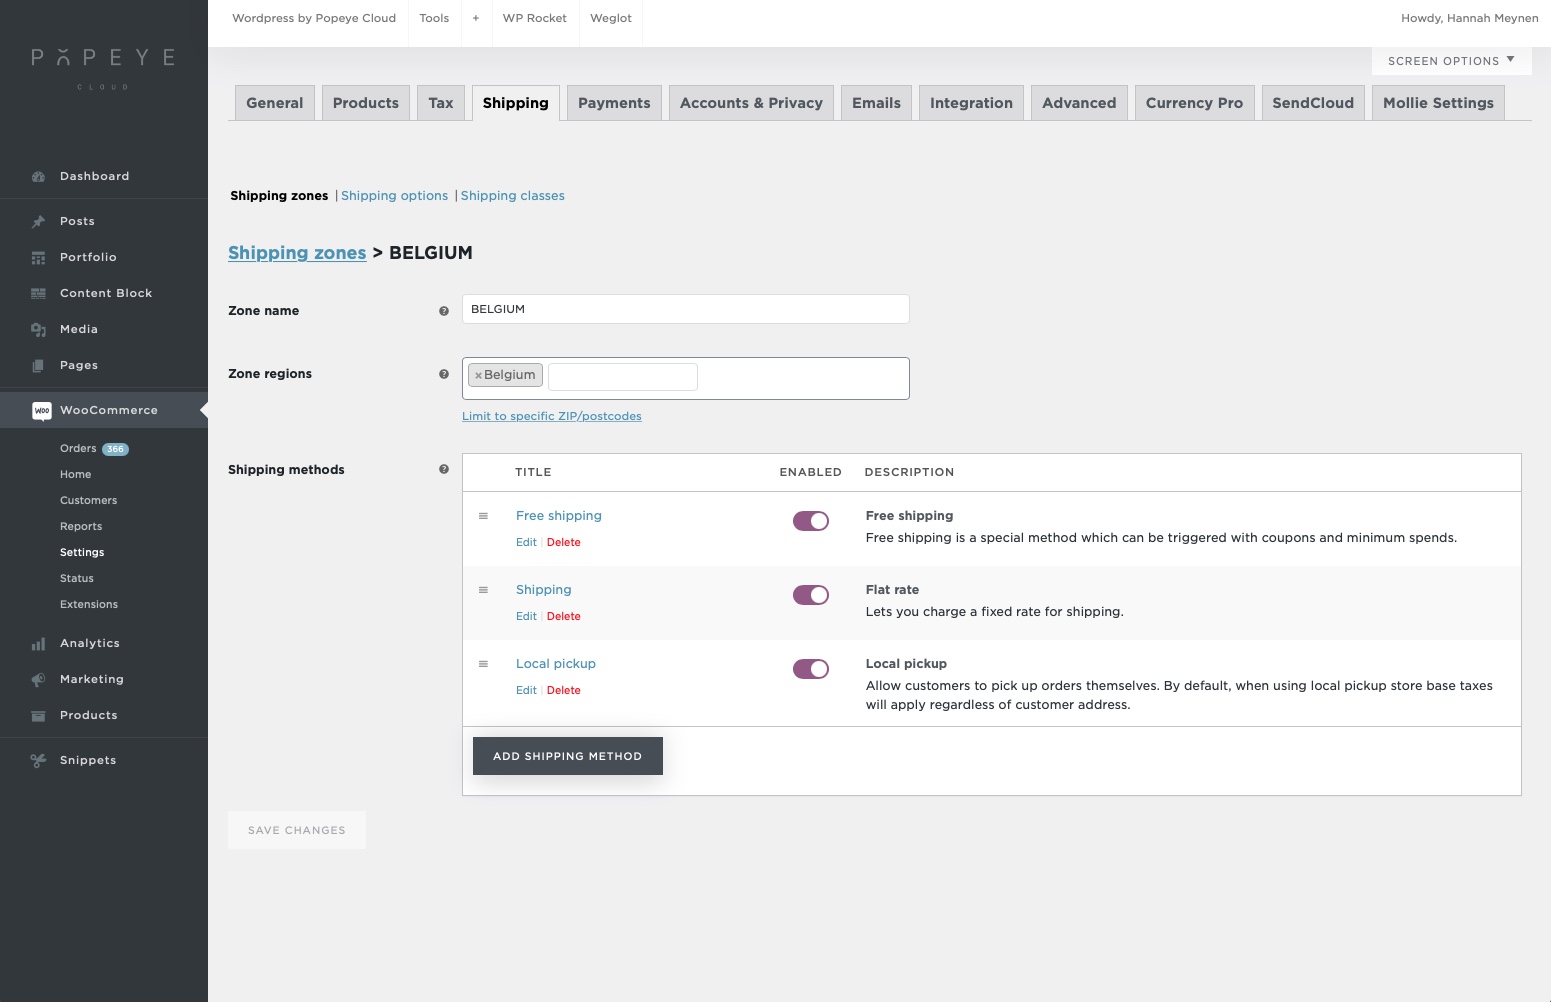
Go to Woocommerce > settings > go to the tab ‘shipping’
You now find yourself in the shipping zones. A shipping zone is a geographic region where a certain set of shipping methods are offered. Your webshop will match a customer to a single zone using their shipping address and present the shipping methods within that zone to them.
If you want to add a shipping zone > click add shipping zone
Zone name: fill in the name of the specific zone you are adding. In this case it’s Belgium.
Zone regions: if you want to set the shipping methods for Belgium only choose the right country, in this case Belgium.
Shipping methods: choose which options the customers within Belgium have for shipping in Belgium. In this case we have free shipping, shipping (flat rate), local pickup. If you want to add another shipping method click the button ‘add shipping method’.
Tips 'n tricks
Explore with it and you'll get away with it quickly!
How to add attributes for variations use
How to add attributes for variations use
— Add attributes to set role-based pricing on a variation by variation basis.
Products attributes
Products > Attributes > Add new attribute by entering a name
Attributes let you define extra product data, such as size or color.
Terms > configure terms
Attribute terms can be assigned to products and variations.
Note: Deleting a term will remove it from all products and variations to which it has been assigned. Recreating a term will not automatically assign it back to products.
Add new sizes name e.x: small, medium, large
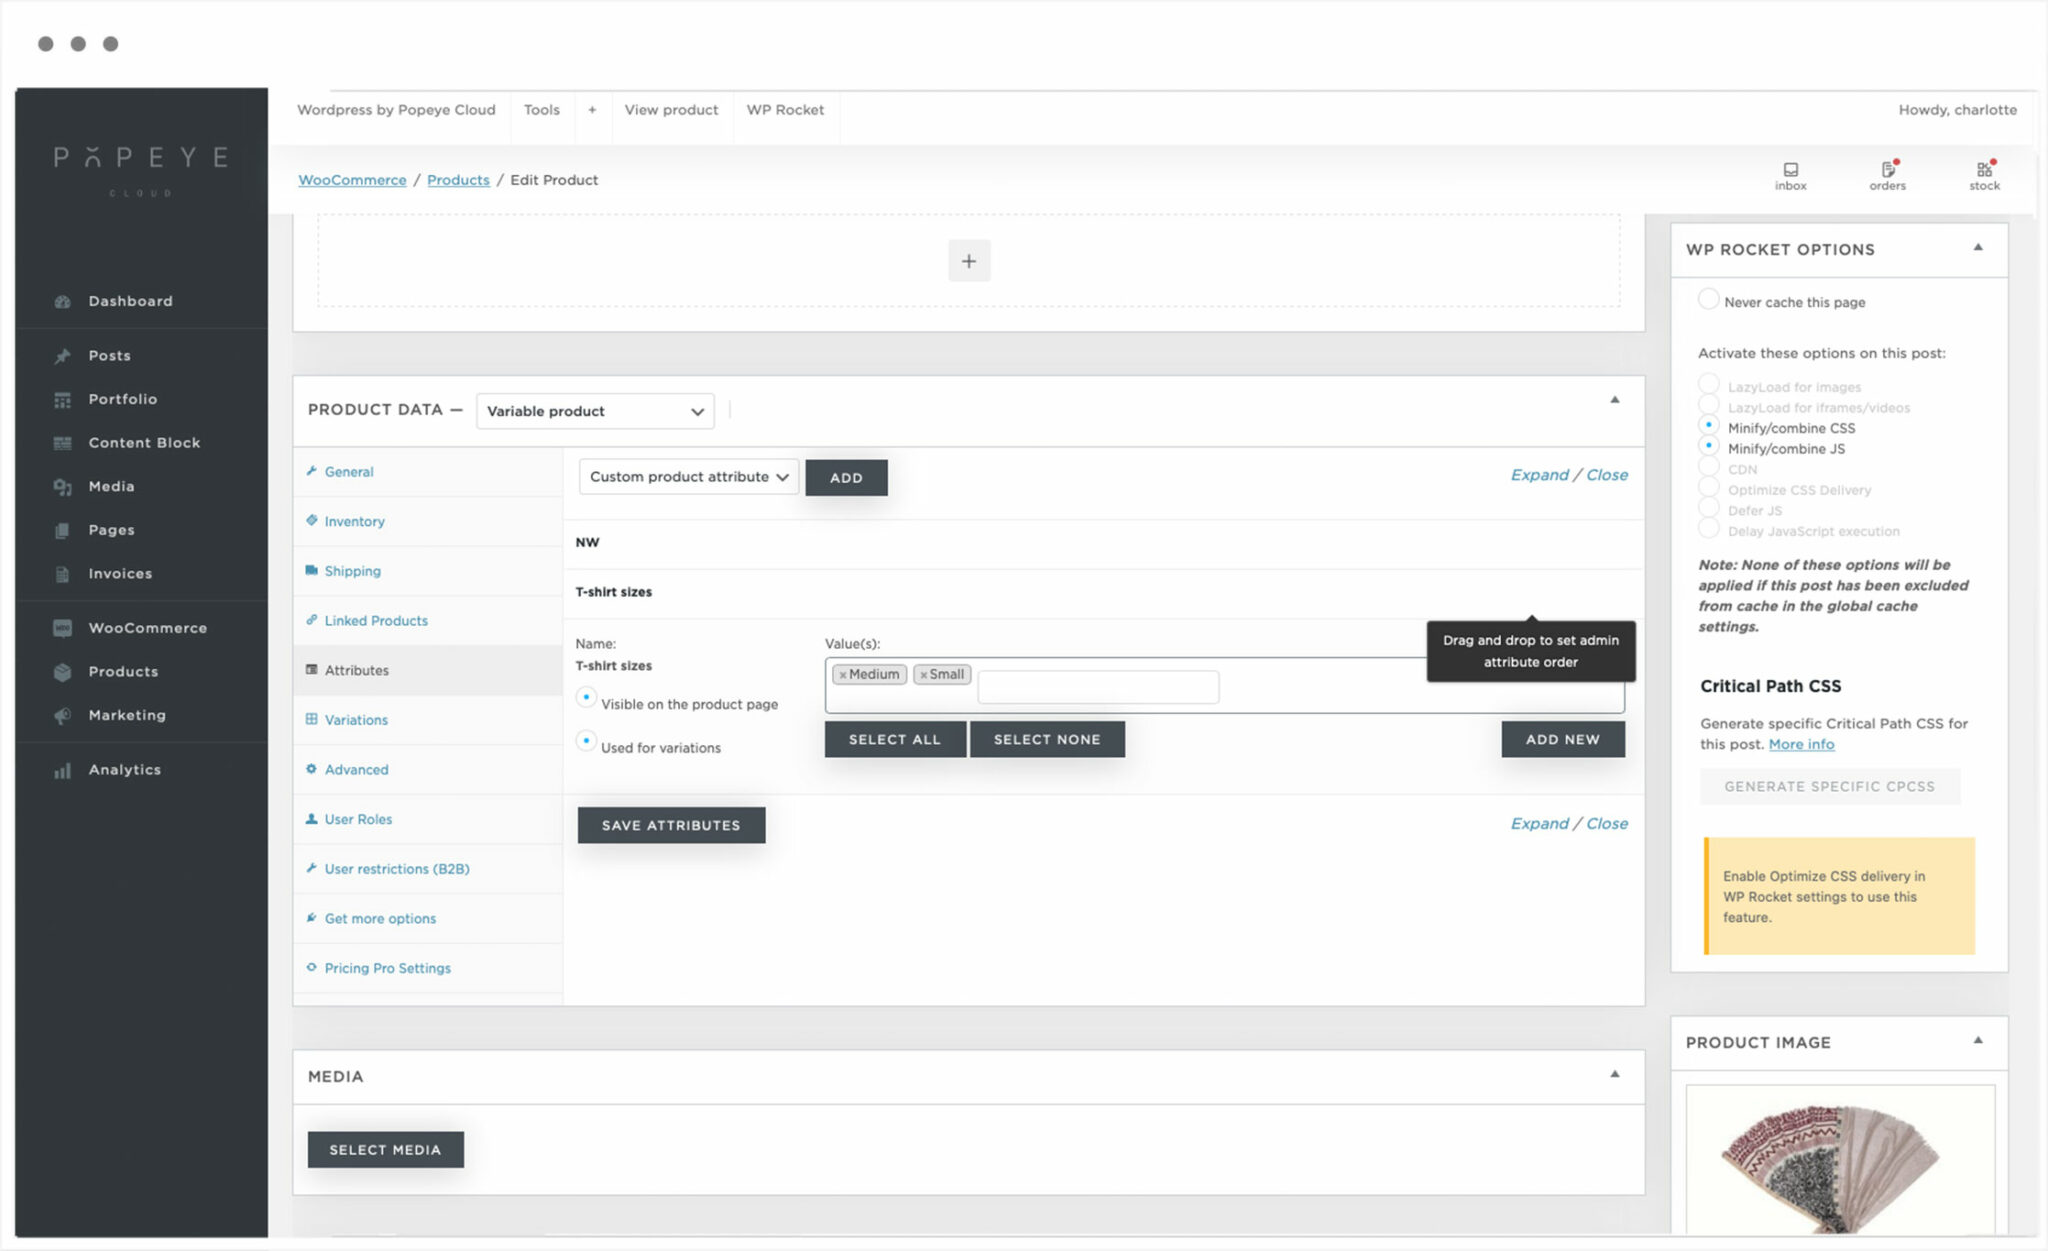
Products
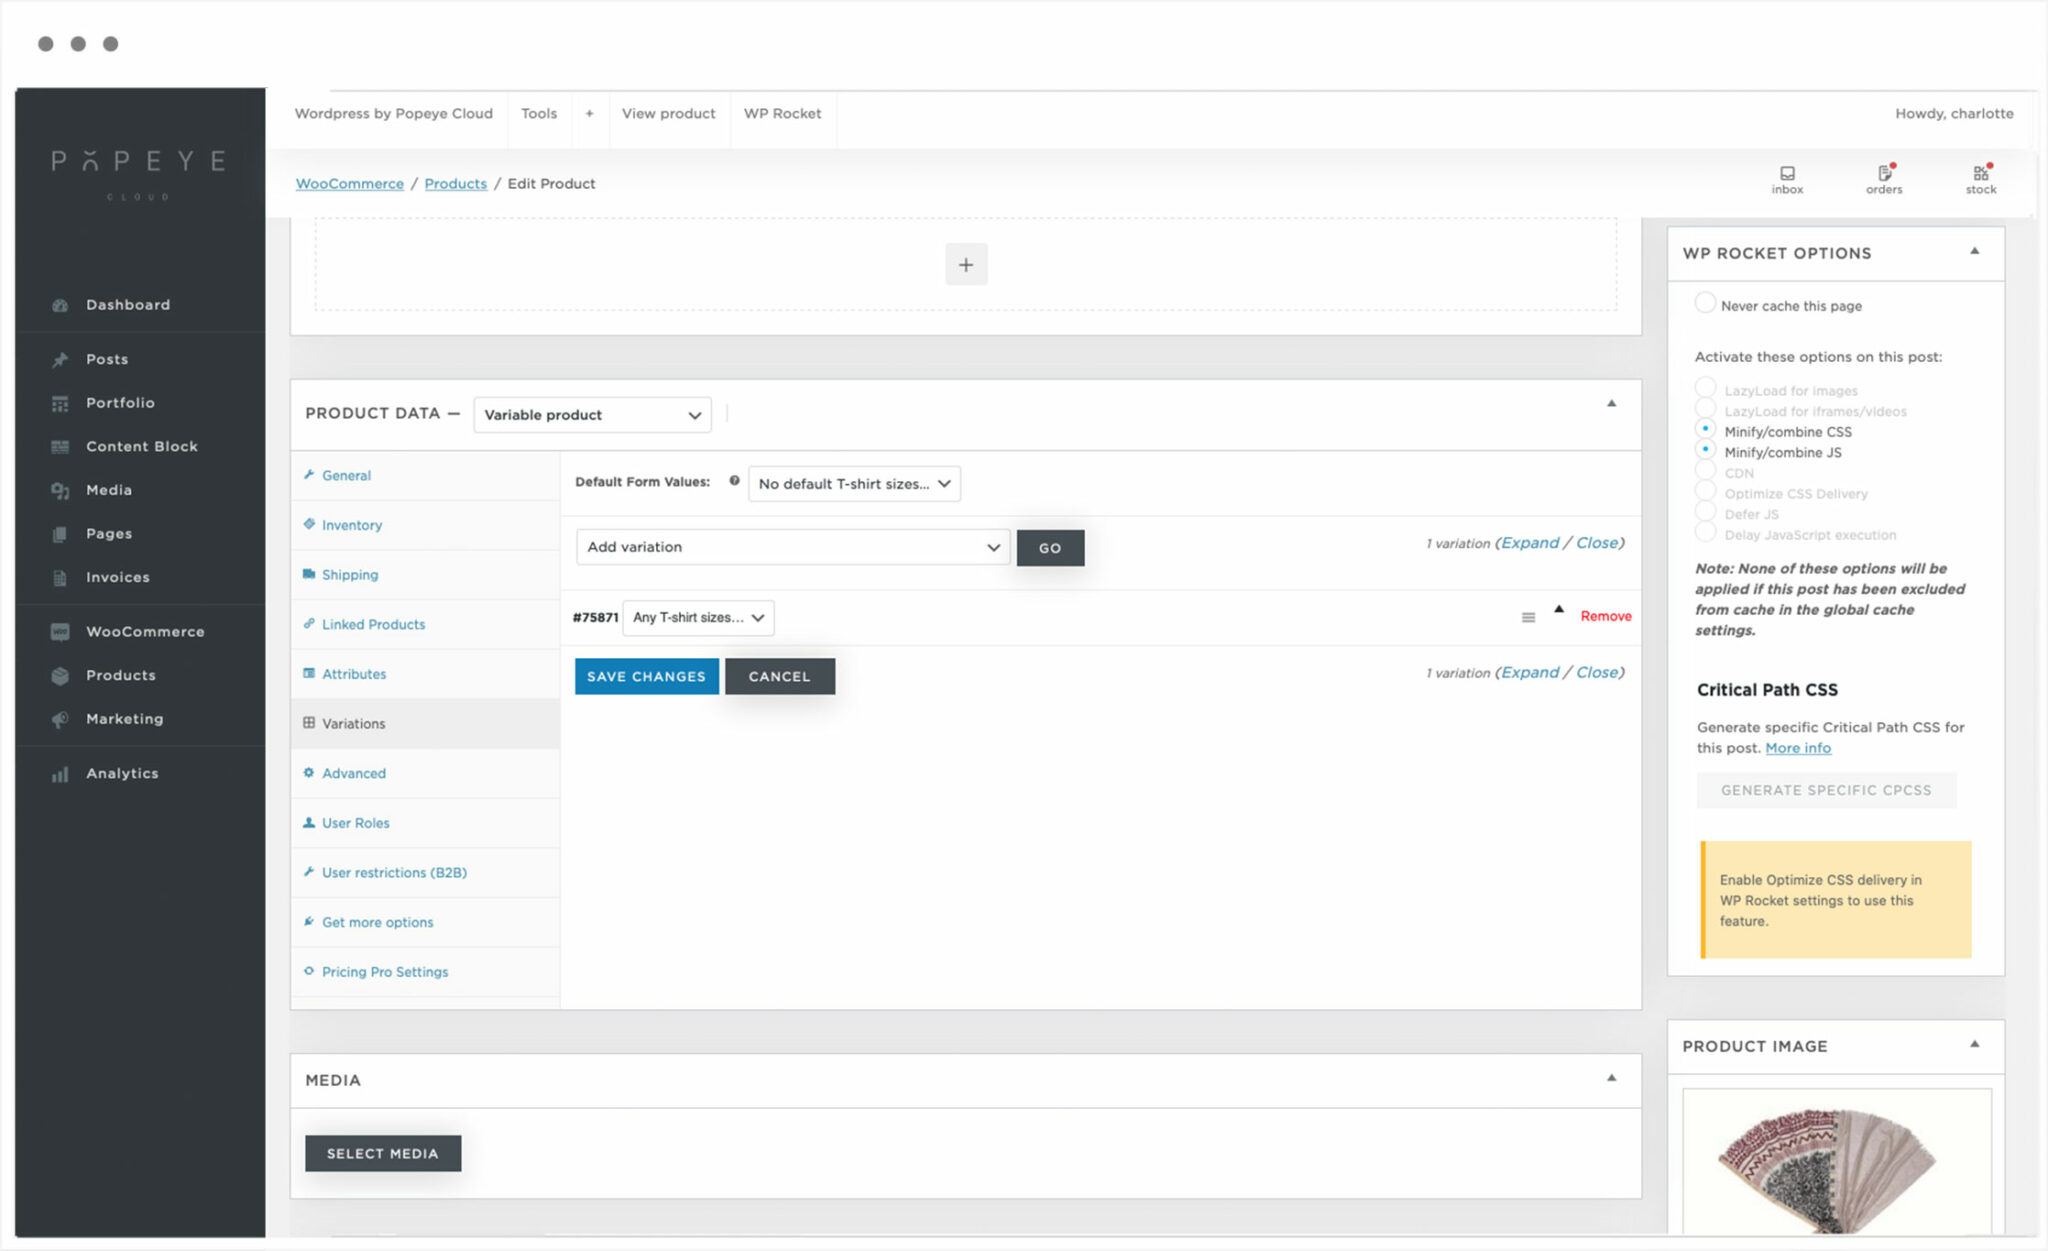
Go to a product. Variable product > attributes
Choose your attribute you just created > add
Enable ‘used for variations’ + select all > save attributes
Variations
Variation tab > Add variation > Go